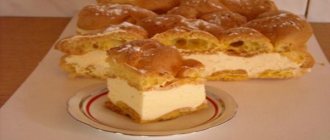
Gata or otherwise gyata is a sweet that belongs to Armenian cuisine!
This dessert would be perfect for tea! Gata has been prepared since ancient times. This is the most famous and popular pastry, and it is also very high in calories.
To prepare this dessert you will need:
- - 250 g butter
- - 2 cups wheat flour
- - flour for dusting
- - 1 glass of kefir, matsoni
- - 1/2 cup walnuts
- - a pinch of salt
- - 1/2 teaspoon of soda
- - 2 yolks for greasing.
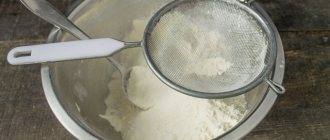
Sift the flour into a large bowl through a sieve, add salt and soda. Cut the butter into small pieces with a knife and add to the flour. Pour kefir or matsoni into it and mix. Start kneading the dough. If the dough turns out liquid, then add a little flour. Then divide the dough into 3 balls, put each ball in a plastic bag and put it in the refrigerator in the lower part for 40 minutes.
To prepare the filling you will need:
- - 1.5 cups flour
- - 80 g soft butter
- - 1 teaspoon vanilla sugar
- - 1.5 cups powdered sugar.
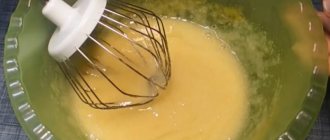
Grind the butter with a mixer with powdered sugar and vanilla sugar until white. Add flour and knead the filling with your hands until a homogeneous crumbly mass is obtained. If the mass does not turn out crumbly, add flour.
Chop the nuts finely and add to the filling. Mix everything thoroughly and divide the filling into three parts.
Roll out each piece of dough into a rectangle. The thickness of the dough should be 3 cm. Distribute the filling over the dough and roll into a roll. Roll up the remaining two pieces in this manner.
Place parchment paper on a baking sheet and grease it with sunflower oil. Place the rolls on top and make punctures and patterns on top with a fork. Then brush the rolls with yolks and cut into pieces directly in a baking sheet 3 cm wide. Move the pieces a little away from each other and put the baking sheet with the gyata in a preheated oven for about 10 minutes. Then reduce the temperature to 180 degrees and bake for another 20 minutes.
Armenian gata is delicious both hot and cold. You will want to try this dessert again and again..)
And for those who want to stay slim and eat sweets, I recommend reading the article about dietary sweets !
- Related Posts
- Spinach fritters
- Hapama
- White bean soup
« Previous entry
Ingredients:
For the test:
- 3.5 cups flour;
- 200 g sour cream;
- 200 g of margarine (I don’t use it unless you find a very high quality one; I prefer to buy inexpensive butter for baking - but not margarine or spread, but add better butter to creams and fillings);
- Half a teaspoon of baking soda;
- ¼ teaspoon salt;
- A pinch of vanillin or a bag of vanilla sugar.
For filling:
- 1.5 cups flour;
- 1.5 cups sugar;
- 100 g butter.
According to Marie's advice, you can replace the butter in the filling with chopped nuts. I think you can experiment with walnuts, almonds, hazelnuts, hazel...
For lubrication:
- 1 egg.
How to bake:
Both the dough and the gata filling are extremely easy to prepare.
Melt the butter for the dough and let it cool to lukewarm or room temperature.
Pour soda into the sour cream, stir and leave for a couple of minutes. Soon you will see how the sour cream begins to come out of the container like a foamy “cap”. This soda reacted with the fermented milk product, which will ensure the dough is soft and crumbly, coupled with fat, which will add a “sandy” effect.
Sift the flour into a large bowl - not all at once, but 3 cups out of three and a half; put sour cream there, mix.
Pour in the melted butter and knead the soft dough, adding the rest of the flour (if necessary). For the dough I needed just 3.5 cups (200 grams), but in each case the amount will depend on the flour.
The dough is very pleasant: soft, but not sticky, because it is quite fatty. Kneading it is a pleasure, but this is not yeast dough, which needs to be kneaded longer - but shortbread dough, which, on the contrary, needs to be kneaded as quickly as possible. Therefore, having collected all the components of the dough into a bun, divide it into 4 parts, wrap it in cling film and put it in the refrigerator for 30 minutes.
In the meantime, you can make the filling for the gata. In a separate bowl, mix sifted flour, sugar and soft butter.
Beat with a mixer or simply stir with a fork until smooth, fluffy, tender crumbs.
Prepare a baking sheet by lining it with high-quality parchment. You don’t even have to grease it (but only if the parchment is good! – the cookies won’t stick). And if the paper is so-so, then it makes sense to apply a thin layer of vegetable oil. But don’t overdo it, the dough itself is quite fatty.
Sprinkle the table with flour. Roll each part of the dough in turn into a rectangle approximately 26x20 cm, 3-5 mm thick. Visually divide the filling into 4 parts.
Pour a quarter of the filling onto the dough layer and distribute evenly, almost reaching the edges - 2-3 cm each.
Roll the roll along the long side, pinch the edges and seam.
Place the rolls on a baking sheet, seam side down, at a distance of 3-4 cm from each other.
Brush the rolls with beaten egg or yolk mixed with a teaspoon of milk.
And we cut it - in the classic version, with a curly knife, so that the edges of the cookies turn out wavy. But my knife couldn’t cut through the thick layer, so I cut it with a regular knife. But not across, but slightly obliquely. Well, do it as you like.
Bake the gata for about half an hour in an oven preheated to 180C until the dough in the middle is baked and the crust becomes golden brown and shiny. Again, the baking time and mode will be individual for each oven: Marie’s indicated 25 minutes at 160C; After this time, my cookies were still damp inside, so I kept them for 35 minutes at 180-200C. It depends not only on the oven, but also on the quality and calorific value of the gas... or maybe you have an electric oven? The method of heating is also important (top-bottom or just bottom), and so on...
So we determine the readiness of the khata by the appearance of the cookies - just don’t overdry them, as the cookies then dry out quickly. Transfer the finished gata to a tray and let it cool a little...
And let's treat ourselves!
1. Mix half of the cold butter (not warm) with salt, soda (not quenched with vinegar) and 3 cups of sifted flour. You can rub the butter and flour with your fingers in a deep bowl, or you can entrust this important mission to a food processor.
Pour kefir into the resulting flour crumbs and turn on the kneading again.
2. The dough should be elastic and smooth. If it sticks to your fingers, add flour a tablespoon at a time. I added about five tablespoons of flour.
Prepare the filling by melting the remaining butter, adding 0.5 cups of flour, simple and vanilla sugar. Chop and add walnuts. You can use raisins instead of nuts. Stir the mixture until it becomes homogeneous. The filling should be soft enough to spread.
Divide the dough into two pieces and roll each into a thin rectangle. Place the filling on top of the rolled out dough and spread evenly.
3. Roll the roll tightly. You should get two rolls with a nut layer. Using a knife, cut the roll into pieces approximately 3 cm wide.
Line a baking sheet with paper and place cookies on it. Brush the top of each piece with refined sunflower oil or beaten egg yolk. Set the oven temperature to 180 degrees and bake the cookies for exactly half an hour (I have an electric one, it may take longer for a gas oven).
What is gata? It is synonymous with bliss. In Armenia, this round flatbread with a delicate creamy vanilla taste not only enjoys constant popularity, but has even become part of folk rituals, just like our loaf. They celebrate weddings with her and celebrate the New Year. The bride must bring a basket of gata to the groom's house. And on December 31, the housewife puts a coin in the dough before baking. If the knife touches it while cutting the cake, the next year will be unlucky. But if someone gets a piece with a coin, then good luck awaits him. The delicious Armenian gata pastry became famous on Soviet television. It is eaten by the “athlete, Komsomol member and simply beautiful” Nina in the film “Prisoner of the Caucasus.”
Vegetable salad"
“Vegetable” salad may well become the main dish in the diet of people who adhere to proper nutrition.
Ingredients:
- Fresh tomato - 1 pc.
- Red beans - 1 tbsp.
- Green beans - 1 tbsp.
- Corn - 1 tbsp.
- Bell pepper - 1.5 pcs.
- Lemon juice - 1 tbsp. l.
- Vegetable oil - 1 tbsp. l.
- Salt, pepper, cardamom, cumin - to taste
- Greens - for decoration
Preparation:
Boil beans in salted water. If the corn is fresh, it should also be boiled. To save time, you can use canned sweet corn.
Wash the bell pepper, remove the stem and seeds and cut into cubes.
Now all the vegetables should be placed in a large container and mixed thoroughly.
Wash the tomato and separate its pulp. This will be the basis for the salad dressing. Add lemon juice, vegetable oil, salt, spices to it and mix thoroughly.
Immediately before serving, season the salad with dressing.
Your own gata is closer to heaven
Since this pastry has become a kind of national symbol, there are many regional varieties. And residents of every corner of the country claim that their gata (also called kyata) is the most delicious. The product is made from sponge and simple yeast dough, with sweet and savory fillings, in various shapes: round, in the form of rolls, and so on. The technology of kneading and layering with filling also has its own regional characteristics. Therefore, it is difficult to say unambiguously how to prepare Armenian gata. Indeed, in the country there is even a special recipe for the lazy - from ready-made puff pastry. If we take as a basis that classic kyata is from the capital, Yerevan, then let’s look at this recipe first.
In Yerevan it is prepared using a straight method. The whole highlight of the dessert is that a large amount of butter is used, which is simply pressed into the dough, making it no longer resemble yeast dough, but puff pastry. Sift two glasses of flour through a sieve into a deep bowl, add a pinch of salt and half a teaspoon of soda. A pack of butter (250 g) taken out of the freezer and quickly grated into flour. A certain crumb is formed, which needs to be formed into a slide and a depression made at its top. Pour a glass of matsoni into it. This is the name of the Armenian national fermented milk product. Matsoni can be replaced with regular fat kefir. Mix the dough, form a bun, knead a little, divide into three equal parts. Wrap them in cling film and place them on the bottom shelf of the refrigerator for 40 minutes.
Bean salad with corn and croutons
A fairly simple and incredibly tender dish that both adults and children enjoy eating. You can use both canned and boiled legumes in the recipe, both red and white varieties.
List of required ingredients:
- A can of red beans.
- Can of sweet corn.
- A small forkful of Chinese cabbage.
- Chicken breast or fillet – 300-350 gr.
- A small pack of crackers (it is best to take the flavor of sour cream and herbs).
- Salt and mayonnaise sauce.
Let me note right away that since the recipe uses salted croutons, many people may not need salt; add it according to your own preferences.
Step-by-step preparation steps:
1. Rinse the chicken meat and boil until tender in salted water, then let the product cool and disassemble into small fibers. Helpful advice! The breast turns out much juicier and tastier if you cook it by adding an onion, carrot, laurel and a few black peppercorns to the pan.
2. Drain the marinade from jars of canned food.
3. Finely chop the Pekinka.
4. Mix all prepared ingredients, mix with sauce, sprinkle crackers on top.
The most delicious, tender salad with legumes, chicken and croutons is ready!
Preparing the filling
As already noted, there are sweet and salty Armenian gata. The recipe for Yerevan kyata involves filling with vanilla (a spoon), powdered sugar (one and a half glasses) and (80 g). Beat these ingredients with a mixer until white. Then add flour - as much as is needed to obtain a homogeneous and crumbly mass. We take out a piece of dough, roll it into a pancake, grease it with melted butter. Fold it in four or five times, remembering to grease it each time. Roll up the roll, cut into pieces and roll out again into a flat cake. Place the filling in the middle, pinch the ends and roll out again. In the end, we should have a round cake half a centimeter thick. This is how Yerevan gata differs from Gyumri gata: it has the shape of a roll.
Baking
Lay out a baking sheet and place our flatbread there. We make punctures in several places with a fork to prevent the formation of bubbles. You can also apply wavy patterns to the surface and form beautiful edgings. To secure the artistic decoration, brush the top of the cake with egg yolk. Preheat the oven to 200°C. How long should Armenian gata be baked? The recipe advises that after 10 minutes, reduce the temperature to 180 °C and wait until the product acquires a golden-brown hue.
Armenian butter gata: step-by-step recipe
In Kirovakan, this dessert is made using the sponge method. First, heat the milk or water to 35 °C. Dissolve the yeast in the liquid and add half the total amount of flour. The dough will be very liquid. We put it in a warm place for two hours. Then we successively add granulated sugar, vanillin, milk and salt to the dough. Add flour. Knead for at least 10 minutes, after which we put the dough back in a warm place for half an hour. During this time we prepare the filling. We have already looked at how sweet Armenian gata is made. The recipe from Leninakan will help us create a culinary product with sour filling. You can rub the filling inside the dough along with butter. Every time we roll a pancake, we not only coat it with fat, but also add a little cottage cheese. Then the gata will resemble the Bulgarian banitsa. Or you can distribute the filling, as in khachapuri: put it in the middle, pinch the edges of the flatbread. There is another way to form a gata. Roll out the dough into a pancake. Place the filling on top. Roll the dough into a roll and again, carefully so as not to tear it, roll it out with a rolling pin or press it with your hands. This gata is baked for about half an hour, first on moderate heat, and then on low.
Useful tips to make any salads with beans delicious
In recipes you can use both canned beans and boiled beans in salted soda.
If you are boiling the main ingredient, first soak it in water at room temperature for at least 8 hours.
To prevent the salad with beans from leaking juices, be sure to drain the liquids from canned foods before adding them. If desired, you can additionally rinse the products from the marinade.
You can season this healthy snack with homemade or ready-made mayonnaise, sour cream, mayonnaise sauce, olive or sunflower oil, natural yogurt, lemon juice, a mixture of sour cream and mayonnaise.
If you are preparing an appetizer with the addition of mushrooms, then you can use absolutely any type. Champignons, boletus mushrooms, chanterelles, honey mushrooms, butter mushrooms, etc. go well with legumes. In addition, feel free to experiment and use not only canned products, but also fresh mushrooms, which you can fry with onions before mixing with other ingredients.
To make the dish more flavorful, you can add your favorite spices or herbs. Today, stores sell a large number of ready-made salad dressings; they are perfect in this case.
New Year's or wedding recipe
The usual filling for gata is called khoriz in Armenia. It is made from butter - melted or, conversely, frozen, and flour. But on the days of major holidays, raisins, crushed nuts, and candied fruits can be added to the khoriz. Since such a filling is poorly rubbed into the dough and can cause it to break through, the festive Armenian gata is formed in a different way. The recipe advises to thoroughly layer the yeast base, kneaded using the sponge method, with butter. Using a thick rolling pin, roll out the elastic dough into a large square or rectangle no more than three millimeters thick. Let's prepare a festive horiz. First place 80 grams of butter in the freezer. Sift 120 g of premium flour into a deep bowl and mix with one and a half cups of powdered sugar. Let's also add a spoonful of vanillin. Quickly rub the frozen butter into this mixture. With clean hands, we begin to squeeze it all until something similar to crumbs is formed. You have to act quickly before the butter melts. Add candied fruits, raisins, roasted crushed nuts, zest. Knead the horiz.
If it is not crumbly, add flour. Spread the filling over the surface of the “pancake” in an even layer. Roll the gata into a tight roll. We cut this sausage into pieces of equal width diagonally. Lubricate them with a mixture of yolk and milk. Place the roll pieces on a baking sheet, leaving 3-4 centimeters of free space between them. Bake in an oven preheated to 200°C for about half an hour.
"Lazy" gata
This is a great recipe for those who don't know how or don't like to cook. This Armenian gata is made from puff pastry. It must first be defrosted at room temperature and the cellophane cover removed. Carefully unwrap the bag and cut off a piece. Dust a work surface with flour and place the puff pastry on it. Roll out into a rectangle. Place and distribute the filling evenly over the entire surface. Roll it up and cut it into pieces. Place on a baking sheet, grease the top of the products with yolk. We bake this gata at 180°C.
Gata (kyata) is a well-known Transcaucasian (Armenian, Azerbaijani) national confectionery product made from yeast dough with filling, which is a puff pastry
. There are several varieties of gata, which differ in filling, dough kneading characteristics, and so on. Gata is so diverse - Artsakh, Stepanavan, Karaklis, Gugar, Yerevan, Gyumri, you can’t list them all.
We bring to your attention the recipe - Armenian gata (kyata)
. To prepare the Armenian - Karaklis gata, the dough is rolled out not very thin, a thick layer of filling is laid out, rolled into a roll, which is cut into pieces and.
Armenian gata recipe
5 from 1 reviews
Gata (kyata) Armenian
Type of dish: Baking
Cuisine: Armenian
Ingredients
- Dough:
- Flour - 2 tbsp.,
- butter - 250 g,
- kefir or matsoni - 1 tbsp.,
- salt - to taste,
- soda - 0.5 tsp,
- Filling:
- Flour - 1.5 tbsp.,
- powdered sugar - 1.5 tbsp,
- vanilla sugar - 1 tsp,
- ghee - 80 g,
- egg yolk for greasing - 1-2 pcs.
Preparation
- First of all, sift the flour with salt and soda. Add butter and chop with a knife until crumbs form.
- Then, pour in kefir or matsoni, mix, roll the dough into a ball, then knead it a little (if the dough is liquid, add flour).
- Next, divide the dough into 3 parts, put it in a bag and put it in the refrigerator for 40 minutes.
- In the meantime, let's prepare the filling: to do this, beat the butter, powdered sugar and vanilla sugar with a mixer until white. Add flour and knead the filling with your hands until you obtain a crumbly, homogeneous mass (add flour if it does not turn out crumbly). Divide the filling into three parts.
- Remove the dough from the refrigerator and roll each part of the dough into a rectangle shape, approximately 2–3 mm thick, distribute one part of the filling over the rectangle, roll into a roll, stretch it and press down with your hands to make the roll denser.
- Place the rolls on a baking sheet, apply wavy patterns on top with a fork and prick the rolls in several places; if desired, brush the top with egg yolks.
- Cut the rolls directly on the baking sheet into 2.5 cm wide pieces with a curly knife. Move the pieces away from each other a little.
- Place the baking sheet in a preheated oven at 200 degrees for 10 minutes.
- After this time, reduce the temperature to 180 degrees and bake until done (until the gata is browned), about 20 minutes.
Enjoy your tea!
Armenian cuisine is very rich in a variety of dishes of amazing taste, the preparation of which does not take much time, but gives delicious results. One such dish is gata, a delicious sour cream cookie. Slightly crispy, crumbly, with a delicate creamy taste and aroma.
Thanks to the large amount of butter (or margarine) in the dough, Armenian gata does not dry out for a long time, remains tender, fresh and tasty. Cookies are quite high in calories, so those who are watching their extra pounds should enjoy baking with caution. But, nevertheless, gata is worth trying.
Recipe 3: Armenian gata with kefir (step by step)
- Butter – 250 g
- Wheat flour / Flour (200 g glass) - 3.5 cups.
- Kefir - 0.75 cup.
- Sugar - 0.5 cup.
- Chicken egg - 1 pc.
- Egg yolk (for greasing cookies) - 1 pc.
- Vanilla sugar - 2 tsp.
- Baking powder - 0.5 tsp.
- Salt - 1 pinch
Making the gata dough. To do this, mix (you can use a blender) 2.5 cups of flour, salt, baking powder and butter (125 grams) chopped into large cubes. We need to grind the mass to a crumb state (it was easier for me to grind the butter and flour by hand).
Add egg and kefir to the resulting butter crumbs.
Knead a soft and tender dough and then put it in the refrigerator for 30 minutes. Let him “rest” for now.
Let's start with the filling. Melt the remaining butter and add 1 cup of flour, regular and vanilla sugar. Mix the mixture until it has a homogeneous consistency. The filling should be soft so that it can be easily spread on the dough.
Take the dough out of the refrigerator and divide it into two parts. Roll each part into a layer 3-4 mm thick. We also divide the filling into two parts, spread it with a spoon onto both dough cakes, leaving a little free space on one side of the cakes.
We roll our cakes into tight rolls and grease them with yolk. We take a knife and with its blunt side we make shallow dents and stripes along the roll, and then cut it into 7-8 parts.
Place the cookies on a baking sheet and bake at 175 degrees for 20-25 minutes until golden brown.
After the cookies have cooled, transfer them to an airtight container or bag so that they do not dry out, and the gata will remain fresh for several more days (tested). :). Or you can eat it straight away with tea or milk.
Recipe for Armenian gata cookies with photos
how to make gata cookies recipe
- 2 yolks;
- 3 cups flour;
- 450 g matsun or sour cream;
- 250 g butter or margarine.
For the filling (horiz)
- margarine or butter – 250 g;
- granulated sugar – 2 cups;
- enough flour to make a crumbly mass;
- vanilla to taste.
Sift the wheat flour onto a work surface. Next, mix it well with butter or margarine with your hands, as a result of which crumbs should form, as when chopping.
Make a hole in the resulting mass. Separately break the eggs, separate the whites from the yolks. We immediately place the yolks into the recess of the “well”.
We also send sour cream there. To prepare gata, you can use sour cream of any fat content.
From the prepared ingredients you need to knead a soft dough that does not stick to your hands.
Divide the prepared dough into approximately equal 3 parts.
For the khoriza (filling), mix soft butter with sugar and flour. Take enough flour to make a crumbly mass (but don’t overdo it).
Now pour the horiz (filling) onto the rolled out layer of dough. Distribute it evenly over the entire surface.
Divide the layer roughly into six long strips. Fold the dough in half: the first part to the second and the sixth to the fifth.
Fold the resulting pockets again towards the middle. You should now have two connected stripes.
Fold the two strips together.
Cut the resulting strip with a curly knife slightly diagonally into smaller pieces. Be sure to pierce each one in several places with a fork.
Now carefully place the pieces on a clean and dry baking sheet, brush them with egg and place in the oven, preheated to 180°C. Bake until golden brown (about 20 minutes).
Armenian gata is ready! Such wonderful cookies are perfect for tea, coffee, and a glass of milk, both cold and hot. Bon appetit!
Recipe No. 2
Artsakh gata is a round flatbread with khoriz, a special filling made of butter and flour. Its recipe has been known for several centuries and has hardly changed. Except that today Artsakh gata is prepared not in a tonir (tandoor), but in the oven. In the classic version, the Armenian flatbread contains a large amount of melted butter in the filling, so the sweet dessert turns out to be very filling and high in calories. Artsakh gata is served with matsoni or tea made from mountain herbs. This is exactly the kind of flatbread that the heroine of “Prisoner of the Caucasus” Nina eats with pleasure.
Recipe 4: Armenian gata made from puff pastry
Many people call gata cookies or crackers, since when prepared it is dry. This property is very convenient for storage, due to the large amount of oil it contains, gata does not dry out for a long time, is fresh and tasty. To make gata with delicious layers, beautiful and aromatic, you need a little skill, and with our photos of step-by-step preparation, you will get a real Armenian gata.
for test:
- Flour - 1000 grams
- Butter - 180 grams
- Kefir – 500 grams
- Eggs - 2 pieces
- Soda - 15 grams
- Vinegar - 20 grams
For filling:
- Butter - 180 grams
- Sugar - 150 grams
- Flour - 150 grams
Let's start preparing gata by kneading the dough. Pour the flour onto the table in a mound and place the butter in the middle.
Let's chop the butter with flour. You need to “chop” it as finely as possible, so the dough will turn out flaky, and the friability of the finished gata depends on this.
When the butter and flour are sufficiently crushed, we collect it again into a mound and make a “hole” in the middle.
Pour room temperature kefir into the “hole”. It is better to warm it in advance at room temperature, otherwise the dough may become light and plastic.
Quench the soda with vinegar and add to kefir. Stir a little so that the kefir rises into a “head”.
Now add eggs to kefir.
Mix everything well until a homogeneous mass is obtained.
When all the ingredients are mixed, gently knead the dough. It should turn out soft, so you shouldn’t mix in a lot of flour when forming it, as this will make the dough tough and tough.
Cover the finished dough with a towel and let it sit for a while.
Let's start preparing the filling. Pour the flour onto the table again, put the butter in it and grind it. Add sugar.
After adding sugar to the filling, you should rub it a little with your hands, then the sugar will be evenly distributed and the filling will become homogeneous.
Place the finished gata filling on a plate and prepare the work surface for the last stage - forming the roll.
We take out the dough and knead it a little again.
Roll out the dough into a plate about 3-4 mm thick. It is better to roll out the layer a little oblong, so that later you get a long and thin roll.
Place the filling on the dough and distribute it evenly throughout the entire layer of dough. We begin to carefully roll up a tight roll.
When the roll is ready, use a knife to slightly shape its even walls so that the roll is neat.
In a mixing bowl, beat the egg to brush the finished products.
Cut the roll into equal parts approximately 5-6 cm thick.
Place the chopped ghats on a greased baking sheet. Leave a distance between the products of approximately 2-3 cm so that they do not stick to each other during baking.
Brush the gats with beaten egg.
We apply patterns on the ghats with a knife.
Place the baking sheet in the oven, preheated to 100 degrees. Bake for 40-50 minutes.
When the gata is ready, it is covered with a golden brown crust. We take it out of the oven.
Once it has cooled down, you can serve the gata. Bon appetit!
Gata recipe with photos step by step
Khoriz for Artsakh gata can be prepared in advance and the filling can be stored in a closed container in the refrigerator for several weeks. It is added to all types of gata, as a filling or used for sprinkling on sweet pastries. Horiz is similar to German streusel.
How to prepare khoriz for gata
To prepare, you need to take butter or ghee and sugar in equal proportions, and then grind them with two portions of flour. To prevent the fat from melting, you need to mix the horiz in a cold container and quite quickly. For three Artsakh gata flatbreads, which are made from the specified amount of ingredients, you will need 450-500 g of filling. This means that you need to mix 120 g of butter and sugar with 240 g of flour.
Salad with canned red beans, tomatoes and corn
An excellent snack option that can be topped with mayonnaise, sour cream or natural unsweetened yogurt. This dish can be served in portions or in one salad bowl.
Take for preparation:
- Ripe tomatoes – 2 pcs.
- Canned red beans – 200 gr.
- One small onion (can be replaced with a bunch of green ones).
- Can of corn – 200-240 gr.
- Mayonnaise, salt, pepper and parsley to taste.
- Garlic – 1 clove.
Even a child can make such a snack. To do this, you need to drain the beans and corn, mix these ingredients in one bowl, add randomly chopped tomatoes, chopped onions and garlic, spices, and salt. Now all that remains is to season it all with mayonnaise, mix and decorate with leaves or small sprigs of parsley.
Salad with beans, corn and tomatoes is ready!
