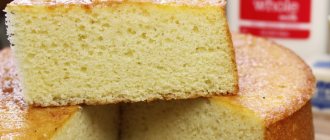
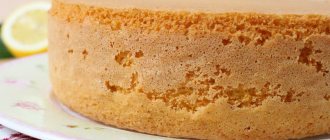
Biscuit is a universal pastry for confectioners. Almost no cake is complete without sponge cake; cakes and rolls are made from sponge cake, and used as a base for any confectionery product.
Fluffy, like a cloud, and quite dense, with butter and cream, with nuts and carrots - they are very different, but they are united by their cooking technology. Whatever the biscuit dough, you just need to beat the eggs (or separate whites and yolks) and add the rest of the ingredients as carefully as possible. It is due to the air added during whipping that your sponge cake will rise in the oven.
Before carefully studying Irina Chadeeva’s technology, we suggest watching a video recipe from professional pastry chef Oleg Ilyin!
What do we bake from?
Without one thing it’s basically impossible to bake a sponge cake, it’s without eggs. It is the eggs that give it both fluffiness (when whipped) and strength (when baked). A well-beaten egg mass is the key to success when working with sponge cake.
SUGAR
Basic biscuit recipe
There are many variations of sponge cake, but you should start with the simplest recipe, which, however, is no worse than the most complex. Remember the proportion:
4 eggs 120 g sugar 120 g flour and no baking powder!
How to make a sponge cake:
1. First, measure out all the ingredients. Sift the flour (and starch, if you use it) - it is saturated with air and then mixes better in the dough. Separate the eggs into whites and yolks (remember that cold eggs are best separated into whites and yolks), using a large bowl for the whites and a medium-sized bowl for the yolks.
2. Pour half the sugar into the yolks and beat with a mixer at maximum speed into a thick, almost white mass.
3. Wash and dry the beaters and beat the egg whites at maximum speed until the mixture becomes white and thick. The mixer attachments should leave a clear, non-blurring mark. Just now add the remaining sugar and beat further until the mass becomes snow-white and shiny.
4. Add the yolks to the whites and mix very carefully with a spoon until the mass becomes homogeneous and light yellow in color.
How to mix correctly? Take a spoon and place the side down into the middle of the bowl. Run the convex part of the spoon along the bottom (towards you), then up the side of the bowl, continue over the dough and lower the spoon back into the middle. The spoon will describe a circle. Repeat this movement, turning the bowl with your other hand. In this way, all types of biscuit (and other whipped) dough are quickly and accurately mixed. This method is called the "folding method".
5. Add flour and other dry ingredients. Mix again using the folding method. Do not stir for too long as the dough may thicken too much.
What to add?
Butter is often added to biscuits. To do this, melt it, cool it and pour it in as carefully as possible. Even a small amount of butter makes the crumb more tasty and moist; biscuits with butter do not go stale longer.
How to prepare the form?
There are several ways to prepare molds and bake sponge cakes. Each has its own advantages and disadvantages. Sometimes it doesn't matter what pan you bake in, but sometimes it does.
Method No. 1
Grease the inside of the pan with softened butter (melted butter will drip and you won't get an even coating). Add a spoonful of flour and, shaking the pan, spread the flour first along the sides of the pan and then along the bottom. Tap the pan well to release excess flour.
With this method, the biscuit does not stick at all to the bottom and walls of the mold. After baking for 5–10 minutes, the sponge cake cools down and shrinks slightly in size, with a small gap appearing between the wall of the mold and the sponge cake, and a small mound remains on the sponge cake. Turn the biscuit over onto the wire rack; it will come out easily, with the mound at the bottom and the top completely flat.
DISADVANTAGE: When using this method the sponge cake comes out slightly lower.
Method No. 2
Do not grease the pan, but line the bottom with baking paper.
When baking, the sponge cake will stick to the walls, but when you take out the pan, it will also settle. Since the walls cannot settle (they are stuck), a “hill” will settle, thus, when cooling, the surface of the biscuit will become smooth. The biscuit is removed from the mold only when it has cooled completely. To do this, you need to very carefully run a knife along the walls, separating the biscuit, and remove the mold. Baking paper is removed before using the biscuit.
DISADVANTAGE: in order to separate the biscuit from the walls, skill and accuracy are required; Silicone molds cannot be used.
Method No. 3
Do not grease the pan or place baking paper on the bottom.
This method is suitable for the lightest and most delicate biscuits, which settle under their own weight when cooling. These are biscuits with a small amount of flour and starch, as well as protein biscuits. It is usually recommended to cool them upside down - to do this, immediately after baking, turn the mold over and place it on bowls so that the sponge cake does not touch them. In this position, the bottom and sides of the biscuit are glued to the mold; it does not fall out, but also does not settle under its own weight. Please note that in this case it is important to choose the correct size of the mold so that the sponge cake does not turn out higher than the edges and can be turned over.
DISADVANTAGE: Sometimes it is difficult to separate the sponge cake from the pan; Silicone molds are not suitable for such baking.
Bakery
Always preheat the oven to 180-200°C in advance. It is advisable to bake biscuits on the middle level of the oven; you can use convection. Try not to open the oven during the first 15 minutes of baking to avoid cooling the air. You can check the readiness of the biscuit 25–30 minutes after the start of cooking. The finished biscuit is always evenly heaped and golden brown. Pierce it in several places (closer to the middle) with a toothpick; there should be no sticky dough on it. You can also press with your palm, the finished biscuit is elastic and durable.
To ensure that the biscuit does not become soggy during soaking and is strong and elastic, it is advisable to let it sit for several hours. For cakes, I usually bake the sponge in the evening and leave it in the kitchen overnight. Please note that the biscuit should not dry out - for this, if the air in the kitchen is dry, you can put the biscuit in a bag after it has completely cooled.
How to bake a tall fluffy sponge cake
Biscuit is a universal pastry for confectioners.
Almost no cake is complete without sponge cake; cakes and rolls are made from sponge cake, and used as a base for any confectionery product. Fluffy, like a cloud, and quite dense, with butter and cream, with nuts and carrots - they are very different, but they are united by their cooking technology. Whatever the biscuit dough, you just need to beat the eggs (or separate whites and yolks) and add the rest of the ingredients as carefully as possible. It is due to the air added during whipping that your sponge cake will rise in the oven.
Before carefully studying Irina Chadeeva’s technology, we suggest watching a video recipe from professional pastry chef Oleg Ilyin!
What do we bake from?
Without one thing it’s basically impossible to bake a sponge cake, it’s without eggs. It is the eggs that give it both fluffiness (when whipped) and strength (when baked). A well-beaten egg mass is the key to success when working with sponge cake.
Basic biscuit recipe
There are many variations of sponge cake, but you should start with the simplest recipe, which, however, is no worse than the most complex. Remember the proportion:
4 eggs 120 g sugar 120 g flour and no baking powder!
How to make a sponge cake:
1. First, measure out all the ingredients. Sift the flour (and starch, if you use it) - it is saturated with air and then mixes better in the dough. Separate the eggs into whites and yolks (remember that cold eggs are best separated into whites and yolks), using a large bowl for the whites and a medium-sized bowl for the yolks.
2. Pour half the sugar into the yolks and beat with a mixer at maximum speed into a thick, almost white mass.
3. Wash and dry the beaters and beat the egg whites at maximum speed until the mixture becomes white and thick. The mixer attachments should leave a clear, non-blurring mark. Just now add the remaining sugar and beat further until the mass becomes snow-white and shiny.
4. Add the yolks to the whites and mix very carefully with a spoon until the mass becomes homogeneous and light yellow in color.
How to mix correctly? Take a spoon and place the side down into the middle of the bowl. Run the convex part of the spoon along the bottom (towards you), then up the side of the bowl, continue over the dough and lower the spoon back into the middle. The spoon will describe a circle. Repeat this movement, turning the bowl with your other hand. In this way, all types of biscuit (and other whipped) dough are quickly and accurately mixed. This method is called the "folding method".
5. Add flour and other dry ingredients. Mix again using the folding method. Do not stir for too long as the dough may thicken too much.
What to add?
Butter is often added to biscuits. To do this, melt it, cool it and pour it in as carefully as possible. Even a small amount of butter makes the crumb more tasty and moist; biscuits with butter do not go stale longer.
How to prepare the form?
There are several ways to prepare molds and bake sponge cakes. Each has its own advantages and disadvantages. Sometimes it doesn't matter what pan you bake in, but sometimes it does.
Grease the inside of the pan with softened butter (melted butter will drip and you won't get an even coating). Add a spoonful of flour and, shaking the pan, spread the flour first along the sides of the pan and then along the bottom. Tap the pan well to release excess flour.
With this method, the biscuit does not stick at all to the bottom and walls of the mold. After baking for 5–10 minutes, the sponge cake cools down and shrinks slightly in size, with a small gap appearing between the wall of the mold and the sponge cake, and a small mound remains on the sponge cake. Turn the biscuit over onto the wire rack; it will come out easily, with the mound at the bottom and the top completely flat.
DISADVANTAGE: When using this method the sponge cake comes out slightly lower.
Do not grease the pan, but line the bottom with baking paper.
When baking, the sponge cake will stick to the walls, but when you take out the pan, it will also settle. Since the walls cannot settle (they are stuck), a “hill” will settle, thus, when cooling, the surface of the biscuit will become smooth. The biscuit is removed from the mold only when it has cooled completely. To do this, you need to very carefully run a knife along the walls, separating the biscuit, and remove the mold. Baking paper is removed before using the biscuit.
DISADVANTAGE: in order to separate the biscuit from the walls, skill and accuracy are required; Silicone molds cannot be used.
Do not grease the pan or place baking paper on the bottom.
This method is suitable for the lightest and most delicate biscuits, which settle under their own weight when cooling. These are biscuits with a small amount of flour and starch, as well as protein biscuits. It is usually recommended to cool them upside down - to do this, immediately after baking, turn the mold over and place it on bowls so that the sponge cake does not touch them. In this position, the bottom and sides of the biscuit are glued to the mold; it does not fall out, but also does not settle under its own weight. Please note that in this case it is important to choose the correct size of the mold so that the sponge cake does not turn out higher than the edges and can be turned over.
DISADVANTAGE: Sometimes it is difficult to separate the sponge cake from the pan; Silicone molds are not suitable for such baking.
Always preheat the oven to 180-200°C in advance. It is advisable to bake biscuits on the middle level of the oven; you can use convection. Try not to open the oven during the first 15 minutes of baking to avoid cooling the air. You can check the readiness of the biscuit 25–30 minutes after the start of cooking. The finished biscuit is always evenly heaped and golden brown. Pierce it in several places (closer to the middle) with a toothpick; there should be no sticky dough on it. You can also press with your palm, the finished biscuit is elastic and durable.
To ensure that the biscuit does not become soggy during soaking and is strong and elastic, it is advisable to let it sit for several hours. For cakes, I usually bake the sponge in the evening and leave it in the kitchen overnight. Please note that the biscuit should not dry out - for this, if the air in the kitchen is dry, you can put the biscuit in a bag after it has completely cooled.
How to cut a biscuit?
One four-egg sponge cake baked in a tin with a diameter of 20 cm can usually be cut into three layers. To ensure that the cuts are even and the cakes are the same thickness, use a few simple techniques.
Place the sponge bottom side up - it's very flat and your cake will be flat on top too. It is convenient to use a sheet of baking paper, a flat plate or a wire rack as a base, the main thing is that you can easily turn the cake along with the base. Prepare a knife - it is highly desirable that it be sharp, with a blade that is longer than the diameter of the biscuit. A bread knife with a wavy blade works very well.
Using a knife, mark cutting lines about 1 cm deep around the circumference of the biscuit.
Insert a knife into the cut and cut, carefully turning the sponge and pressing the knife against the bottom cake, it should go exactly along the marked line.
Important rules for baking fluffy sponge cakes
Indeed, only a few confectioners produce tasty and tender sponge cakes. But if you prepare it, following all the rules, then the basis for a cake or roll will definitely work out. And don’t be upset if it doesn’t work out the first time. Many people mistakenly believe that cakes are tender only if you know at what temperature to bake the sponge cake, how long to keep in the oven, and how many ingredients are required. If you only know this, then you won’t get a tender base for the cake.
Technology for preparing products for biscuit dough:
- You need to prepare all the necessary equipment: a bowl, a whisk (mixer with attachments), a spoon. Everything should be not only clean, but also dry. And preferably cold.
- Eggs are taken only fresh, washed, not from the refrigerator, their temperature should be at room temperature. When a recipe requires separating the white and yolk, it is better to do this in a separate plate rather than in the main bowl. If a yolk accidentally gets in, you can put that portion of the egg aside and take another one.
- You need to start beating the eggs at low speed; when the first bubbles appear (after thirty to forty seconds), the mixer power increases to maximum. Pay special attention to beating the eggs.
- If the yolk and white need to be beaten together, then sugar is added here when the egg mass increases by 30%. You need to add it gradually, the next portion of sugar is added when the previous one has completely dissolved. Typically, a beaten egg with sugar increases five times in volume.
- If you need to beat the yolk and white separately, it is better to start with the yolk. Beat it at high speed with half a portion of sugar. The egg is considered ready when all the sugar has dissolved, the yolk turns light yellow, and the volume triples. The consistency of the yolk should be like cream.
- Then the whites are whipped. In this case, sugar is poured in gradually. A well-beaten egg white does not run off the sides of the bowl (it is somewhat similar in consistency to shaving foam).
- Before use, sugar is checked for lumps and debris (sometimes there is debris). Do not pour all the sugar into the dough at once, it will make the base heavier. But if you add it in parts, it will dissolve faster and allow the egg to beat well. When powdered sugar is used for cooking, it does not play a big role; it will not affect the speed of beating the eggs.
- Before use, flour must be sifted, and more than once (maybe 3 times). If you need to add cocoa or starch to the dough, it is better to mix them together with flour and sift both ingredients together.
- If the recipe requires you to beat the white and yolk separately, then the flour can be added to the yolk with sugar and beat with a mixer. You can also add 1/3 of the whipped egg white.
- If the yolk is not separated, then the flour must be poured carefully, in small portions, into the beaten egg-sugar mixture and carefully mixed with a spatula. Movements are made in one direction. You need to try to maintain the volume of the beaten egg. You cannot mix the dough with a mixer, otherwise all the airiness will subside.
- When a recipe calls for adding chocolate to the dough, it is first melted in a water bath and cooled to room temperature. It is poured into the dough at the end of cooking in a thin stream.
- The butter is also pre-melted. Then beat with a mixer until it turns white and becomes fluffy. Add to the dough at the end.
- If you need to use juice or other liquid in the recipe, then it is better to beat the yolk separately from the white. It is better to add liquid to the yolk (with sugar).
- Various additives (raisins, nuts, dried apricots, prunes, coconut, etc.) are added only to the finished dough. They must be washed and dried, otherwise moisture from them may be the reason that the dough will not rise. You can add them when the dough is already in the mold. You should not put juicy berries. They will ruin the entire biscuit; they can only be used in the form of a puree, which is added when beating the yolk.
- For baking, the dough should be used immediately after preparation. Until it settled down. It is better to put baking paper on the bottom of the mold (preferably a springform pan).
How to make a sponge cake. Secrets of chef Vladimir Mukhin
Biscuit is a delicate matter. Everything is important here: moisture, creaminess, and aroma. The chef of the White Rabbit Vladimir Mukhin, knows exactly how to prepare delicious biscuit dough.
Vladimir, how to make delicious biscuit dough? Proportions for classic biscuit dough: for 1 egg, 25 grams of sugar and 25 grams of flour. The result will be approximately 60 grams of biscuit. At first glance, everything is simple: measure, mix, bake. But in fact, in the preparation of biscuit dough there are a number of not obvious things that affect the final result.
For example? Let's start with the products. Flour must be of the highest grade with high gluten. You cannot take the first grade or bran flour. Before cooking, the flour must be sifted. By the way, there is an option for making a sponge cake without flour, from chopped almonds or other nuts. You will get an almond sponge cake.
Let's go back to the classics... For the dough you also need sugar, the most ordinary granulated sugar, fine. It will dissolve better when beaten with the yolks. It must dissolve completely, otherwise grains of sugar will brew, and this will affect the porosity of the biscuit. Undissolved sugar may cause a crunch in the finished product. Therefore, you need to beat well, the yolks until white, the sugar until completely dissolved.
Baking biscuits in the microwave
Microwave ovens are also suitable for baking cakes. They just have to be round, otherwise the corners of the cake will dry out. To use a microwave for this purpose, you need to decide how many degrees it should provide for baking a biscuit. True, this device does not take into account degrees as such, but the power of the device itself. So, with a power of 700 W, the baking time will be 6 minutes and 25 seconds, and with 850 W - 5 minutes and 20 seconds. Every 50 W increase in power reduces the time it takes to prepare a biscuit by 20 seconds. When the biscuit is ripe, it can be removed after 5-7 minutes. In this case, the cake will be completely white.
How long to bake a biscuit: Correct baking time
We welcome beginner confectioners and experienced pastry chefs. Our article provides useful information that is difficult to do without when making biscuit products. The information posted in this section will help you avoid troubles and difficult moments that often await housewives when working with delicate biscuit dough. We will try to tell you in detail: how to set the baking temperature correctly, how long to bake a sponge cake, when it is better to check the degree of its readiness, etc. After reading this article, you will successfully cope with any treachery and vagaries of the sponge cake.
Tricks for making biscuits
The quality and taste of the biscuit are influenced not only by the temperature and baking time. There are also many other subtleties, without taking into account which you will not be able to bake delicious pastries.
- To prepare a biscuit, you must use premium flour, which contains a high percentage of gluten. Before mixing with other ingredients, flour must be sifted to rid it of possible debris and saturate it with oxygen.
- You need to separate the yolks from the whites very, very carefully. If even a small part of the yolk gets into the white, it will not whip properly.
- The yolks should be kept at room temperature before mixing with sugar. While beating the yolks with sugar, the latter must completely dissolve, otherwise crunchy grains will appear in the biscuit. The yolks should turn white.
- Before whipping, the whites must be kept in the refrigerator for 10 minutes. They should then be placed in a clean, dry container and beaten until a fluffy white mass is formed.
- The sponge cake will turn out porous if you carefully and gradually introduce the whipped whites into the mixture of sugar, yolks and flour. The resulting mixture can only be mixed by hand, moving from top to bottom, as if lifting layer by layer. Remember that the dough cannot be stirred for too long, otherwise it will lose its airy texture.
- The sponge cake is best baked in a round springform pan with high sides, a non-stick coating and a diameter of 24–26 centimeters. If the pan has a non-stick coating, just bake it. If there is no coating, it can be greased with oil and covered with parchment. The mold should be placed in the refrigerator for a third of an hour before the dough is placed in it. It is not recommended to fill the mold with sponge dough to more than 2/3 of its height, because during baking the sponge cake will increase by about 1.5 times.
- The biscuit dough should not sit for long. After moving the dough into the mold, it should be immediately sent to a preheated oven.
- Under no circumstances should you open the oven for the first 25–30 minutes , otherwise the biscuit will settle, that is, it will lose its porous texture.
- The finished baked goods do not need to be removed from the oven immediately. It is better to keep it in the switched off oven for another 10-15 minutes after cooking.
- In order for the biscuit to easily leave the mold, it needs to be placed on a wet towel for a few minutes.
If you strictly follow the described rules, instead of a flattened cake you will get a tasty, voluminous sponge cake with a porous, delicate texture.
We welcome beginner confectioners and experienced pastry chefs. Our article provides useful information that is difficult to do without when making biscuit products. The information posted in this section will help you avoid troubles and difficult moments that often await housewives when working with delicate biscuit dough. We will try to tell you in detail: how to set the baking temperature correctly, how long to bake a sponge cake, when it is better to check the degree of its readiness, etc. After reading this article, you will successfully cope with any treachery and vagaries of the sponge cake.
How to bake a sponge cake in the oven
Posted by RECIPES LIFE HACKS REVIEWS (@krem.tort) November 10, 2020 at 6:02 PST
Many housewives dream of baking tall sponge cakes. To get the desired result, several conditions must be met:
Publication from LIFE HACKS RECIPES REVIEWS (@krem.tort) August 18, 2020 at 10:31 PDT
- when preparing ingredients for a recipe, it is advisable to use products and even dishes of the same temperature;
- Before adding to the dough, flour must be enriched with oxygen; for this, it is not sifted in advance, but directly into a container with the main composition;
- if the recipe calls for bulk products, such as cocoa powder, baking powder, salt, soda, they are mixed with flour before sifting;
- It is recommended to separate the eggs for biscuit dough into whites and yolks, and then thoroughly beat them one at a time;
- the components are mixed in strict sequence: yolks, ground with sugar, are added to a sweet protein foam, and flour sifted through a sieve is added;
- melted butter, chocolate, cream, milk, kefir, vegetable oil, etc. are added at the last stage, and you need to mix the ingredients not with a mixer, but with a spatula for a very short time, so as not to destroy the oxygen bubbles, on which the sponginess and airiness of the future sponge cake depends;
- mixing is done very carefully, movements are directed from the bottom to the surface;
- the stove is heated in advance to the set temperature (+140, 160, 170, 180, 200°C);
- When baking sponge cakes, you must strictly observe the exact baking time of the sponge cake in the oven; under no circumstances open the oven or the multicooker lid for at least the first half hour, otherwise the baked goods will immediately sink and will not rise again.
Features of the cold method. What is being done and in what order?
Most often, recipes use a cold method of preparing dough. Features of this method:
- For the dough you need to separate the yolk from the white. Beat the yolk with half the sugar until the dough increases in volume up to three times.
- Separately, beat the whites according to all the rules (sprinkle sugar a little at a time, the mass should increase up to five times).
- Add 1/3 of the white to the yolk and gradually add flour. Mix gently, without sudden movements, until all the flour is in the dough.
- Then the remaining protein is added and everything is mixed with smooth movements from bottom to top.
Interesting: Is it possible to keep dry ears of wheat at home?
How long to bake a biscuit in the oven
Time setting is one of the most important factors affecting the quality of biscuit baking. It's time to figure out how long a biscuit bakes in the oven. Many recipes require baking times between 30 and 40 minutes. It is known that these are theoretically averaged figures. In practice, everything happens completely differently. The following parameters depend on how long the dough is in the oven:
- appearance of the biscuit;
- its taste;
- aroma;
- dough moisture level;
- structure density;
- tenderness, airiness and many other important qualities.
First of all, you need to consider why the sponge cake is baked: for serving as a separate dessert, for cutting into cake layers, for making a roll, etc. In each individual case, the master pours the dough of different thicknesses, sets different temperatures, and determines the baking time , based on accumulated experience and individual instincts.
For example, when making dough for a future sponge roll, the baking time lasts no more than 15 minutes. But for cakes it will take from half an hour to 60 minutes.
Biscuit baking time and temperature
Biscuit, as a rule, does not like high temperatures. Therefore, it is baked as follows: during the first 30 minutes, the biscuit is baked at a temperature of 180 degrees, then it is reduced and the product is baked for the remaining time at 160 degrees . Please note that to prepare a biscuit, you need to set the convention mode. Thanks to this, the temperature in the oven becomes the same on all levels, which allows the baked goods to bake evenly.
As for the cooking time for the biscuit, it is purely individual, as it depends on the capabilities of the oven and the thickness of the confectionery product. On average, a biscuit is baked from 30 to 60 minutes . It’s very easy to check if the biscuit is ready – it should turn brown and spring back when pressed with a silicone spatula. You can also check the baked goods by piercing them with a thin wooden stick, such as a toothpick. If the dough does not stick to the stick, then the biscuit is ready.
How to avoid cracking the top crust of a sponge cake
You can often observe a picture when the top swells in the form of a slide, which ruptures and a liquid mass flows out of it in the form of volcanic lava. What is the reason for this effect? Most often the reason lies in too high a temperature. Due to inexperience, some housewives make the oven too hot. At the same time, the top of the biscuit is quickly baked, the mass inside simply boils, expands in volume, swells the top of the cake, and then flows out.
Another reason for the appearance of cracks on the surface of baked goods is too much flour. If the proportions with the amount of flour were violated when kneading the dough, your cakes or muffins will have unsightly cracks.
The third reason is that the dough is in the oven for too long, as a result of which the biscuit simply dries out and cracks.
Why the biscuit does not rise or falls quickly - the main reasons
In the process of preparing biscuit dough, it often happens that the cake does not want to rise, and if it was destined to rise, it does not last long at all, it immediately collapses. It would seem that all the conditions have been met, the smallest details have been taken into account, including the baking time for the biscuit in the oven, but still, a mistake was made somewhere. It's a shame.
Let's look at the reasons for such annoying phenomena:
- The first reason is non-compliance with the temperature regime. Even the slightest deviation from a given parameter leads to a negative result.
- An old oven often has gaps and the lid does not close tightly. When air is passed through, the temperature inside the chamber immediately decreases.
- Frequently opening the door in the middle of baking also produces dough of inadequate quality.
- A common cause is uneven heat supply due to gas oven malfunctions. If the mode is unstable, the cakes turn out lopsided and ugly.
- In the process of preparing the dough itself, mistakes also occur: the proportions are not followed, excessively chilled products are used, the egg whites are not whipped well, the baking powder is not good enough, etc.
- Some housewives do not always carefully handle the dough at different stages of cooking. For example, they do not immediately put the prepared mass into a mold and send it to a hot oven, they sharply move the container filled with the raw mass, or they tap on a baking sheet with a hot cake, trying to speed up the removal of the baked tender sponge cake.
- It turns out that not everyone knows how long to bake a biscuit in the oven. But premature removal of the cake turns it not into a fluffy, beautiful sponge cake, but into a hint of baked goods with a deep dent in the middle.
Confectioners' recommendations for preparing baked goods such as sponge cakes
To ensure that the time spent preparing the biscuit is not wasted, it is important to follow certain rules and avoid mistakes. So, how to bake a biscuit in the oven? Adhere to the following rules:
- To prevent the finished biscuit from looking like a mound, after the dough is already in the mold, you need to twist it clockwise.
- It is imperative to observe all proportions of ingredients.
- Make sure that there are no bubbles on the dough (when it is already in shape).
- The dough should occupy no more than 2/3 of the baking sheet (as it will rise greatly during baking).
- Do not open the oven during baking for at least the first 15 minutes, otherwise the dough will settle and will not rise again.
- After cooking, the biscuit should rest for at least 4 hours. For better impregnation with creams, it is recommended to let the biscuit stand for 12 hours.
- Cut the cake into pieces. For example, one needs to be cut into two full-fledged cakes, preferably with fishing line or strong thread. This way there will be no creases.
- Be sure to follow the recipe and temperature conditions (at what temperature to bake the biscuit is always indicated).
- When preparing biscuit dough, it is better to choose large eggs (they contain more protein).
- It is better to cool the dishes and equipment used for cooking in the freezer in advance.
- Salt, citric acid or juice can be a good help in beating the egg white (if the egg is not beating at all). Therefore, it is advisable to keep them nearby during the cooking process.
- Be sure to sift the flour first. Do not consider this an unnecessary action.
- The mixer is used only for beating eggs. Next, mix everything with a spatula.
- If you need a crust on the sponge cake, grease the pan with butter. If not needed, it is better to line it with baking paper.
- The dough is poured into the mold immediately and placed in the oven, otherwise the biscuit will not rise.
- While the dough is baking, you should not run or jump near the appliance where the biscuit is being prepared. Children often love to spend time with their mother and at the same time they are big fidgets. Due to their jumping, the dough may not rise at all.
- If there are problems with the oven (the bottom is burning, the heat is unevenly distributed), then you can put a couple of bricks (clean) on the bottom of the oven or place a bowl of water.
Interesting: How to Cook Frozen Crayfish at Home
How to get a well-baked sponge cake
Many beginners often have numerous questions: how well the cakes are baked, how long to bake the sponge cake, how to check the degree of its readiness, and many others.
The readiness of sponge cakes is checked using a regular wooden stick (toothpick, skewer, match, etc.). You need to pierce the cake with a piece of wood in the center of the biscuit and immediately pull it out. If the stick is dry without any sticky pieces of dough, the baked goods are ready.
Experienced confectioners do not always check the readiness of the dough in this way. They determine condition by appearance. For example, if the dough has moved away from the walls of the mold, the baking seems to have shrunk - the biscuit is ready, the oven can be turned off.
However, there are times when the cake looks perfect on the outside, but is not baked at all on the inside; you will have to finish baking it until done. If the oven temperature is too high, you need to lower the temperature. Conversely, if the oven is not warm enough, you need to add heat. At the same time, you need to make sure that the top of the biscuit does not burn; to do this, cover it on top with a piece of foil and only then send it for processing. Do not forget to periodically poke with a stick to check readiness.
Now about the possible reasons for this result:
- Too much sugar or flour. The basic rule for preparing biscuit dough is to strictly follow the recipe proportions. Biscuit is very capricious if the balance of ingredients is imbalanced.
- Temperature violation. This mistake also leads to poor quality baked goods. If the oven was not preheated or the baking temperature was chosen incorrectly, everything leads to the fact that the cake will either bake too quickly, dry out and even burn at the edges, or, on the contrary, it will turn out underbaked from the inside.
- The recipe always indicates the recommended time range. For example, how long to bake a biscuit in the oven at 180°C. Unless you have sufficient experience, it is best to set the baking time according to the recipe you are using.
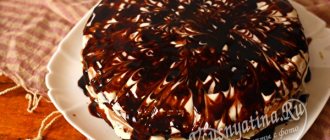
Chocolate sponge cake with kefir for cake
Any housewife should have at least two recipes for making sponge cake in her culinary arsenal. Situations are different. For example, the refrigerator is out of eggs, but you really want to make a cake.
Recipe components:
- soda – 0.5 tsp;
- sugar – 200 g;
- kefir (you can use yogurt) – 1 glass;
- cocoa – 2 tbsp. l.;
- flour – 200 g.
Cooking time: dough preparation 15 minutes + baking 30 minutes.
Number of calories: 251 kcal.
Cooking steps:
- Add sugar to kefir and beat;
- Add soda;
- Pour cocoa and flour through a sieve;
- Using a spatula, mix the dough ingredients until smooth. The consistency of the biscuit dough should be liquid;
- Pour the dough into the mold;
- Bake the sponge cake at 200C for about half an hour;
- The finished biscuit must cool in the mold.
Article on the topic: How to cook stewed fish with vegetables
What is the optimal temperature for biscuits?
When making biscuits, every little detail is a determining factor that affects the taste, aroma, and appearance of the finished product. The choice of temperature is one of the important parameters. Firstly, before placing the pan with biscuit dough in the oven, you should always preheat the oven to the required temperature. If you do not fulfill this condition, no one can guarantee you that the biscuit will rise and be fully baked. Depending on the type of biscuit dough, it is customary to set different values:
- for butter biscuits, the baking temperature is set to no higher than +180°C;
- To bake classic cakes, the oven should be heated to +220°C.
Why is starch added to biscuit dough?
Looking through many recipe descriptions, we often see potato starch among the recommended products. For many, this raises a fair question: why should it be added to the biscuit? It is known that this product has absorbent properties, thanks to which it is possible to get rid of excess moisture in individual biscuits and give them additional airiness and fluffiness. Most often, starch is used when making sponge cake with apples or other too juicy fruits.
There are certain rules for working with potato starch:
- This powder must be dissolved in milk or fermented milk products.
- Potato starch reduces the taste of confectionery products; to mitigate the negative impact, vanillin or another flavoring must be added to the dough recipe.
Features of baking biscuits in a multicooker
When using a multicooker, you should not try to get a huge sponge cake. The rules for baking biscuit dough in this device are similar to a conventional oven. The temperature regime is also set here and how long the biscuit is baked is determined. By analogy with traditional conditions, the lid should not be opened. Everything is as usual.
There is one nuance related to the design features of the household appliance. If your cake is too tall, it may block the valve in the multicooker lid. This leads to disruption of the circulation of air flows inside the chamber with all the ensuing consequences.
At what temperature should you bake a biscuit?
I try to write in each recipe at what temperature to bake this or that sponge cake, so that even inexperienced housewives get the result the first time.
But have you ever wondered why most biscuits are baked at 180ᵒ C? And why do pastry chefs make such a fuss about getting the oven temperature right? What is that mystical number on the oven dial that makes it work so well for biscuits?
Let's look at the impact oven temperature has on the baking process and how you can control your baking results with a little thermal know-how.
After this culinary experiment, you will finally understand once and for all at what temperature to bake a sponge cake!
What processes take place during baking a biscuit?
During baking, cake batter undergoes a complex process of chemical and physical reactions that transform it from gooey to light, fluffy deliciousness. Each of these actions takes place when the batter reaches a certain temperature. And the speed at which they happen depends on how hot the oven is.
Here are the steps that turn the batter into a sponge cake, and the order in which they occur:
- Fats melt
- Gases expand and form
- Sugar dissolves
- Proteins coagulate
- Starches gelatinize
- Gases evaporate
- Caramelization occurs
Let's conduct an experiment and bake 5 biscuits at different temperatures
If the sponge is baked at a relatively low temperature, these steps occur more slowly and evenly throughout the sponge, with less duplication of processes.
Gently raising the temperature of the dough allows the outer crust of the sponge cake to react to processes in the same way as the inner part of the sponge cake.
Conversely, a batter placed in a high temperature oven will have a number of processes occurring in rapid succession and in an uneven distribution. In this scenario, the crust of the cake will go through all the stages faster than the inside of the cake.
I baked 5 biscuits at temperatures ranging from 150°C to 200°C to give a practical example of how changes in oven temperature can change the end results.
Conclusions on how baking temperature affects sponge cakes:
- A sponge cake baked at 150°C is lighter and fluffier than a cake baked at 200°C.
- A sponge cake baked at 150°C also has a pale, smooth outer crust that remains gummy due to reduced evaporation at the surface of the cake.
- The 200°C sponge cake has a dark, raised outer crust with a drier surface. The evaporation of water on the surface of the biscuit allows the caramelization processes to occur.
- Caramelization can add flavor, but if taken too far it can result in a burning, acrid taste.
- Another noticeable difference in the biscuits at different temperatures was the consistency of the crumb.
- The sponge cake baked at 150°C had a very soft, smooth crumb, while the sponge baked at 200°C had a slightly rougher mouthfeel. This is likely due to the speed at which the proteins coagulated.
Source: thecakeblog.com/2015/04/baking-temperature-comparison.html
If you still don’t fully understand when to add baking soda to a biscuit and when to add baking powder, take a look at this experiment.
To put theory into practice, I recommend that you conduct a similar simple experiment in your ovens
I’ve already done this with classic biscuits, with shortcrust pastry (with eclairs too), and now I’ll show you with an olive sponge cake.
This test perfectly shows that the baking temperature of the sponge cake affects the result. And most importantly, after this experiment you will be able to easily understand your oven.
Test it on any simple cupcake and you’ll see for yourself.
My conclusions:
- for biscuits in cakes, I choose a baking temperature of 170 ° C so that it is not only as even as possible, but also rises well. (“The volcano” in the middle of biscuits depends not only on temperature, but I also take this factor into account and don’t forget about it).
- I bake cupcakes at 185°C.
- But I bake a large cake at 160°C, otherwise the walls dry out. At 160°C the cake is perfectly baked in depth.
Source: @nastya_shtapenko
And don't forget to sift the flour when making the sponge cake! Why this is important was written here.
I hope you enjoyed this experiment, and you received a comprehensive answer to the question at what temperature to bake a sponge cake .
In conclusion, let's watch a video of making a sponge cake: