One day, while having a morning cup of tea, Bublichkina was watching TV, where they were showing a story about the gastronomic preferences of Parisians. At the tables of street cafes, sophisticated Europeans imposingly ate tender brioche à tête buns, washing it down with hot coffee. They chatted lazily, laughed, showing with all their appearance the unearthly pleasure from this meal. Anyutochka thought that we were certainly no worse, but for some reason we didn’t eat brioche. Therefore, the issue needs to be resolved, and without delay for a second.
A little history and theory
The word brioche is believed to come from the Old French "brier", which means a certain manipulation of dough. According to the old recipe, the dough for a brioche bun was kneaded for a very long time; today's chefs have been able to optimize the process.
Be that as it may, it is still a rich pastry based on yeast dough with a lot of butter. Thanks to this, the products come out tender, incredibly aromatic and with amazing taste. Traditionally, brioche is baked in the form of a large loaf, divided into six parts. Today there are several varieties of Brioche:
- Parisiennes is a product in the form of a round bun with a small ball in the center.
- Mousseline – has a cylindrical shape, decorated with creamy crumbs. It’s somewhat reminiscent of our Easter cake that we bake for Easter.
- Bordelaise - resembles a crown in size and shape, which is decorated with candied fruit or sugar on top.
- Vendéene is a braided loaf with an oval shape.
- Dressie vendéene – similar in shape to a loaf with orange flavor.
- Pastis landais is a tall bun with a raised contour around the circumference.
The essence of making Brioche buns
The main feature is the dough, into which a lot of butter is introduced. It is left warm for a certain time to ferment, after which it is sent to the refrigerator for 8-10 hours. Cooling slows down the fermentation process, and when the dough is taken out of the cold, it begins to rise very quickly. Long fermentation also has a beneficial effect on the taste of homemade brioche buns.
Thanks to their exquisite taste, French rolls are popular all over the world. The painter Edouard Manet played a certain role in the recognition, who not only adored such pastries, but also immortalized them on his canvases.
Brioche bun video recipe
Watch the step-by-step video for making Brioche buns at home to make sure you get it right.
Finally, I would really like to recommend you a few more excellent options for delicious buns, because every housewife simply needs to have more recipes for sweet pastries in stock. For example, try the fragrant Buns with jam, which the children in my family adore most. In addition, don’t miss the magnificent Cinnamon Buns and the very appetizing, so far underrated by housewives in our country, Garlic Buns. I also can’t help but recommend the exceptionally tender and delicate Kefir Buns and the amazingly delicious Apple Buns. Any of the recipes I recommend are perfectly balanced and 100% foolproof, so you don't have to worry and get straight to baking. Good luck with your experiments in the kitchen and always have a good mood! I hope you will write me some comments and reviews about the Brioche buns just described, and also recommend your own, original options for preparing them. Bon appetit!
Other bun recipes
Hamburger buns Buns with jam Butter dough for buns Hot dog buns Kefir buns Bon appetit!
Reader reviews
Nobody has written anything yet. Be the first!
Parisian brioche buns at home: recommendations
Anyuta suggests starting your acquaintance with French pastries with the Parisian brioche - a round loaf with a small ball in the center. The classic recipe requires maximum patience from the cook; this is the only way the end result will meet all your hopes. There are four basic rules worth highlighting here:
- Use high quality products to get good results.
- Pay special attention to the dough; a good knead should have a homogeneous structure, without large air bubbles.
- The ingredients should be at room temperature, only the water needs to be cooled first.
- The proofing process requires optimal temperature and humidity.
Butter
The choice of good oil plays an important role. Don’t think about it, good stuff doesn’t have to be expensive, but 82.5% fat content – take it out and put it in. After all, we need the oil not to stand like a “stake” when cooled, but to be plastic and pliable.
Flour
Flour with a high protein content is desirable; the French are talking about the T55 brand, which has a protein content of 10.5%. This is exactly the flour that is sold in any store.
Making homemade brioche buns: ingredients and baking recipe
Ingredients
| Products | Quantity |
| Premium flour | 350 g |
| Butter | 150 g |
| Eggs | 3 pcs. |
| Instant yeast | 5 g |
| Water | 50 ml |
| Sugar | 40 g |
| Salt | 7 g |
| Egg yolk | 1 PC. |
If you have live compressed yeast on hand, you can use it, you just need to recalculate the dosage. There are experimenters who add all sorts of spices: cardamom, cinnamon, nutmeg, and raisins infused with rum. Sift the flour first.
Preparing the dough
- Pour all the flour into a suitable container, add salt, sugar and yeast. Stir with a spatula or whisk until all ingredients are evenly distributed throughout the mixture.
- Break three medium-sized raw eggs into the flour, pour in 50 ml of cold water and start kneading the dough. According to the traditional recipe, the dough for brioche buns at home is kneaded by hand, but let me tell you, it’s still a lot of work. Therefore, it is better to use electric units if possible.
- Mix the ingredients thoroughly. Using a dough mixer with a hook attachment, knead the dough for 5-8 minutes at medium speed, but you will have to knead it with your hands longer until it is smooth. When kneading by hand, it is important not to overheat the dough and cool it periodically.
- The butter from the refrigerator needs to be softened a little, for which you need to leave it at room temperature, wrapped in parchment for 10-20 minutes. Then roll it out with a rolling pin so that the butter pancake resembles plasticine.
- Add butter to the dough in small portions without stopping kneading. First you need to start with a tablespoon of oil, when it is mixed in, add the next portion, etc. The mass after introducing all the oil will look heterogeneous; it is sticky, but not liquid.
- Continue kneading the dough with the dough hook attachment for another 12-15 minutes, until the shapeless piece turns into a smooth, non-sticky lump. Manual kneading until the dough reaches this state can last 30-40 minutes, and this is provided that the “stretch-fold” kneading technique is used.
- Roll the finished Parisian brioche dough into a ball, put it in a container and cover with film or a towel. Leave for one hour at room temperature. During this time, the dough will increase 1.5-2 times.
- Place the dough on the table, stretch it into a square layer about one centimeter thick. Visually divide it into three parts, fold it lengthwise like an envelope - you get a rectangle consisting of three layers. Now you need to fold it two more times, only across it.
- Place the layered dough, seam side down, in a container, cover with a lid and place in the refrigerator for 8-10 hours. As a result, the dough will rise twice and become dense.
Classic Brioche
I’ve been meaning to do a good and detailed master class on the classic French pastry “Brioche” for a long time. First, let's figure out a little what it is:
Brioche (French une brioche) is a sweet bun made from butter dough on brewer's yeast with the addition of butter. It was made back in the 16th century in Normandy and the 17th century in Vendée, western France. Traditionally made from 6 round-shaped pieces of delicate butter dough, molded together before baking.
The essence of the invention was that the butter dough, prepared on sponge, was delayed in growth for a day, as it was placed in the cold. The next day, squeezed into a form that was too tight for it, it rose unusually quickly and not in the form of a dome, but a series of small balls, the number of which was determined by the cuts in the dough. The brioche dough was soft and airy. Very rich, sweet, they were served with tea.
Parisian brioche (brioche ? t?te, with a head) is a large ball of dough, decorated with a small one on top. Raisins and finely crushed chocolate are often added to the dough. Served with tea.
The length of time it took to prepare brioche gradually led to either a simplification of the technology (hence a change in taste) or to the abandonment of the troublesome task. Now brioche is often called a semi-bread or bun consisting of 3-4 small balls connected together.
Brioches gained worldwide popularity thanks to the sincere love that the French artist Edouard Manet had for them. In still lifes and genre scenes, he often paid attention to these sweets. At musical evenings hosted by his wife, brioche always dominated the tea table. In the best traditions, the bourgeoisie decorated the brioche with a living rose and served it with marmalade or a scoop of fruit ice cream.
(Wiki)
As you understand, the molding can be completely different:
- This can be a “loaf”, which is formed in a bread pan from 6 balls of dough;
— It can be a portioned bun “with the head”;
- This can be in the form of a “pie”, on which cuts are made, and it is also possible to sprinkle this bun with sugar, which does not melt in the oven.
I'll show you an example of the formation of the last two options.
This recipe is one of the classics, as it is almost 40 years old. Recipe from the book of the confectionery house “Len?tre” - “Len?tre's desserts and Pastries” 1975. I will give the proportions exactly as they are given in the book - broken down into three different weight options.
Adviсe:
This dough must be prepared a day in advance. It must rise slowly in the cold overnight. I will also give two options for kneading - machine and manual. The book recommends kneading in small portions and using your hands.
Preparation: 30 minutes
Dough “rising” time: from 3.5 hours to 5.5 hours
Test resting time: 12 hours
Baking: 25-35 minutes
Ingredients:
For 1200 g dough: 450 g butter, room temperature 15 g fresh yeast 2 tbsp. l. warm water 15 g salt 30 g sugar 1/2 tbsp. l. milk 500 g flour 6 eggs
For 600 g dough: 225 g butter, room temperature 8 g fresh yeast 1 tbsp. l. warm water 8 g salt 15 g sugar 2 1/4 tsp. milk 250 g flour 3 eggs
For 360 g dough: 135 g butter, room temperature 5 g fresh yeast 3/4 tbsp. l. warm water 5 g salt 10 g sugar 1 1/2 tsp. l. milk 150 g flour 2 eggs
For greasing: 1 egg yolk 1 tbsp. l. milk
Preparation:
The recipe will describe the process of preparing dough based on 1200. With a smaller quantity, everything is prepared in exactly the same way, only proportionally reducing the amount of ingredients.
Making the dough:
Remove the butter 15 minutes before you start preparing the dough.
Dissolve yeast in warm water.
In another bowl, combine salt, sugar and milk. Never mix yeast and salt at the same time.
To knead in an electric mixer:
Place the salt-sugar-milk mixture in a mixing bowl. Add flour and dissolved yeast.
Mix on low speed with a mixer fitted with the hook attachment for 2 minutes, then gradually add 4 eggs one by one, adding the next one only when the previous one is completely incorporated into the dough. After adding the 4th egg, continue kneading the dough until it becomes homogeneous and smooth. Add the last 2 eggs and turn the mixer speed to medium. Beat for about 10-15 minutes or until the dough is light and silky in appearance and does not stick too much to your fingers.
Continuing to beat, slowly adding butter in small pieces, beating the next piece into the dough only after the previous one has completely dispersed. After adding the last one, beat for about 2 minutes.
To knead the dough by hand:
Prepare all the ingredients in the same way as in the previous version.
Pour the flour onto the table and make a small depression in the center. Pour in the diluted yeast. Using your fingertips, mix the yeast into a small amount of flour, still remaining in the well of the flour and leaving the bulk of the flour intact.
Add 3 eggs and mix them with half the flour. Then add sugar, salt, milk and another egg. Mix everything until smooth with your fingertips, adding all the flour little by little.
When all the flour is mixed into the dough, start kneading the dough with your whole hand, carefully kneading it on the table for 15 minutes. When the time is up, add the remaining 2 eggs and continue kneading until your dough becomes elastic, soft, and pliable.
After this, add softened butter. Ideally, beat it a little in an electric mixer so that it becomes a homogeneous mass, and not different cubes. It is most convenient to mix into the dough using a scraper. Try to use your hands as little as possible, as the dough is quite sticky.
Proofing:
Place your dough in a large bowl, cover the top with a towel and leave in a warm, draft-free place for 1.5-2.5 hours. Your dough should rise to double in size.
After this, knead the dough well and put it in the refrigerator for 2-3 hours, it should increase in size again. Punch down the dough thoroughly again, wrap it tightly in cling film and refrigerate overnight.
If you want to freeze the dough, you can store it in the freezer for up to 1 month, wrapped in cling film. If you are making a large amount of dough (1200 g), then divide it into 3 parts. 24 hours before using, transfer your dough to the refrigerator.
Molding:
The next day, remove the dough from the refrigerator, unwrap it, and place it on a lightly floured cutting surface.
Knead it very well and thoroughly again. It should become smooth, uniform, and shiny.
Forming options:
Portioned bun “with the head”:
For this molding, you will need ramekins or a mold with high fluted sides that taper at the bottom and widen at the top. Carefully grease the bottom and walls with butter.
Divide the dough so that you get a pair of a larger ball and a slightly smaller one.
Knead a larger ball of dough well and make a hole in the middle. It should look like a donation.
Using the edge of your palm, lightly press on the smaller ball, so that it visibly divides into two parts - a slightly larger and a slightly smaller one. The larger part will be the “head”, the smaller part will be the “tail”.
Now start rolling the smaller ball with your palm so that a ball remains on one side (the larger one when dividing), and a long tail comes out on the other.
Take a donut-like piece of dough in your left hand so that the hole is on your fingers, between your middle and index fingers. With your right hand, insert the tail from the second part of the dough into this hole. Then, without pressing anything yet or pushing it all the way through, place the resulting figure into the mold.
Now, with two fingers, gently press and push your “tadpole” down.
It is necessary to calculate when dividing the dough so that the assembled brioche (base) only reaches the middle of the walls of the mold, because it will still rise very well. I can’t say in grams, because I don’t know what size your molds will be (after all, you can make one large brioche in exactly the same way), nor what volume of dough you will make.
Brioche "pie":
This molding method is somewhat easier for the first time and I recommend starting with it.
Also divide the dough into small equal balls. Using the palm of your hand, flatten the ball to make a flat cake.
With the fingertips of your left hand, grasp the edge of the cake, just above the middle. Turn your thumb down slightly and use it to roll the dough towards the center. Using the fingers of your right hand, press this tip that is in contact with the main dough.
Thus, go to the very end.
Now, using the same technology, start over - take the far right corner and press it to the edge of the dough, sealing the edges well.
And so on until the very end. Place the bun seam side down and press lightly with your palm.
Place the finished buns on a baking sheet lined with parchment paper, cover with a towel and leave for an hour and a half.
Preheat the oven to 200C.
Brush the surface of the brioche with a mixture of egg yolk and milk using a brush. You can also make cuts on those buns that will be baked without a mold using scissors.
Bake in the preheated oven for 25-35 minutes depending on the size of your items. The surface should become golden.
Remove the finished buns from the mold and place on a wire rack. Let cool completely.
Serve with milk and your favorite jam.
Enjoy your tea!
Making and baking Parisian brioche with your own hands
Even if the dough rests for a couple of hours, this is not so critical; you won’t get up at five in the morning to make buns. So, the dough has frozen and risen, and the consistency just calls for work:
- Divide the dough into 10 pieces of equal weight and roll them into balls. This is important because identical preparations will be baked at the same time.
- Using the edge of your palm or a couple of fingers, roll the ball so that it takes the shape of a skittle: one part is larger, and the other is small, in the shape of a ball. Do a similar operation with all the balls. You need to work quickly; the dough should not have time to heat up from the heat of your hands.
- Make a hole in the middle of most of the workpiece with your thumb. Then, with two fingers, expand it so that the head of the future bun passes through. Now you need to insert the smaller part of the pin into the hole, you should get a steering wheel with a small ball in the center. As a last resort, you can simply connect the two parts of the workpiece, but there is a risk that the head will fall off during the process.
- If you want to make tall brioche buns at home, then you should put the blanks in muffin tins. If there are none, you can simply lay them out on a baking sheet covered with parchment, just be prepared that the products will not hold their shape, but this will not affect the taste in any way.
- Cover the finished pieces with cling film and leave to proof in a warm place for an hour and a half, until they have doubled in volume. You can put the buns in the oven and just turn on the light. After this, they need to be greased with egg yolk.
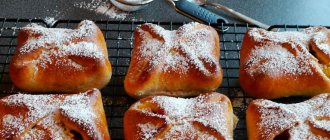
- Preheat the oven to 190℃ and bake the buns for 15-20 minutes until they are golden brown. Baking time depends on the size of the pieces. Cool the hot brioche on a wire rack and are ready to serve.
The hardest part is waiting for the buns to cool, the aroma is crazy. It’s worth making tea or coffee for now, and then enjoying the fresh crumb with a piece of butter.
Brioche buns – amazing baked goods from France
French cuisine is one of the most famous in the world. Thanks to this country, many dishes have been invented that delight millions of people. Confectionery products are especially tasty and original. These include brioche buns. This is an incredibly delicious pastry. In appearance, this culinary miracle looks like ordinary bread, but it leaves a pleasant aftertaste of cream.
The French treat themselves to this delicacy only on Sundays, because the process of preparing it is very complicated and time-consuming.
But the result surpasses itself, because the dessert turns out very tender and airy, with an unusually thin crust that has a pleasant crunch.
It tastes so incomparable that all the suffering in creating this confectionery masterpiece fades into the background. Let's look at the detailed recipe for brioche buns step by step with photos.
Classic brioche option
These are real French brioche buns without any creams or fillers. They take a very, very long time to prepare, so be patient, because ready-made products are not comparable to store-bought ones. The following products need to be prepared and weighed accurately:
- Sugar – 50 g;
- Salt – 10 g;
- Wheat flour – half a kilo;
- Fresh yeast – 15 g;
- Large eggs - 6 pieces (or 350 g eggs without shell);
- Unsalted butter - 250 g (preferably French-made). It should be cold;
- For the glaze, beat an egg with a pinch of salt.
Now let's look at how to prepare this masterpiece at home. The scheme is as follows:
- First, let's make the brioche bun dough. Cut the butter into cubes and leave on the package. Then you can grease the molds with it, so there is no need to throw it away;
- Take a bowl and sift the flour into it, then put salt, sugar, and yeast in it. Use your fingertips to rub the yeast into the dough;
- Add eggs, mix well. The French use a special scraper for this, but you can use a mixer spatula. It is very comfortable and scrubs the sides perfectly;
- You need to stir for a long time and with great persistence. The dough should become stiff and very heavy;
- Now you need to lay it out on a work surface, which can be a board. But it must be large and comfortable. Do not dust with flour yet. Scrape the remaining dough mixture from the container and begin kneading. It is already very difficult to knead with a mixer paddle; it bends and can easily break. But it will be good for her to scrape the dough from the board and from her hands, because at first it will stick a lot;
- We continue in this sequence: first you need to knead, then lift, then stretch and fold. Then knead vigorously again. The consistency of the dough remains at the same level;
- About an hour passes and it becomes noticeable that changes for the better are taking place with the test mass, it takes on a beautiful appearance;
- We are waiting for the moment when the dough begins to stick from your hands and from the board. Scatter pieces of butter over its surface;
- We continue kneading again. It turns out a lot of oil that comes out between your fingers. But don't panic. We need to go to the bitter end until our dough is silky, smooth and very elastic. It should not stick to the work surface or hands;
- Sprinkle a little flour onto the board and into a bowl. Make a ball out of the dough mixture, put it in a plate and leave it for 2 hours to rise, covering it with a linen cloth. It is necessary that there is no draft in the room and the temperature is 25 degrees;
- When 2 hours have passed, you need to check the mass. If it has not increased much in size, you can leave it for another hour. If it has risen perfectly, remove it from the bowl with a scraper or spatula onto a board dusted with flour. The French advise wrapping the dough inward from the edges;
- Roll into a ball and place again on a floured plate. Cover with a cloth and place in a cool place for 12-14 hours, but not in the refrigerator. This point is very important. This is what makes this French recipe different;
- After this time, keep the dough for about an hour in a warm place - it should warm up;
- We form balls-pieces. From each blank we pull out a smaller ball and attach it back to the main one. The resulting figures are in the shape of “tadpoles”;
- We grease the molds with the packaging that remains from the butter. Then you need to put the brioche in them, cover with a towel and leave for a couple of hours to “rise”;
- Buns can be baked in one pan. At the same time, they must be placed in the mold not tightly to each other, because during baking and proofing they increase in size and can grow together;
- After proofing, you need to coat the brioche with glaze, made in advance an hour before the start of the baking process;
- Bake for approximately 20 minutes at 190 degrees until golden brown;
- Cool the finished products. If there are a lot of them and you won’t eat them right away, you can freeze the buns and gradually defrost them at room temperature before eating.
It is because of the long preparation that this dish is not eaten every day in France.
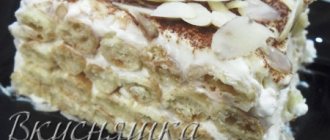
Brioche with chocolate and Patissiere cream
This option cooks much faster and contains a creamy chocolate filling. You will get a large pie from several rolls, which is perfect for a large company. You need to stock up on the following products:
- One yolk for greasing.
For the test:
- Sugar and butter – 60 g each;
- Flour – half a kilogram;
- Milk – 250 ml;
- One egg;
- Salt - half a small spoon;
- Fresh yeast – 21 g.
For the syrup guy:
- Powdered sugar – 50 g;
- Lemon juice – 3 large spoons.
For the cream and filling:
- Milk – a quarter liter;
- 2 yolks;
- Granulated sugar – 40 g;
- Potato starch and vanilla sugar - 20 g each.
- Dark bitter chocolate (with cocoa content of at least 70%) – 30 g.
The cooking instructions are as follows:
- Let's start with the test. Heat the milk a little and dissolve the yeast in it;
- In a separate bowl, combine pre-sifted flour, salt and sugar, mix everything well. Add milk with yeast, softened butter and cut into pieces, and egg to the same container. Form a dough mass, kneading for at least 20 minutes;
- Place the workpiece in a warm place for an hour until it doubles in volume;
- Now let's decide on the cream. Grind the yolks with starch, add a little milk so that the mixture becomes liquid;
- Pour both types of sugar into the remaining milk, then boil. Carefully pour the previously made egg mixture into the same bowl, while stirring everything with a whisk. Stir for about three more minutes until the consistency is thick. Cover the finished product with film and cool;
- When our dough arrives, sprinkle a little flour on the work surface, lay out the dough mass, also sprinkle a little flour and roll it into a layer measuring approximately 30x40 cm;
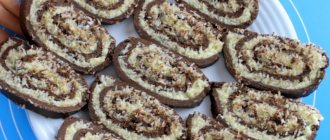
- Grease the dough layer with cooled cream, break the chocolate into small pieces and sprinkle on top, form a roll and cut it into equal portions;
- For baking, it is better to use a mold with a diameter of 26 cm. Cover it with baking paper and carefully move the pieces onto it, cut side up, and leave to rise for another half hour;
- Dilute the yolk with water and brush future buns with it;
- Bake at 170 degrees for 40 minutes;
- Cool the finished products and decorate with a syrup of sugar and lemon juice. Brioches with pâtissière cream are ready.
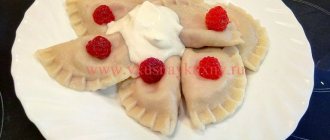
Chocolate in the filling can be replaced with raisins, nuts, candied fruits, cherries or dried pears. You can serve it with marmalade or a scoop of ice cream. We described in detail how to prepare patissiere cream according to several recipes in this article.
Making your own brioche buns takes time and patience. As a result, you will create amazing baked goods that cannot be compared with store-bought ones, and you will be able to please yourself and your loved ones.
: Recipe for brioche buns with pâtissière cream
Source: https://gotovite.ru/vypechka/bulochki-briosh-potryasayushhaya-vypechka-iz-francii.html