If you are lucky enough to be born in a season of abundance of vegetables and fruits, then it would be a sin not to take advantage of the wealth when preparing the festive table for a home celebration. Recipes from cherries are an inexhaustible source of inspiration for a healthy, colorful and juicy birthday menu that will be remembered by all guests! We have collected here not only summer dishes, but also those options that can be used in winter by replacing fresh ingredients with canned or frozen ones.
Cherries and sweet cherries appear at about the same time and are largely similar in culinary processing. However, cherries have a sour taste, so we often see them in combination with meat.
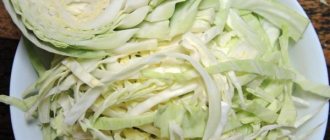
But cherries make the most colorful salads! For example, if you simply combine cherries of different colors and shredded cabbage or coarsely chopped leafy greens. Before serving, sprinkle the salad with sweet croutons or cookie crumbs. Everyone's attention is guaranteed to the salad!
Because for a birthday, a spectacular presentation is the easiest way to surprise guests. Moreover, when it is combined with the appearance on the table of juicy fruits, which we have missed so much over the winter.
In addition, cherries have long been loved for winter preservation. All year round, we offer our favorite multi-colored cherry compotes from childhood.
It is also worth noting that it is beneficial to choose cherries for a children's party - due to its sweet taste and wide possibilities for consumption by those children for whom cherries are too aggressive and sour.
At the same time, cherries are an excellent fruit for freezing! It retains taste, color and aroma well. And therefore, all recipes where cherries undergo culinary processing are easy to adapt for the winter season.
We also realize that a birthday cherry can appear in every serving! In drinks, as an accompaniment for stewed and baked meats, in fillings for baked goods, in curd desserts, jelly and ice cream.
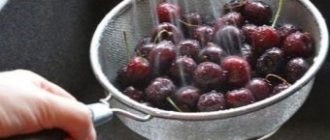
How to quickly pit cherries
To easily prepare homemade recipes from cherries, you need to find a convenient way to quickly peel the seeds from the berries. You can resort to using a hairpin. Or buy a special kitchen appliance.
Or get used to the high-speed method with a bottle. Check it out in this short video:
Let’s not reinvent the wheel and distribute simple, interesting recipes for cherries among the usual sections of the birthday menu - appetizers, salads, main courses and desserts.
Snack: cherry pies like at McDonald's
McDonald's signature cherry pies are a favorite treat for children. What are there – children! The world giant knows how to conquer adults too. So let's make pies ourselves - for your birthday! Once we have mastered the recipe, we will get an economical, tasty, healthy and familiar snack even for children for any season.
Ingredients
- Puff pastry without yeast - 500 g;
- Frozen cherries - 500 g;
- Sugar - 5-7 tbsp. spoons to taste, depends on the cherry;
- Starch - 1-3 tbsp. spoons to taste, depends on the thickness of the filling;
- Egg - 1 pc.
Preparation
- Defrost the cherries, or wash and peel fresh ones, cut into pieces and mix with sugar and starch.
- Cook the cherry mixture over low heat, stirring constantly, without letting it boil! If the cherries are fresh, add a little water.
- As soon as the mixture thickens, remove from heat and leave to cool.
- Roll out the puff pastry and cut into squares. Place on baking paper.
- Beat the egg with 1-2 tbsp. water and grease the edges of future puffs.
- Place the filling in the center of the squares.
- We fasten the edges and press with a fork so that the dough sets around the perimeter of the pie. Brush the top of each puff pastry with the egg mixture.
- Bake in an oven preheated to 210°C until the dough is golden brown - about 15 minutes.
A simple step-by-step recipe for cherry wine with pits at home
Speaking about the complexity of the technological process, I would like to note that traditionally, cherry wine is made without pits. This means that you need to remove the pit from each cherry. If three kilograms of cherries are taken as standard, then the removal process will be quite long. Of course, this makes the wine more intense. However, if you don’t want to deal with this “tedious” process, then you can also resort to recipes for wine made from cherries with pits.
True, I tried both options, and I want to note that I did not notice much of a difference in the final product. But, one way or another, here we will make wine from cherries without removing the seeds from them.
Ingredients for making wine (for three liters):
- cherry berries – 3 kg;
- water – 3 l;
- sugar – 1 kg.
Cherries, like any other wine product, do not need to be washed so that natural yeast remains on the berry. You just need to sort out the cherries, removing the bad berries.
One more addition. Cherry wine can be made without water, but only with juice, just like grapes. This recipe will be given in another section.
So, at the first stage, we take the sorted berries, pour them into a container and crush them with our hands.
The main thing in this process is not to damage the bones. Otherwise, the wine may be too bitter.
Not all berries may be crushed - this is not scary. At the second stage of preparing wine, pour out all the prepared water and add 400 g of sugar.
It is best to use water not from the tap. It can be purchased either in a store or in special water vending machines.
At the next stage, mix the whole mass and cover with gauze so that flies do not get into the future wine. You can cover with a towel instead of gauze. In this case, the small fruit fly, which appears en masse on vegetables and fruits, will certainly not get into the container with the wort.
Then we place the container in a dark, warm place and leave it for five days. After about six hours, the fermentation process will begin in the container. To prevent the wort from souring, it must be stirred periodically.
It is best to use a wooden spatula for mixing. When stirring, all the pulp from the berry pulp should be drowned. You can stir it a couple of times a day, but once will be enough.
After five days, we proceed to the next stage - removing the pulp and filtering the liquid. For this purpose, take a large saucepan and place a sieve on it. You can also cover the top of the sieve with gauze. Then transfer the cake in small portions into a sieve and squeeze it out.
The squeezed cake can be thrown away - it is no longer needed. After we have selected all the cake, we begin to filter the liquid. Pour the liquid through a sieve with gauze. However, you can do everything at once: take another bucket, cover it with gauze and use a ladle to transfer the mixture with liquid, squeezing out the cake.
Now you can begin the fermentation stage. Before this, pour the remaining sugar into a container with liquid and mix well. Then we pour the liquid into fermentation containers - three-liter jars or five-liter jars, if available.
You should pour the wort into the jar not up to the throat, but leaving about a quarter of free space for fermentation. All that remains is to install a water seal and place the jars in a warm and dark place for fermentation.
Now, regarding the water seal. You can buy it ready-made in the store.
Or you can install a traditional glove, which has been used by Soviet winemakers for centuries.
If you use a glove, then after it has inflated and risen. It needs to be pierced.
The fermentation process will last from 25 days to 50. Maybe a little more. It all depends on the temperature. But there is no need to count the days; the water seal itself will indicate the end of fermentation. If it runs out, the water seal no longer releases gas (bubbles stop releasing), and the glove deflates.
We begin the stage of removing sediment. To do this, take a tube, lower it into the wine, but not to the very bottom, so as not to touch the sediment, and, gradually, pour the wine into another container. After draining, you need to filter the wine a couple more times through cheesecloth.
Then we taste the wine and, if necessary, add sugar for sweetness. But it’s better to prevent it from fermenting further by adding half a glass of alcohol. This will seal the drink.
Now we prepare the bottles, pour the wine into them up to the neck and close with corks.
We put bottles of wine in a dark and cool place for aging for at least six months. After ten days, we check for sediment and, if it appears, then remove the wine from the sediment in the same way as described earlier. If sediment does not appear for more than a month, then the wine is ready and can be stored.
Appetizer: pancakes with curd and cherry filling
A great idea for a birthday buffet table - a variety of pancakes with fruit filling. Take a closer look at recipes for sweet fillings, including curd and cherry, in our article “What filling to cook pancakes with.”
And don’t miss the inspiration to use pancakes at a buffet table, because they are an ideal appetizer for a children’s party too!
Salad: cherry vinaigrette with nuts
In addition to a summer holiday, this versatile recipe will fit well into a winter birthday if you use frozen cherries. It can be given to children at any celebration, especially if you use sweeter compositions in the composition.
For the basic option we need
- Pitted cherries - 200 g;
- Carrots – 3 pcs.;
- Beets – 1 medium size;
- Walnuts – 80-100 g;
- Garlic – 1-2 cloves;
- Parsley – 1 small bunch;
- Sour cream or mayonnaise – 75-80 g;
- Salt and ground red pepper - to taste.
How to cook
- Wash carrots and beets, boil, peel and cut into small cubes
- Wash the parsley in running water and chop finely.
- Chop the nuts with a knife or in a blender until they form coarse crumbs.
- Peel the garlic and crush it in a garlic press.
- We remove the seeds from the cherries and cut them into pieces (each into 2-3 parts).
- Combine boiled vegetables and nuts in a bowl and mix. Then add garlic, cherries and dressing. Salt and pepper to taste, stir again.
Let stand in the refrigerator for at least 30 minutes. Before serving, sprinkle parsley on top.
Cook's Advice For a basic vinaigrette recipe, the sauce can be a mixture of light mustard and honey - in a 1:1 ratio.
How to vary the composition of cherry vinaigrette
- You can add diced dairy products - processed cheese, hard cheeses, lightly salted sheep cheese.
- Or add an egg and potatoes.
- You can remove the walnuts or replace them with another type.
- Another delicious option is to make your cherry vinaigrette more fruity by adding fresh banana or sweet nectarine in the summer, and dried apricots or prunes in the winter.
With any option, remember that the sourness is provided by cherries, so vary the amount or play with the acidity of the sauce.
Homemade cherry wine - a simple recipe using a glove
There is also a very simple recipe for making wines in general and cherry wines in particular. Many people use this option at home. Of course, it will take time to infuse the product, but there is no way around it. As you know, the longer the drink matures, the tastier it becomes.
And even if you prepare young wine, as in this option, it still needs aging.
We will need:
- cherry – 3 kg
- granulated sugar – 2.5 kg
- water – 6 liters
Preparation:
1. For ease of preparation, it is best to make the preparation in small batches. In this case, we will use 3 kg of fruit. If you have more fruit, then make a second batch.
Place the prepared raw materials in a large saucepan or bucket. Keep in mind that a decent amount of water and sugar will also be added to it.
2. First, add sugar to the fruit, but not all at once; at this stage, only one and a half kilograms is enough.
3. Immerse your hands in the ruby fruits and knead them thoroughly so that they release all the juice contained in their pulp. You can put on gloves first, or you can work without them, but your fingers and nails may turn a characteristic color.
4. After everything has been thoroughly washed, fill the contents with water. Pour in everything you have prepared at once. It should be at normal room temperature and not boiled.
5. Armed with a wooden spoon with a long handle, stir the contents. Cover the container with a lid or gauze and place in a warm, dark place. After 10-12 hours, the first signs of fermentation will begin to appear. A cap of foam will appear on the surface and a hissing sound will be heard. The mixture will take on a life of its own.
6. It should be left in this position for 3-4 days, but do not forget about it. At least three times a day, or even more often, the container should be opened and the contents thoroughly mixed, which is called pulp among professionals.
This is done to prevent the mixture from souring and to prevent mold from appearing on top.
7. After infusion and the first stage of fermentation, pour the juice into a clean container. To do this, you can use a colander or sieve.
The remaining pulp should be thoroughly squeezed through several layers of gauze. We don’t use the leftovers together with the seeds, or in other words, the cake, so you can simply throw it away.
8. Pour the resulting juice into a sterile bottle or jars. Add another kilogram of sugar to it. Make sure that the containers are filled no more than 70-75%. You need to leave room for fermentation.
It is very convenient to have large bottles for such purposes.
9. Prepare a medical glove and make a hole in the place for the fingers with a needle. The carbon dioxide accumulated from the fermentation process will escape through it. If you forget to make these holes, the glove will most likely inflate and burst. Put a glove on the bottle and place it in a dark place.
Now the second stage of fermentation will begin, which can last from 12 to 20 days. The time will depend on the conditions under which the container is located. The end of this stage can be determined by the glove. First, it will inflate and all the “fingers” will rise up.
It happens that at this stage it is taped to the jar so that it does not get torn off. But this is if necessary. For the most part, she holds up well on her own.
At this time there will be a lot of foam inside the container, which can rise to the very neck.
When the fermentation process is over, it will fall off. It will simply hang lifelessly on a container of fermented juice.
10. As in all previous recipes, now it should be strained from the sediment. And for this we will again use either a long tube or a special hose. Do not lower it to the very bottom, otherwise the sediment will be the first to fall into a clean container.
11. The third stage, called “quiet fermentation,” begins. But before starting it, check the resulting fermented juice for taste. Now is the time to adjust it. You can add a little more sugar, or you don’t have to. Everything will depend on the type of cherries and how sweet you would like the finished product to be.
12. We put the glove on the neck of the bottle again and place the container in a cool, dark place. When the glove falls off again, remove it. If there is sediment, drain it again, then pour it into a clean container and cover with a lid.
Let it brew for two to three months and you will get a magnificent, tasty and aromatic product that is pleasant to serve to guests and enjoy its taste with them.
Our alchemical project is complete. And you yourself were a magician, and you created divine delicious nectar with your own hands! It's nice to know this!
By this principle, by the way, you can prepare this magical nectar from other fruits. So take note of it.
Salad: cherry with onions for adults
An interesting salad for fatty meat dishes. It's perfectly easy to do! And by replacing cherries with sweet cherries, and white onions with sweet (Crimean) onions, we get a universal recipe for any season.
Ingredients
- Fresh cherries-300 gr;
- White onion – 1 medium size piece.
Preparation
- Wash the cherries, dry them, pit them and lightly chop them in a blender. Can be cut into halves.
- Peel the onion and finely chop it. Or we use a burner grater, where 2 cuts are suitable - the smallest or thin strips.
Salt, pepper and season the salad to taste, choosing a sauce of sour cream with honey or spicy vegetable oil with lemon juice.
Main course: chicken baked with cherries
For approximately 5 servings we will need
- Chicken - 1 pc.;
- Vegetable oil - 1 tbsp. l.;
- Salt - 3 pinches;
- Spices - 2 pinches;
- Cherry - 300 gr.;
- Sugar – 1-3 tbsp. l. taste.
Prepare the chicken for baking according to the usual procedure:
- wash, gut, salt, coat with your favorite spices and vegetable oil.
Prepare cherry sauce:
- if necessary, remove the seeds from the wine. Combine sugar and 100 grams of cherries and grind in a blender.
Note that you can use frozen cherries, and choosing chicken in winter always saves money on the birthday main course.
- Pour sweet sauce over the chicken.
- Stuff the chicken with the remaining cherries, but leave a few berries for decoration.
- Bake the chicken in a preheated oven at 200 degrees.
- To get an appetizing crust, use the grill for 15 minutes before finishing baking.
- If there is no grill in the oven, brush the chicken with a small amount of honey or sour cream. Avoid mayonnaise! It can give the meat an unpleasant vinegary smell.
How to tell when baked chicken is done
- At a temperature of about 200 degrees, about 40 minutes of baking are required for each kilogram of carcass weight.
- We check the readiness of the chicken by inserting a match or toothpick in the breast area. If the juice that appears is clear and colorless, then the chicken is ready.
- And remember! You should not overcook the chicken in the oven so that the meat does not become dry and acquire the smell of melted fat.
Main course: pork stewed with cherries
This is a more adult recipe, but it can be used at a schoolchild’s birthday party, because the alcohol included in the ingredients has time to evaporate during stewing.
Ingredients
- Pork - 400 gr;
- White or Crimean onions – 2 pcs.;
- Ginger (root) – 2 cm;
- Fresh cherries – 150-200 g;
- Hot red pepper – ½ medium pod;
- Wine vinegar (red) – 50 ml;
- Dry wine (red) – 50 ml;
- Honey – 1-2 tbsp.
Preparation
- We wash and clean the vegetables. Attention! Remove all seeds from peppers! Finely chop the onion, and cut the ginger and red pepper into thin strips.
- Cut the pork into large cubes.
- We put the saucepan with vegetable oil on the fire and immediately add the onion to fry until golden brown, after which we take it out into a separate bowl.
- Place pork pieces into the same oil and fry on all sides.
- Add onion, ginger, red pepper to the meat, salt and mix.
- Add honey, vinegar, wine and boil by half.
- Add a glass of water and cook over low heat until the pork is soft - about 25 minutes.
- Place the cherries in the saucepan and simmer for another 10 minutes, stirring occasionally.
Serve the meat with plenty of cherry sauce and garnish with a couple of whole cherries and a sprig of herbs.
For stewed pork, you can use frozen and dried cherries, so the recipe will decorate the holiday table and for a winter birthday
Homemade felt cherry wine recipe with pits
Felt cherry is different from ordinary cherry, so it will not be difficult to recognize it.
Its fruits are small, juicy and less sour than ordinary cherries. It is recommended to use sour berries to make wine. So the question may arise, is it possible to use felt cherry?
For making wine, felt cherries are just as suitable as regular ones. Since the pits are much more difficult to remove than ordinary cherries, berries with pits are used for wine.
To prepare felt cherry wine you need to take:
- Felt cherry berries – 3 kg
- Water – 3 l
- Sugar – 1 kg
Initially, all the collected cherries must be sorted, removing all the bad berries. Then we put it in a container and knead it with our hands. After this, add 200 grams of sugar and add water.
Mix, cover the container with gauze or a rag, and place in a dark and warm place for five days. During the entire period of primary fermentation, open the container and stir the mass. It is necessary that the pulp be recessed and not accumulate with a cap at the top.
After five days, remove the pulp by squeezing it out, and filter the liquid through cheesecloth. Then add another 400 g of sugar and stir it well. Now we take out the prepared bottle or jar and pour the liquid into it for subsequent fermentation. You can also add a handful of cherry pits.
We do not pour the liquid into the jar to the very top, but leave a little space, about one quarter.
We close the jar, install a water seal, and put it in a dark and warm place to ferment.
After five days, open the jar and pour out some liquid using a straw. Add the remaining sugar to the poured liquid, mix well and pour into a jar. We put the water seal back on and leave it like that until the end of fermentation.
The end of fermentation will be indicated by the water seal - the release of bubbles will stop or the glove will deflate if you used it as a water seal.
Now the wine must be drained from the sediment. Take a tube and carefully, without touching the sediment, pour the wine into another container. You can filter again through cheesecloth. We pour the wine into bottles, close it and put it in a cool room to mature. The bottles stay there for about six months. During the first couple of months, when sediment appears, we remove it by draining the wine through a straw. When sediment stops forming, the wine is ready. Pour into bottles, close and store.
Dessert: “Tricky” cherry pie
The highlight of the pie is in its shape! This cherry recipe is simple, but it will require a photo so that you quickly grasp all the tricks of its preparation.
Dough ingredients
- Butter – 200 gr;
- Flour – 3 cups;
- Kefir – 1 glass;
- Baking powder – 1 tsp;
- Salt – 1 pinch;
- Vanilla or vanilla sugar - to taste, from 1 pinch.
Filling ingredients
- Pitted cherries – 500 g;
- Sugar – 100 gr.
How to cook
- Sift the flour, add salt, baking powder and mix.
- Add oil and grind with flour. Pour in kefir and knead the dough. If necessary, add flour little by little.
- Roll out the dough into a thin layer of about 3 mm and cut into strips about 8 cm wide and about 25 cm long.
- Place pitted cherries in the middle of each strip and sprinkle with sugar, as shown in the photo.
- Form closed sausages.
- Place the sausages in a spiral in a greased springform baking pan. Bake until browned at 200 degrees for about 40 minutes. For an appetizing crust, 10 minutes before the end, you can brush it with an egg mixture with water (1:1 ratio).
Serve the pie on a platter after sprinkling with powdered sugar, sifted through a sieve.
Homemade cherry wine with pits - a simple recipe with vodka
A drink made from cherries with vodka is not called wine, but rather a tincture or liqueur. Tinctures are prepared within a month or a little less, and liqueurs from a month to two.
In addition, the liqueur is prepared without a fermentation process. This is due to the fact that vodka or alcohol is used as a base.
Cherry liqueurs are called cherries. There are many recipes for such drinks. Before giving the recipe for one of the easy-to-prepare cherries, I would like to recall the classic recipe. This recipe is based not only on the use of cherries, but also honey.
True, no alcohol is used here.
- Cherry – 6 kg
- Honey – 2 kg
Probably now hardly anyone uses two kilograms of honey to make liqueur, although...
The classic recipe uses a wooden, preferably oak, barrel. But you can also take glass containers. Selected cherries are poured into it. Leave 20 centimeters to the edge of the container. Then honey is poured. After this, the container is closed with a lid and left to infuse for three months. After three months, the liqueur is filtered, bottled, tightly closed and stored.
But, as I said, probably hardly anyone will prepare such a product. Therefore, we will use its analogue without honey.
Ingredients:
- Cherry – 1 kg.
- Sugar – 300 g.
- Vodka (alcohol) – 1.5 l.
The cherries are initially sorted and bad berries are removed. The seeds are not removed. But it is even recommended to wash it. Since we will not have fermentation, a shower will not harm the berries, but even vice versa.
Then we take a three-liter jar and put the prepared berries in it. They should take up no more than half the space in the jar. Then pour in vodka or alcohol. Close the lid and put it in a dark and cool place. We keep it this way for two months. The jar needs to be shaken periodically.
At the end of the aging period, strain the drink. Place the berries in a separate container. Divide the sugar in half. We pour half into a container with liquid, and the other half into a container with berries. We close both jars with lids and leave to infuse for two weeks. Both jars must be shaken well throughout the infusion period.
At the end of two weeks, we take out both cans and open them. We strain the berries and now throw them away, but pour the resulting liquid into a second jar. Now the liqueur is ready, it can be bottled and stored.
Sauce: fruit mustard
Even if you decide not to take risks with completely new recipes, or limit yourself to a birthday buffet table, you can find interesting ways to use cherries in your holiday menu.
One of them is fruit mustard according to an Italian recipe, the preparation of which is described in the article “Fruit mustard.”
Drinks: cherry and strawberry compote
A light vitamin drink suitable for a children's party, provided that guests are not allergic to strawberries.
Let us remind you of an important rule: always remember what you cook from for your children’s birthday at home in order to easily answer questions from children with allergies and their parents.
We will need
- Cherry – 300 gr;
- Strawberries (or raspberries) – 200 g;
- Black (or red) currants – 100 g;
- Sugar – from 200 g to taste;
- Water – 4 l.
Preparation
Add berries and sugar to boiling water. Let it boil and boil the compote for no more than 5 minutes. Serve the compote chilled.
Frozen cherry wine
Unfortunately, it is not always possible to get large quantities of fresh berries. For such cases, there is a way out - homemade wine can be made from frozen cherries, subject to minor amendments to the classic recipe. It is necessary to add wine yeast or a handful of unwashed dark raisins to enhance the fermentation process. Let's look at the recipe for this option.
Ingredients:
- Frozen cherries – 5 liters
- Water – 5 liters
- Sugar – 1.5 kg (depending on preferences, you can increase or decrease the amount by 0.5 kg)
- Dark raisins – 1 handful
Preparation:
Having previously defrosted the berries and removed the seeds, you need to grind them into puree; it is most convenient to do this using a blender. Raisins are added to the mixture, and the mixture is left in this state for two days. After this, you need to add warm boiled water, strain the mass, squeeze and add sugar to the resulting liquid. The wine is left to ferment, always wearing a water seal or glove.
After fermentation is complete, the wine is carefully poured into sterile bottles - the drink is ready. Among the many varieties of methods and methods for preparing homemade wine, the same principle and composition of ingredients are observed
Depending on what kind of wine you want - dry, sweet or table, the amount of sugar and water changes, and alcohol is added depending on the required strength of the drink. However, the best way to develop the formula for your own homemade wine, which will become your calling card, is, of course, experimentation. Don’t be afraid to change the ratio of products (within reasonable limits) and you will definitely find your unique taste
Among the many varieties of methods and methods for preparing homemade wine, the same principle and composition of ingredients are observed. Depending on what kind of wine you want - dry, sweet or table, the amount of sugar and water changes, and alcohol is added depending on the required strength of the drink. However, the best way to develop the formula for your own homemade wine, which will become your calling card, is, of course, experimentation. Don’t be afraid to change the ratio of products (within reasonable limits) and you will definitely find your unique taste.
For a novice moonshiner
- How to prepare mash for moonshine?
- Homemade moonshine made from sugar
- Clarifying mash


![Cherry jam with pits for the winter - recipe with photos [8 recipes]](https://edelight.ru/wp-content/uploads/varene-iz-vishni-s-kostochkami-na-zimu-recept-s-foto-330x140.jpg)