Features of cooking in an autoclave
When preparing canned food, it is necessary to take into account the nuances of working with an autoclave. Cooking takes place under pressure and at high temperatures, so precautions must be taken. Before turning on the fire, you should first increase the pressure in the autoclave and make sure that the device is sealed. During its operation, it is strictly forbidden to open or tilt the device, and it is better to open it when the temperature inside reaches 30℃.
Canned food is most often cooked at 100–120℃, and the cooking time depends on the size of the pieces and the condition to which the fish is planned to be brought. You need to leave 2 cm of space near the neck of the jar so that the lid does not explode due to temperature. Jars with blanks must be filled completely for sterilization, or preferably 2 cm above the lids. It is better to remove the bones from large fish, and cook small fish whole, including the head.
Recipes with different fillings
Canned fish in an autoclave tastes best when using fillings. The best sauce options are described below.
In oil
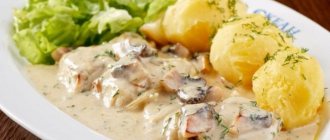
If you preserve fish in oil with a small amount of spices, you will get an amazingly tasty and healthy delicacy. Using oil, you can prepare any fish: mackerel, saury, silver carp or pink salmon. Cooking takes place in half-liter jars with metal lids. Necessary components: 5 kg of fish, 4–5 onions, 5 carrots, ½ cup clarified butter, 3 tbsp. l. salt, a handful of peppercorns, 10 bay leaves.
Step-by-step cooking process: Wash and gut the fish. If the carcasses are large, cut them into pieces and salt for 3 hours in a cool place. Peel the onions and carrots. Chop the onion into half rings and cut the carrots into thin rings. Place peppercorns and vegetables with fish in layers at the bottom of washed jars. And also add 1 laurel leaf to each container.
Pour hot oil and seal with a key. Cook in an autoclave at a temperature of 110℃ for up to 1.5 hours. With prolonged heat treatment, the pulp is boiled, and small bones are practically not felt when eating. After the autoclave has cooled, remove the workpieces and store them in the pantry.
Only refined oil should be used so that its taste does not overpower the delicate flavor of the fish.
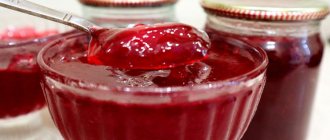
In tomato
Tough pieces of fish in a pleasant sweet and sour sauce are one of the best options for winter preparations. The legendary “bulls in tomato” can be easily prepared at home. Ingredients for 4 half-liter jars: 2.5 kg of fresh bullheads or pink salmon, 2 tbsp. l. fine salt, 100 g breading flour, 5 onions, ½ cup clarified butter, 2 tbsp. l. sugar, 5 tbsp. l. tomato paste, 1 tbsp. l. vinegar, 800 ml of purified water.
Step-by-step cooking method: Cut the cleaned and gutted carcasses without heads into pieces 3 cm thick. Cover the slices with salt and leave for 3 hours. Drain off the juice and dip each slice in flour. Fry for 2 minutes in oil. Place the chopped vegetables in oil and fry, adding tomato paste and sugar to the pan and stirring.
Boil water in a saucepan. Boil the tomato paste again, add vinegar and spices to taste. Pour 3 tbsp onto the bottom. l. tomato sauce, fish and remaining sauce. Seal the jars and fill with water in an autoclave. Cook the dish for an hour at 110 ℃. Cool the preservation and store the preparations in the cellar.
In its own juice
The healthiest way to store fish for the winter is in its own juice. The method allows you to preserve the maximum amount of useful substances from raw materials. To improve the taste of preserved food, you can combine dietary and fatty fish varieties. Required for 6 cans of 0.5 l: 3–3.5 kg of fish, 3 onions, 12 pcs. black peppercorns, 6 tbsp. l. clarified butter, 6 bay leaves.
Preparing canned fish in an autoclave: Clean the carcasses from giblets, cut off the heads. Divide the pulp into pieces so that they fit easily into the jar. Chop the onion into rings. Place spices in washed jars: 1 bay leaf and 2 peppercorns in each jar. Place onion rings and fish pieces on top of the seasonings. You need to place the pieces as tightly as possible so that there is a minimum of free space in the jar.
Leave 2 cm of empty space at the neck. Pour 1 tbsp into each container on top. l. oils Roll up the jars and place in the autoclave. Soak for 45 minutes at 115 degrees. Wait for it to cool and store the preserved food.
On broth
A strong broth provides the fish with a rich taste and pleasant aroma. During storage, the broth becomes thicker and turns into a tasty jellied meat. Necessary components: 3 kg of silver carp, a bunch of greens (dill with parsley and celery), 3 tbsp. l. tomato paste, fine salt and pepper - a pinch per jar, 1 bay leaf per jar.
Preparation process: Clean and gut the silver carp. Boil a strong broth from the tail, fins, head and bones. Add herbs with spices and tomato paste to it, strain. Cut the fish into pieces and fry.
Fill the washed jars 2/3 full with broth and add pieces of fish into it. Add broth so that 2 cm remains to the top and roll up. Place in an autoclave for half an hour at 110℃. Store in the cold and use to prepare delicious soups and hodgepodges.
It is necessary to remove large and thick bones from the pulp, since there is a possibility that they will not have time to soften during the sterilization process.
Delicious recipes with beans for the winter
At home, in simple conditions, it is not difficult to prepare healthy, tasty pickles. Each housewife independently chooses the recipes that are most preferred in her family. Let's look at the best and widely used ones.
This is the most famous option for salting beans. It has been tested over the years and is loved by many housewives. Use a red or white product. Depends on taste preferences. Canning legumes is easy.
List of ingredients:
- beans – 1 kilo;
- salt – 120 grams;
- granulated sugar – 5 tablespoons;
- water – 3.5 liters;
- vinegar - 2 tbsp. l.
Recipe:
- Freshly picked vegetables need to be soaked for an hour and a half.
- Red beans are filled with water and left for twelve hours.
- In the morning, pour out the remaining liquid and pour in fresh liquid in a volume of 3.5 liters.
- Add salt, sugar and your favorite seasonings.
- Send over a small fire and keep until the beans are soft.
- Once cooked, add vinegar and cook a little more.
- Transfer the workpiece into sterilized jars.
- Roll up the lids, turn them over, and wrap them in a warm cloth.
This preparation is used in different ways - you can prepare a salad, add it to soup, serve as a side dish for meat, fish, chicken. Even in its pure form it will be delicious. Any dishes, combined with canned beans, turn out excellent and satisfying.
This option of pickling will give you the opportunity to experiment in winter and combine beans with a variety of products. Preservation will be tasty and versatile.
What you will need:
- beans – 2 kilos;
- onion – 400 grams;
- bell pepper – 400 grams;
- carrots – 400 grams;
- different spices, sugar, salt - to taste;
- vegetable oil;
- seasonings - optional.
How to cook:
- Boil the beans, but not fully cooked.
- Cut the peeled vegetables into thin strips and fry in a saucepan in oil.
- Add beans, salt, sugar and seasonings.
- Simmer until the beans are soft.
- Without waiting for it to cool, pour into sterilized containers, roll up the lids and insulate.
According to this option, the pickles turn out to be natural, just like in a regular store.
List:
- beans - one kilogram;
- water - five liters;
- to taste - salt
Sequencing:
- The beans will need to be sorted and all suspicious ones removed.
- Place in water and leave for 12 hours. During this time, the liquid is drained several times and refilled with fresh liquid.
- Then the beans are washed under running water and placed in a container.
- Place on fire and boil for about an hour.
- Do not salt it right away, as the product will remain solid.
- After boiling, add salt and cook until soft.
- Without waiting for it to cool, the mixture is poured into jars, covered with lids and set to sterilize.
- After completion, the containers are twisted, turned over and insulated.
The preparation will not take much time. The dish will amaze even the most picky gourmet. Excellent pickle, you can lick your fingers, how delicious it is.
Grocery list:
- beans - one kilogram;
- bell pepper – 1 kilo;
- onion – 600 grams;
- carrots – 500 grams;
- tomatoes – 2.5 kg;
- garlic - two heads;
- oil – 150 milliliters;
- salt – 2 tbsp. l.;
- sugar - three teaspoons;
- vinegar - 1 large spoon.
- Soak the product and wait until it swells.
- After 7 hours, put on low heat.
- Cook until half cooked, drain the first broth, then add a little salt.
- Wash and peel the vegetables. Grind at your own discretion.
- Mix all ingredients, except tomatoes and beans, and simmer for 20 minutes.
- While there is time, the tomatoes need to be passed through a meat grinder.
- Then place with vegetables and simmer for 10-15 minutes.
- At the very end, pour out the beans and the liquid in which they were boiled.
- Add granulated sugar and finely chopped garlic.
- The mass should boil a little. At this time, it needs to be stirred regularly so that it does not stick to the bottom.
- Pour in acetic acid and simmer over low heat for about five minutes.
We invite you to familiarize yourself with Funchoza rice noodles for weight loss: how to cook and eat correctly
The pickle is ready. Pour the hot mixture into prepared jars, roll up the lids, and wrap in a warm cloth.
The rich variety of recipes amazes every person. Any of us will find a way to close the beans.
What you will need:
- beans – 1 kg;
- tomatoes – 3 kilograms;
- sugar – 2 tbsp. l.;
- salt – 1 tbsp. l;
- seasonings
- Soak the fruits in cold water for ten hours.
- Then put on low heat and boil until soft.
- The tomato must be peeled. To do this, they are doused with boiling water or immersed in it for half a minute. Then the skin can be easily removed.
- The tomatoes are twisted through a meat grinder until pureed.
- Then add salt, sugar and seasonings.
- Place on the stove over low heat. Cook for 30 minutes, stirring the mixture regularly.
- The mixture should not be allowed to burn to the bottom; this will affect the taste of the finished dish.
- After half an hour, add the beans and simmer for 15 minutes.
- The workpiece is distributed into jars and covered with lids.
Those who love vitamin mixtures will be satisfied. The preparation will turn out excellent.
What you will need:
- 1 kilogram of beans:
- 1 kilogram o;
- dill – 1 bunch;
- parsley – 1 bunch;
- coarse salt – 100 grams;
- hot pepper in pods - to taste.
- The beans are placed in cool water for 6 hours.
- Transfer to a bowl and boil until the main ingredient is ready.
- Tomatoes are scrolled through a meat grinder and crushed in a blender.
- Add a little salt and finely chopped pepper.
- The greens are chopped.
- Place tomatoes on the stove and bring to a boil.
- Add parsley and dill and cook for 10 minutes.
- The marinade is ready.
- The beans are transferred into sterilized jars, but not completely. There should be 2 centimeters left to the neck.
- Pour boiling filling to the top.
- Banks are sterilized. The process time depends on the volume of containers.
- They roll up the caps and send them to the cellar.
There are many options for how to cook beans. In addition to canning and cooking, baked beans are also popular. It is easy to prepare and can be stored for a long time.
What you will need:
- beans – 500 grams;
- tomatoes – 200 grams;
- vinegar – 1 tablespoon;
- onion – 1 piece;
- salt.
Step by step recipe:
- Cook the beans until soft.
- The peeled onion is chopped into half rings.
- Place in a frying pan heated with vegetable oil and fry until golden brown.
- Tomatoes are crushed in any available way to a puree state.
- Add the puree to the onion and simmer for 5 minutes.
- All components are combined in a separate large baking dish.
- Turn on the oven at 180 degrees. Place the container for a quarter of an hour.
- 4 minutes before the end, add vinegar.
- Keep in the oven for the remaining time.
- Distribute into jars, close with lids, and cover with a blanket.
The recipe uses hot pepper. The hostess herself determines its quantity, since everything here is individual. Focus on personal preferences.
What you will need:
- beans – 1.5 kilograms;
- bell pepper – 1 kilogram;
- onions – 8 heads;
- hot pepper – 2-3 pieces;
- vegetable oil – 50 grams;
- garlic – 2 heads;
- sugar – 200 grams;
- salt – 50 grams;
- table vinegar - 100 milliliters.
We invite you to familiarize yourself with Installing an expansion tank for heating a private house
How to cook:
- The beans are cooked until soft.
- Cut the onion into cubes, leave 2 pieces raw, and fry the rest until golden.
- Pepper is finely chopped.
- Bell peppers are cut into arbitrary pieces.
- The peppers are mixed and fried in a frying pan in oil.
- Peel the garlic and grate it on a fine grater.
- Tomatoes are passed through a meat grinder and poured into a container.
- Then move the onions and peppers.
- Place on the stove, wait until it boils and simmer for ten minutes.
- At the end add garlic and beans.
- Then salt it and add granulated sugar.
- Wait for the mixture to boil and pour in the acid.
- Boil for 5 minutes, then turn off the gas.
- When hot, pour into prepared containers, close with lids and insulate.
The sunsets turn out magical and spicy.
There are a lot of options for how to pickle beans. Each person chooses the most delicious and easiest recipe for himself. You need to stick to the recipe, and in winter the pickles will delight all household members.
What you will need:
- beans – 2 kilograms;
- vinegar essence – 1 small spoon;
- salt – 2 tablespoons;
- granulated sugar – 50 grams;
- The main ingredient must be sorted out and filled with cool water for several hours.
- Turn on a small fire and send the pan with the beans. When it boils, add salt and sand.
- Periodically check the readiness of the ingredient.
- When the beans are ready, add vinegar and bring to a boil.
- The mixture is transferred into ready-made containers and sealed with turnkey lids.
- To help it reach the end better, the jars are wrapped in warmth - a blanket, a sweater.
Canning different types of fish in an autoclave
Canned food recipes vary depending on the type and size of fish used. It is necessary to strictly observe the temperature regime so that the slices do not fall apart, but do not remain raw.
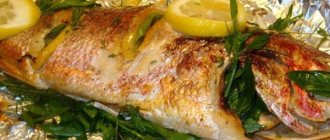
Pink salmon in tomato sauce
The dish is considered budget-friendly and can be eaten separately with bread or added to pasta or porridge. Required set of products for 6 cans: 5 kg of pink salmon, 4–5 onions, ½ cup of tomato paste, ½ cup of granulated sugar, 2 tbsp. l.9% vinegar solution, 1.7 l purified water, 3–4 tbsp. l. flour.
Canning fish in tomato:
- Wash the pink salmon, gut it and remove the head.
- Place the fish in a bowl, sprinkle with salt and leave for a couple of hours.
- Bread in flour and fry until golden.
- Separately, fry the onion until transparent, add tomato paste and sugar into the pan.
- Place the roast in a pan of boiling water and pour in the vinegar.
- Boil the sauce and remove from the stove.
- Pour 3-4 tbsp onto the bottom of washed jars. l. tomato dressing, place the pink salmon tightly and distribute the remaining sauce, leaving 2 cm of empty space at the neck.
- Roll up the jars and place in the autoclave.
- Heat to 110℃ and hold for an hour.
- Remove the jars only after they have cooled.
- Pink salmon slices turn out whole, tasty and aromatic, and the sauce becomes thicker and is also used for side dishes and sandwiches.
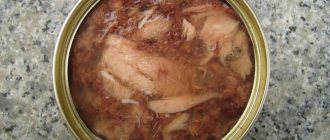
Canned fish in an autoclave
Cooking canned food and fish dishes in an autoclave takes little time. The taste of such preservation is natural; almost all useful substances are preserved in the fish. Canned fish in an autoclave can be made from almost any type of fish with all sorts of additional ingredients. The best recipes and method for preparing fish are described in this article.
Homemade canned fish
Working with an autoclave requires attention. To make canned food tasty, you need to follow certain rules.
- The autoclave operates at high temperatures and under significant pressure, so while cooking stew, you must not move it, drop it, remove the lid, or even just touch it. First, it must complete cooking, then the gas is turned off, and after the tank has completely cooled down, you can open it.
- Large fish, as a rule, have large bones removed, while small fish, such as sprat, are cooked in an autoclave whole and even with the head.
- The dish in the seaming container is laid out so that there is about 2 cm left to the neck, otherwise the lid will be torn off.
- Water is poured into the machine so that the lids of the jars are covered by 1-2 cm.
- Before putting the autoclave on fire, you need to check the tightness, whether the lid is closed, and whether everything is done correctly.
- Canned fish in an autoclave is made at a temperature of 100-120 degrees. During cooking, it must be constantly checked, otherwise the final result may be disappointing.
Preparing the main ingredient - beans
This stage is given a special place, since the correct preparation of the beans and its subsequent taste depend on it. Main rules:
- the beans need to be sorted. You need to cover fruits of the same variety, since everyone has their own cooking time;
- The fruits are placed in a container with water in the evening, adding salt to it - this way it will cook faster the next day;
- for preservation, the product is completely boiled until soft; undercooked beans can cause poisoning;
- It is better not to use fruits of a suspicious type.
We invite you to familiarize yourself with Growing carrots as a business - the best varieties, agricultural technology and crop protection
There is nothing complicated in preparing the product. Only over the years do certain details appear that fall within the requirements of family members.
Recipe for canned food in oil at home
Recipe for canned food in oil at home
Fish in oil is the easiest way to make canned fish in an autoclave. You can use any fish for this dish at home. Small ones like sprat are also suitable, but it’s best to take crucian carp, rudd, catfish, silver carp or something similar.
Ingredients:
- Fish – 5 kg;
- Onion – 500 g;
- Carrots – 500 g;
- Vegetable oil – 150 g;
- Salt – 55 g;
- Black peppercorns;
- Laurel – 10 leaves.
Preparation:
- The fish is first cleaned, the head is cut off, and the giblets are removed. If the fish is large, it needs to be cut into manageable pieces (to fit in a jar) and salted for 2-3 hours.
- Peel carrots and onions. The carrots are cut into rings or grated, and the onion is chopped into half rings.
- The jars for twisting are washed together with the lids. Peppers, vegetables and fish are placed in layers at the bottom. You also need to put 1 bay leaf in each half-liter jar. Oil is poured on top of the preservation and sealed.
- That's it, the jars are ready, they are placed in an autoclave and cooked at a temperature of 110 degrees for 1-1.5 hours. When cooked for a long time, the fish becomes soft and small bones become less noticeable.
After cooking, when the autoclave has cooled, these homemade canned fish are taken out, dried and hidden in the pantry.
Recipe for canned fish in oil
Homemade canned fish can be stored for quite a long time. In a dry and dark room they can last a whole year. It is not recommended to store this product in jars for longer, as botulism, which is dangerous to humans, can develop in them.
Preserving bream at home is very simple. The whole difficulty lies in using the autoclave correctly; for this you need to follow the instructions exactly. Canned fish will delight you all year round with its taste and vitamins.
A simple recipe for canned fish in an autoclave
A simple recipe for canned fish in an autoclave
Fish in its own juice is a very tasty and healthy dish. Catfish, silver carp or similar large fish are best suited for this recipe. You can also combine two or more types, for example, fatty varieties of fish with dietary ones.
Ingredients:
- Fish – 3 kg;
- Onion – 1 pc.;
- Black pepper – 9 peas;
- Vegetable oil – 3 tbsp. l;
- Laurel – 3 leaves.
Preparation:
- The fish is cleaned, gutted, and the head is removed.
- Clean fish is cut into medium pieces (to fit in a jar).
- The onion is peeled and cut into rings.
- Spices, onions, and then pieces of fish are placed in washed jars. They are placed tightly so that there is very little free space in the jar. But there must be 2 cm of free space left to the edge of the jar!
- Oil is poured on top of the fish (no more than a tablespoon per half-liter jar) and then the containers are rolled up.
- The rolled containers are installed in the apparatus. Preservation is done for 35-40 minutes at 110-115 degrees. When the autoclave is turned off, you need to wait for it to cool down, remove the jars and store them.
This canned fish does not take long to cook in an autoclave. If the fish is large, you should remove the bones in advance, because they may not have time to cook and will later end up in canned food.
Recipe for canned fish in tomato juice
The shelf life of home-canned fish is 12 months. In this case, it is important that the temperature regime is within 0... 5°C, and the air humidity is not higher than 75%.
Did you know? Some types of canned fish are much healthier than fresh ones. For example, herring reveals its qualities most fully when sterilized with oil and vinegar.
Canned fish can become your signature dish, the recipe of which all housewives you know will want to know. Its advantages are excellent taste, low cost and ease of preparation.
Let's start with the traditional canning method. Canned fish in oil has a pure taste without unnecessary additives. It is perfect for making sandwiches.
We will make canned food in half-liter jars. You can also use liter containers, but this is no longer recommended.
To prepare 1 half-liter jar, we will need:
- fish – 350-400 g;
- black peppercorns – 3 pcs;
- oil – 2 tbsp. spoons;
- bay leaf – 1 piece;
- salt – 5-7 g;
- carrot;
- onion.
- The first step is to clean our fish and rinse it under tap water. Next, cut the fish into pieces of 50-70 grams and salt it.
- Wash the carrots and onions, peel and chop.
- Place the ingredients in a jar.
First, put a bay leaf on the bottom and pour in 3 peppercorns. Then we fill the jar tightly with fish pieces until about halfway, make a vegetable layer of carrots and onions and put the fish in again. The remaining space can be filled with vegetables, leaving an air gap of 2 cm. The result should be a kind of “sandwich” with several layers of fish and vegetables. We pour sunflower oil on top of all this.
The remaining banks are completed using the same system. After which they are placed in a special cassette, which are then placed in an autoclave.
- Fill the autoclave itself to the top with water, regardless of the number of cassettes with workpieces. Do not add 2-4 cm to the upper edge of the body. Close the lid and tighten the nuts tightly.
- Set the autoclave to heat up. We are waiting for the temperature to reach 110°C. Once this indicator is reached, wait 30-35 minutes. The canned food is ready. All you have to do is wait until the autoclave cools naturally to remove the finished fish delicacies from it.
Important! Maintain a temperature of 110°C throughout the entire sterilization process. As soon as it starts to rise, reduce the heating power. Otherwise, the canned food will simply cook, and the lids from the cans may fly off.
Canned fish in tomato juice will be slightly different in taste, but no less tasty and healthy. The recipe is very similar to that written above, but there are some nuances.
We invite you to familiarize yourself with Fried Sandwiches with Potatoes and Sausage
For 1 half-liter jar we will need:
- fish – 350-400 g;
- onion – 1 onion;
- carrots – 1 piece;
- bay leaf – 1 piece;
- black peppercorns – 3 pcs;
- salt - to taste;
- tomato paste - 2-3 tbsp. l.
- The fish must be cleaned, washed and cut into pieces. If you use gobies, capelin or small river fish, then you do not need to trim the fins and tail - it will all boil in the autoclave. We gut the carcasses, wash them, then lightly fry them in a frying pan. This way we can get rid of excess moisture. Then add some salt to the fish.
- Cut the onion into rings and grate the carrots. Fry the vegetables in a frying pan in a large amount of oil. After a couple of minutes, add tomato paste to them, simmer under the lid for about 10 minutes.
- The critical stage is the layout of the products. First, we wash the jars, dry them, and inspect them for integrity.
- We secure the blanks into special cassettes and place them in an autoclave. Fill the container with water, without adding 2-3 cm to the top edge. Turn on the heat and wait until the device shows a temperature of 110°C. After that, time it for 40 minutes. After the time has passed, the canned food will be ready. All you have to do is wait until the autoclave cools down to enjoy the fish delicacy you’ve prepared yourself.
Then put a bay leaf on the bottom and throw in a couple of peppercorns. On top of them we lay layers of fish and our tomato broth. Leave an air cushion of 2-3 cm at the top of the jar.
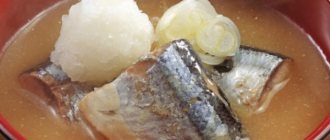
How to make gobies in tomatoes
How to make gobies in tomatoes
Homemade canned fish is a dish for all times, for example, gobies in tomato cooked in an autoclave are very popular. In terms of price, this dish is inexpensive, but at the same time it can be consumed separately or added to other dishes.
Ingredients:
- Steers – 5 kg;
- Onion – 500 g;
- Tomato paste – 150 g;
- Sugar – 150 g;
- Vinegar – 2 spoons;
- Water – 1.7 l.
Preparation:
- The bulls wash themselves. The giblets, head, and outer husk must be removed.
- The prepared bulls are placed in a large bowl, salted and left for 2 hours.
- Now you need to fry the fish in flour until cooked.
- Chopped onions are fried in another frying pan. When it becomes transparent, add tomato paste and sugar.
- The finished frying is transferred to a pan of boiling water, and vinegar is immediately added. The resulting mass needs to be mixed thoroughly, and as soon as it boils, turn it off and remove from the heat.
- It is not necessary to sterilize the jars in advance, but it is important to wash them thoroughly, as well as the lids. A little tomato dressing (about 2-4 spoons) is poured into the bottom of the jars, then the bulls are placed. When the fish is laid out, the remaining dressing is distributed. It is important to leave 2 cm free in each jar up to the neck.
- The prepared containers are rolled up and placed in an autoclave. The device is placed on the fire and first heated over medium heat so that the temperature on the thermometer reaches 110 degrees. After this, the fire is reduced and maintained at this level for 1 hour.
After the canned fish has been cooked in the autoclave for an hour, turn off the stove, wait until the autoclave has cooled down, and then take out the canned fish.
Recipe for pickled cucumbers in an autoclave
Today we will tell you how to prepare homemade preserves from cucumbers using it.
Ingredients
- cucumbers
- Salt
- Garlic
- Black peppercorns
- Dill
- Horseradish
- Black currant leaves
- Red pepper
- Vinegar
- Water
How to cook cucumbers in an autoclave
Selecting blanks
You need to choose fresh, medium-sized, hard cucumbers. We remove overgrown and diseased fruits; they are not suitable for pickling. An important point - it is advisable that the cucumbers were picked from the garden no later than 24 hours ago.
We thoroughly wash the selected cucumbers with water and soak them in a saucepan or any other container for 1 hour.
Making the marinade
The next stage is the marinade. Its quantity directly depends on the density of the blanks in the jar. But on average you need 300-400 grams per 1 liter jar.
Prepare the marinade as follows: take 100 g of salt and 50 g of sugar for 2 liters of water. Mix and heat. We are waiting for it to boil.
We complete banks
While the marinade is cooking, put the ingredients into jars. Take a horseradish stalk, cut it into pieces about 5-7 cm long, place a piece on the bottom of each jar. We also put an umbrella of dill there. Add to them a dark currant leaf and a bay leaf, 2 allspice peas and 3-4 black peppercorns. Add garlic (3-4 cloves). Then we lay the vegetables, adding some horseradish leaves during laying. Place a piece of hot pepper on top of the vegetables.
Important! We place the vegetables as tightly as possible, but do not compact them.
At the last stage, fill the workpieces with marinade, leaving an air gap of 2-3 centimeters to the lid. Add 2 tbsp to the jars. spoons of 9% vinegar. We roll up the jars with lids, having first measured the temperature in one of them. We'll tell you why this is needed below.
Canning cucumbers in an autoclave
Why did we need to measure the temperature in the jar? The fact is that if you expose vegetables to too much heat, they will boil in the jars and turn into mush. To prevent this from happening, you need to reduce the total heating time of the autoclave and the canning process itself.
The marinade that we poured into the jars is, of course, no longer boiling water, but still quite hot. In the autoclave, we pour water at the SAME temperature (or slightly lower) as the temperature of the marinade. This will help the autoclave reach operating temperature faster, thereby reducing the overall cooking time.
So, the jars are packed into cassettes, the cassettes are loaded into the autoclave, and the autoclave is filled with hot water. Close it with a lid and set it to heat. We wait until the device heats up to 90°C. Sterilize in this mode for 5 minutes, then turn off the heating. After the pressure inside the device drops to zero, open the lid, take out the workpieces and enjoy the result!
Cucumbers in an autoclave (video)
Recipe for canned fish in broth
Recipe for canned fish in broth
At home, a wide variety of fish dishes are prepared in an autoclave. This recipe uses a strong broth to pour over the fish. After such canned food sits in the jar for some time, the liquid thickens a little like jellied meat.
Ingredients:
- Silver carp – 3 kg;
- Dill, parsley and celery - 1 medium bunch;
- Tomato paste – 50 g;
- Salt - to taste;
- Black pepper - to taste;
- Laurel - 1 leaf in each jar;
- Water.
Preparation:
- The fish is cleaned and gutted. A strong broth is brewed from the head, fins, and tail. Herbs, tomato paste, and spices are added to it.
- The fish is cut into medium pieces and fried in breading.
- The washed jars are filled with 2-3 cm of freshly prepared broth. Then they put fish in them. All that remains is to put the laurel and add the broth so that there is still 2 cm left to the edge of the jar.
- This dish is prepared for half an hour in an autoclave at 110 degrees.
Canned fish in an autoclave with beans
Canned fish in an autoclave with beans
Canned fish with beans is an independent dish that is perfect for lunch and dinner.
Ingredients:
- Pike or gobies – 2 kg;
- Dry beans – 1 tbsp.;
- Onion – 2 pcs.;
- Tomato paste – 100 g;
- Vegetable oil – ½ tbsp.;
- Salt – 45 g.
Preparation:
- The night before cooking the canned food, pour cold water over the beans. In the morning, the beans are washed.
- The pike is gutted, the head, fins, and tail must be removed. The fillet is cut into medium pieces (preferably there are no bones in the meat), and then salted.
- The onion is peeled and cut into cubes, then it needs to be fried in a frying pan. When it becomes transparent, add the tomato and fry the mixture for another 3 minutes. That's it, the tomato dressing is ready.
- The jars are washed in advance. Add a little tomato dressing to the bottom. Then you need to lay the fish and beans in layers. When the jar is full, add tomato dressing, leaving an empty space of up to 2 cm from the edge of the neck.
- Homemade canned fish is rolled up and cooked in an autoclave for 1 hour at a temperature of 110 degrees.
Canned fish in an autoclave turns out no worse than those sold in the store. The fish retains its juice, taste, and remains very healthy and nutritious. These dishes are simple to prepare. The main thing is to find a suitable recipe that the family will like and follow the cooking rules.
Recipe for beans with vegetables in an autoclave
Beans in an autoclave at home with the addition of vegetables are prepared from the following ingredients (calculation for 1 half-liter jar):
- beans – 100 g;
- carrots – 100 g;
- onions – 100 g;
- bell pepper – 50 g;
- vegetable oil – 50 g;
- tomato juice – 350 g;
- sugar – 0.5 tsp;
- salt – 1 tsp;
- vinegar - 1 tbsp.
The beans need to be soaked for 4-6 hours (can be left overnight). Afterwards, the swollen beans should be thrown into a pan of boiling water. Peel the vegetables, grate the carrots on a fine grater. Finely chop the onions, tomatoes and peppers. Pour the cooked beans with tomato juice, then add vegetables, sugar and salt and put on low heat for about 20 minutes. The guideline is that the peppers and onions should become soft. At the end you need to add vinegar and mix the ingredients.
Like all pressure cooker bean recipes, this one ends with the standard procedure of emptying the ingredients into clean jars. Leaving about 2 cm of free space before the lid, the jars need to be rolled up and placed in an autoclave filled with water. Cooking time is about 20 minutes at a temperature of 110 degrees Celsius.
Do you want to conveniently and quickly cook beans in an autoclave at home? You will need a high-quality autoclave from our company. We produce them industrially, guaranteeing safety, ease of use and reliability. Proven materials are used for production - stainless steel and ferrous metal. An autoclave will turn preservation into a quick and comfortable procedure.
How to prepare canned fish in an autoclave at home?
Hello, dear guests of my blog! Recently, an autoclave appeared in my kitchen - a convenient device that makes my life much easier. We bought it to make homemade stew, which we have already prepared. But it turned out that the device is suitable for other purposes. One day I decided to cook canned fish in an autoclave. It turned out just fine, and now I almost never buy them in the store, but cook them myself.
Can be prepared from any type of fish - river or sea. But it’s better to take fresh, although frozen will do. Canned food can be made in tomato or oil, with vegetables and any seasonings. The question of how long to cook depends on the volume of the jars - on average from 20 to 40 minutes, the temperature is 110-115 degrees.
Canned fish is a wonderful dish, quick and versatile. You can eat it on its own - for example, serve it with a side dish of boiled rice or mashed potatoes. I also add them to a Napoleon snack cake or a regular jellied pie. It turns out very tasty! Try different options and delight your family with a delicious dish.
Homemade canned fish in its own juice from river fish in an autoclave
I love this recipe because it does not require unnecessary additives, and the product retains its natural taste. It is better to take jars of the same size and from the same manufacturer. This way you will be absolutely sure that everything will work out as it should.
Ingredients for the dish (for 1 0.5 l jar)
- 300-400 g fish;
- 1 tsp salt;
- 3-4 peas of allspice;
- half a bay leaf;
- 6-7 black peppercorns.
Cooking method
1. Clean the fish, remove the insides, cut off the heads, tails and fins.
2. Wash the prepared carcasses, allow excess moisture to drain and cut into portions. The size doesn't matter - the main thing is that they fit easily into the jars.
3. Place half of the spices in jars and add 1/2 tsp. salt. If you wish, you can use any other spices to taste.
4. Place the pieces of fish tightly into the jars, up to about halfway.
Alternate large and small pieces to fit more tightly.
5. Sprinkle the remaining salt (0.5 teaspoon) and the other half of pepper on top.
ARTICLES ON THE TOPIC:
6. Add the fish so that it does not reach the edges by 2-3 cm.
7. Place pieces of bay leaf on top. Don't add too much, otherwise it may taste bitter. Screw the lids on the jars. They should be twisted very tightly and tightly.
8. Place cotton napkins on the special stand of the autoclave for better grip. Place the jars in the device, pour water as indicated in the instructions. Close the lid and tighten the restriction nuts.
9. Turn on the stove and cook the canned food for half an hour. Wait until the temperature reaches the required values, and only then note the time.
10. Cans can be taken out only after they have cooled to 30-40 degrees.
The recipe can be used for any type of fish - bream, mackerel, pike perch, etc.
Canning in an autoclave
Stew and various canned goods have always been in demand in our country, but not store-bought, but homemade, from homemade meat, vegetables and fruits. The conventional canning process takes a long time and requires considerable effort.
In addition, canned meat and fish must be prepared under certain conditions to ensure their safety. Thus, ordinary boiling over low heat for six to seven hours provides heat treatment at 1000 degrees, which means not all harmful microorganisms die.
In addition, there are practically no useful substances left in canned food after such processing.
The solution in this situation is an autoclave, which provides rapid heating to 120 degrees at a pressure of 4-4.5 atm, and maintains this mode for 30-60 minutes. Next, rapid cooling occurs. This canning process provides several advantages, namely:
- The canning process becomes safer because contact with hot jars, boiling marinades and syrups is reduced to zero. Raw products are placed in jars, covered with lids and placed in an autoclave. They are also taken out cold.
- The cooking time for canned food is reduced by at least 3-4 hours.
- The products retain vitamins, microelements and taste.
- Canned food is natural and safe, since sterilization at a temperature of 110-120 degrees ensures the death of bacteria.
How to autoclave
- Glass jars are filled with products in accordance with the recipe, sealed with metal lids, placed in an autoclave in layers (jar on jar) to the top of the device, placing a wooden grid on the bottom, and filled with cold water so that it completely covers the jars - no less than 2 cm.
- The lid of the autoclave is closed, the bolts are tightened, and then air is pumped into the autoclave with a car pump to a pressure of 1 atmosphere. Check the tightness of the connections by ear and using soap foam. A pressure of 1 atmosphere is necessary to preserve cans of food in order to reduce the difference in pressure inside the cans and in the device.
- Next, the autoclave is heated on a fire, stove or blowtorches to a temperature of 110 degrees, and the pressure will increase. When the required temperature is reached, the jars are kept in this mode for 50-70 minutes. Needs to be monitored. So that the temperature does not exceed 120 degrees.
- Then the heating is stopped, and the device is left to cool to a temperature not exceeding 30 degrees. It can occur naturally or with the help of cold water. At the same time, the pressure rises slightly.
- The air is carefully released through the safety valve and the autoclave is opened. The water must be drained using a hose and the cans removed.
- The autoclave pressure gauge will show a pressure of 2.5-3.5 atmospheres at a temperature of 110 degrees and 4-4.5 atmospheres at a temperature of 120 degrees. This value also depends on the volume of air between the autoclave lid and the jars. It is important to maintain the temperature within 110-120 degrees during the preparation of canned meat and fish.
How to prepare meat for canning
Meat for stew must be prepared in a special way. It is cut into pieces of such a size that they fit into jars. The marrow bones are cut out and the remaining bones can be cooked. It is better to cut the ribs into pieces.
Banks with a volume of 0.5 or 1 liter are thoroughly washed and rinsed, the meat and bones are placed tightly to half the volume, spices are added (a teaspoon of salt, 4-5 black peppercorns, 1 bay leaf), and then the meat and bones are placed again so that so that the top of this layer does not reach the top of the jar by 1 cm. If this condition is not met, then during the preparation of the stew the lid may break off and the canned food will be spoiled. Then seal the jars tightly with tin lids. The meat must be fresh and the dishes clean, otherwise the canned food will be unsafe.
Autoclave Recipes
Pork pate.
- The pork head (without brains and legs) is thoroughly cleaned, washed, chopped into large pieces, filled with cold water and boiled until the meat is separated from the bones. After this, the meat is removed from the broth, cooled, separated from the bones and passed through a meat grinder.
- The liver is boiled whole for 10 minutes, cooled, and passed through a meat grinder.
- Various offal (heart, lungs, kidneys) are boiled until half cooked, cooled and also ground in a meat grinder.
- Mix all the ingredients in a large container, add about two dozen eggs, 10 onions fried until golden brown, ground black pepper and salt to taste.
- The minced meat is thoroughly mixed, half a bay leaf is placed on the bottom of half-liter jars and the minced meat is placed, not reaching two centimeters from the top of the jar. The jars are sealed with lids and then the canned food is prepared in the same way as stew.
Peas.
- Peas, taken at the rate of 1 small glass per half-liter jar, are washed in cold water. A piece of meat, raw onion, carrots, a couple of black peppercorns, one bay leaf, and a level teaspoon of salt are added to it.
- Everything is placed in jars and the components are filled with the broth remaining after cooking the pork head and legs. It is also necessary to leave 2 centimeters to the top of the jar.
You can cook beans or broad beans using the same principle. By the way, the marrow bones left over from the meat can be poured with cold water, salt, spices and bay leaf can be added and boiled. This way you get a delicious aspic, and all the ingredients of the dish are used.
Evaluate the manufacturing method:
( 18 3.39 out of 5) Loading... Advantages of custom-made furniture May 13, 2020 ( 0 0.00 out of 5, you have already rated it )
Choosing and purchasing furniture is a pleasant, but responsible and difficult task. Numerous specialized stores and showrooms offer a huge…
The impact of the pandemic on travel abroad April 29, 2020 ( 0 0.00 out of 5, you have already rated it )
The pandemic has now disrupted global travel on an unprecedented scale. The travel ban applies to all countries. You will not be able to leave any country...
New technologies in construction: QUICK DECK April 16, 2020 ( 0 0.00 out of 5, you have already rated it )
QUICK DECK is a moisture-resistant particle board, which is a structural material that consists of two oriented…
Nature calendar for kindergarten March 17, 2020 ( 0 0.00 out of 5, you have already rated it )
The use of thematic visualization when conducting classes with preschoolers significantly increases the effectiveness of teaching. This is due to the features...
How to withdraw money from PayPal February 22, 2020 ( 0 0.00 out of 5, you have already rated it )
Editor's Note: This article originally incorrectly stated that $50,000 is 4% of $1,000,000. It has been updated to reflect that $40,000 is...
Source: https://sdelai-sam.pp.ua/?p=10160
Canned fish in an autoclave in a tomato at home
Fish in tomato is an ideal addition to mashed potatoes or grilled fried potatoes. As in the previous recipe, you can take any product to your taste. Sprat and silver carp go well with tomato sauce, but I prefer the second option. You don’t have to deal with large carcasses for a long time, and they also release more juice, so the canned food turns out tastier.