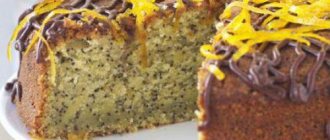
Popsicle Peanut Brownie Recipe
Recipe makes 6 large popsicles on a stick.
Sponge cake (yield: 413 g):
- egg – 62 g (one egg category O);
- hazelnuts – 70 g;
- powdered sugar – 30 g;
- cane or regular sugar No. 1 – 55 g (added directly to the dough);
- baking powder – 3 g;
- premium wheat flour – 35 g;
- butter 82% - 65 g;
- proteins – 75 g;
- cane or regular sugar No. 2 – 15 g (added to proteins).
Cake base:
- whole biscuit (grind in a blender);
- raw condensed milk – 55 g;
- butter – 55 g (softened).
Ganache:
- dark chocolate – 75 g;
- cream 33% - 100 g;
- Earl Gray tea – 1 tea bag or 20 g loose tea;
- glucose – 55 g;
- butter – 15 g.
Glaze:
- white chocolate – 180 g;
- odorless vegetable oil – 40 g (odorless, refined corn or sunflower oil).
In addition to popsicle cakes, I recommend that you make wonderful candies that taste exactly the same as Raffaello. Read more in the article: “Raffaello recipe at home with your own hands - how to make sweets, photos, videos.”
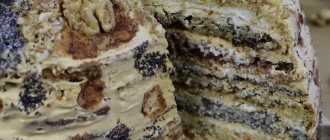
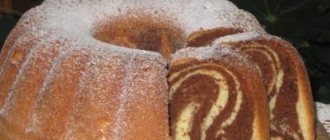
Ice cream cake with nuts
Ingredients:
for the crust:
- 1 cup flour;
- chilled water – 10 tbsp. spoon;
- eggs – 4 pcs.;
- granulated sugar – 250 gr;
- cocoa powder – 1 tbsp. spoon;
- soda – 0.5 tsp;
- vanillin – 10 gr.
for cream:
- flour (heaped) – 3 tbsp. spoons;
- milk – 250 ml;
- butter – 200 g;
- a glass of sugar;
- eggs – 2 pcs.;
- vanilla extract - sachet;
- cognac – 2 tbsp. spoons
for glaze:
- sour cream, sugar, cocoa - 2 tbsp. spoon;
- drain oil – 1 teaspoon;
- walnuts – 125 gr.
Preparation:
Beat the whites and salt separately. Grind the yolks with granulated sugar, add water. Send all the bulk ingredients into them and mix well.
Then add the prepared whites and mix. Bake at 170°C (25 minutes).
Cool the finished baked goods.
Make cream. Mix all products together, excluding butter and cognac.
Cook the mixture over low heat without bringing it to a boil. Stir continuously.
Cool, add remaining ingredients.
Spread the cream onto the sponge cake.
Heat sour cream with sugar and cocoa, add butter and nuts. When it cools down, brush the surface of the cake with it.
Ganache for cakes
I divided the preparation of this Eximo cake into 2 stages: in the evening I prepare the ganache and sponge cake. And in the morning I start assembling the cake. That's why I make the ganache in the evening, as it needs at least another 8 hours to stabilize in the refrigerator.
The ganache will be cream flavored with Earl Gray tea. This is a fairly aromatic tea and is often used to flavor various types of cream. First, I take a saucepan and pour 100 g of 33% fat cream into it. Then I put them on the fire to heat them to a temperature of +60C. Then I put the warmed cream in the Earl Gray tea bag. You can use loose Earl Gray tea, then you will need 20 g of it. Pour the loose tea into warm cream and leave to steep for 10 minutes, and then strain through a sieve.
After tea aromatization, weigh the cream again. And if there are less than 100 g, then add the missing amount of cold cream to them. Then I add 15 g of butter and 55 g of glucose to the cream.
Then I put the saucepan on the fire and bring the cream to a boil.
While the cream is heating, I prepare the chocolate. In a separate bowl I break 75g dark chocolate into small pieces.
I remove the almost boiling cream from the heat and pour it onto the chocolate and stir everything until smooth. First I stir with a silicone spatula, and then I punch the ganache with a blender until the cream and chocolate combine.
The finished ganache should be covered with film in contact and placed in the refrigerator to stabilize for at least 8 hours.
Ingredients:
- Eggs 10 pcs
- Sugar 2.5 tbsp
- or sour cream 4 tbsp.
- Soda 2 tsp.
- Walnuts 2 tbsp.
- Flour 3 tbsp
- Milk 1 liter
- Sugar 10 tbsp.
- Flour 10 tbsp. (without slide)
- Condensed milk 1 can
- Butter 200 gr
- Vanilla
- Cocoa 3 tbsp. l
- Sugar 4 tbsp.
- Milk 4 tbsp.
- One third teaspoon oil
How to cook
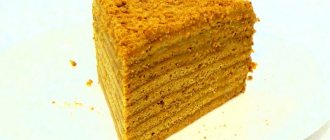
Chop the nuts. Divide the eggs into whites and yolks. Beat the yolks with sugar. Add soda to matsoni or sour cream, stir and pour into the yolks with sugar. Add nuts and flour. Beat everything again. Separately, beat the remaining whites and carefully mix with the dough. Place the dough on a greased baking sheet. Bake at 170 degrees until done. Cool the cake. Let's make the cream: Stir sugar and flour, slowly add milk, beat and put on gas. Brew the custard and cool it. Beat in butter, vanilla and condensed milk. Let's make the glaze: Stir cocoa with sugar, butter and milk, put on fire and cook until thick. Cool as much as possible. Assembling the cake: Apply a thick layer of cream to the cake and cover with glaze. Place the cake in the refrigerator until it takes shape! Popsicle cake is ready!
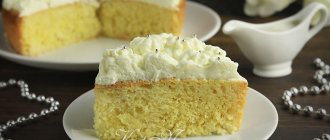
Eskimo cake turns out tender, rich and very tasty! The base of the cake will be a chocolate sponge cake. To make a sponge cake, you need to beat the whites well into a stable foam (beat for about 5-6 minutes), and then gradually introduce them into another part of the dough. You can bake the biscuit either in the oven or in a slow cooker. For this volume of products, I take a 20 cm mold and a 250 ml glass.
The cake cream is prepared on the basis of custard and may, at first glance, seem complicated, but following the detailed step-by-step instructions, you will definitely get an excellent result. When brewing, stir the mixture constantly to avoid lumps, do not forget to cool it after each stage and then you will definitely get the perfect cream!
The cake is covered with chocolate glaze “4 spoons” - it turns out glossy, dense, hardens well and does not crumble when cut. For this cake, half a serving is enough, that is, we take 2 tablespoons of all the products for the glaze!
A series of winter holidays is approaching. It's time to please your family and friends with a delicious dessert - Eskimo cake. Its incomparable creamy vanilla taste will appeal to all sweet tooths.
Even a novice housewife can prepare such an original delicacy.
You will need:
for test:
- flour – 340 g;
- table eggs – 4 pcs.;
- cold water – 50 ml;
- granulated sugar – 300 g;
- cocoa powder – 15 g;
- vanillin – 1 tsp;
- soda – 0.5 tbsp. l.;
- salt - a pinch.
for cream:
- milk – 300 ml;
- sugar – 300 g;
- eggs – 2 pcs.;
- flour – 40 g;
- butter – 200 g;
- vanilla extract.
for glaze:
- sour cream – 40 g;
- granulated sugar – 50 g;
- cocoa – 35 g;
- drain butter – 100 g.
How to cook:
- The whites separated from the yolks are placed in a deep bowl. They are thoroughly beaten with a mixer until strong peaks form. Leave in the refrigerator.
- The remaining yolks are ground with sugar. Pour in water, add cocoa, vanillin, soda, and salt. Mix until smooth.
- Proteins are introduced carefully. The mixture is kneaded from bottom to top so that the mass retains its fluffiness. Then add flour in parts. Mix everything carefully.
- Cover the bottom of the pan with parchment paper. The sides are lubricated with oil. Place the dough into the prepared container and level it out. Place in a preheated oven.
- Bake at 175 - 180° for 40 - 45 minutes. The cake is left to cool in the mold.
- The cream is being prepared. Take a small saucepan. It mixes eggs with flour and sugar. Warm milk is poured. Place the saucepan on low heat.
- Stirring constantly, bring to a boil. After bubbles appear, boil for a minute. Remove from the stove. The mixture should now cool down.
- Separately, beat the butter and vanilla. Without interrupting the process, add the cooled creamy mass in portions.
- Prepare the glaze. Place sour cream in a saucepan. Dry ingredients are added to it. Cook for 10 minutes over low heat.
- Bring the contents of the pan to a boil. Remove from the stove. Add oil. Stir to form a smooth, shiny glaze.
- Place the cooled cake on a flat plate. Place all the cream on it and carefully level it out. Glaze is poured on top. Place in the refrigerator to soak for 30 – 60 minutes.
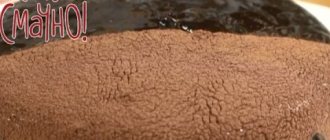
Preparing the biscuit
In the evening I immediately prepare the sponge cake. Immediately turn on the oven to preheat to 160°C. In the meantime, let's prepare the dough. First of all, you need to grind the hazelnuts in a blender almost to the point of flour. Do not grind for too long, otherwise the hazelnuts will release oil. But if you have ready-made hazelnut flour, you can immediately use it in the dough.
After this, leave the hazelnuts for a couple of minutes and start preparing the dough. To do this, I mix one egg, which weighs 62 grams, and 55 g of regular white sugar. Immediately add 30 g of powdered sugar to the bowl. And I mix everything with a mixer until the mass is homogeneous and lightened.
Then I immediately add chopped hazelnuts to this egg-sugar mixture and carefully mix everything until smooth.
Now I add wheat flour and baking powder and mix everything again.
After this you need to prepare the French meringue. To do this, in a separate container, first lightly beat the whites, and then add cane sugar to them. The result should be a stable meringue.
Then transfer the meringue into a bowl with the main dough and gently mix everything until smooth.
I will bake the sponge cake in a springform pan with a diameter of 18 cm. I don’t grease the pan with anything, but simply pour the dough into it, level it and immediately put it in a hot oven.
I bake the biscuit at a temperature of +160C for 20 minutes on the Top Bottom mode without convection.
After 20 minutes, I check the readiness of the sponge cake with a skewer. If the skewer is dry, then the biscuit can be removed from the oven. Do not overdry the biscuit, so you need to remove it from the oven in time.
I take the finished biscuit out of the oven and leave it at room temperature until it cools. Remove only the cooled biscuit from the mold. Then I wrap the cooled biscuit in cling film and store it in the refrigerator until the morning.
When the sponge cake and ganache are ready, you can start assembling the cakes. But 2 hours before forming the Eskimo, you need to remove the ganache from the refrigerator.
It becomes very hard in the refrigerator, so you need to give it time to become pliable. When the ganache has already become plastic, transfer it to the cornet.
Dessert from Irina Khlebnikova
- cream (35%) – 300 ml;
- milk – 300 ml;
- yolks – 2 pcs.;
- egg – 1 pc.;
- water – 50 ml;
- granulated sugar – 80 g;
- flour – 25 g;
- powdered sugar – 30 g;
- gelatin – 10 g;
- vanilla – 1 pod.
- cream (fat content as for cream) – 30 – 40 ml;
- chocolate bar – 60 g;
- butter – 20 g.
Step by step recipe:
The cake from Irina Khlebnikova is quite easy to prepare.
- Make the dough. In a container, beat a couple of yolks with a mixer. Then add granulated sugar. Continue working with the mixer until an airy light mass forms.
- Gradually add vegetable oil, vanilla, warm milk. Mix the sifted flour with baking soda and baking powder. Add flour mixture. Process everything quickly with a mixer until it has a homogeneous consistency.
- Beat the egg whites and salt separately until soft peaks form. Add sugar gradually. Use a mixer to form stiff peaks.
- Then carefully add the whipped whites into the dough in 3–4 additions, kneading it from bottom to top. It turns out to be a very light, airy mass.
- The bottom of the mold is covered with baking paper. The sides are not lubricated with anything. This kind of sponge cake is called chiffon. Its texture is very delicate.
- Therefore, in an ungreased container it will rise faster and will not fall off after baking. The dough is poured into a springform pan (diameter 24 cm). Bake in a preheated oven for 40 – 50 minutes at 160°C.
- The chiffon cake is cooled completely upside down. Then carefully cut it out of the container. Wrap the cake in cling film. Sent to the freezer.
- Water is added to the gelatin and left to swell. Flour and sugar are mixed. For the cream, you can use 2 yolks and a whole egg instead of four yolks. They are shaken with a whisk. Add flour mixture.
- Pour milk into a saucepan and add granulated sugar. Cut the vanilla pod in half lengthwise. Place vanilla seeds and the pod itself into the milk-sugar mixture.
- Place on the stove and heat until very hot, but do not boil. The sugar should completely dissolve. Remove the pod from the pan.
- Hot milk is gradually poured in a thin stream into the yolk mixture and stirred. Boil it until thickened (for 5 – 7 minutes).
- When the mass becomes thick, remove it from the heat. Transfer to a cup. Cover with film, otherwise a crust will form. Let it cool.
- A biscuit is taken out of the freezer. Cut it lengthwise into two halves. The swollen gelatin is heated very carefully so that it completely dissolves. Pour the gelatin solution into the custard. Stir with a mixer.
- Whip cold cream at medium speed, gradually adding powdered sugar. Very carefully and quickly mix the custard base with the prepared cream.
- The cake is assembled in a mold slightly larger than the sponge cake itself. Place the first cake layer, then the cream, cover with the second one. It is pressed in carefully. Place in the refrigerator for 3 – 4 hours.
- Cream and butter are added to chocolate. Heat everything until smooth. Coat the cake. Leave in the cold for 20 minutes.
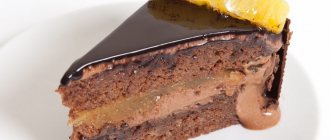
If you want to make a cake for a holiday, do not hesitate - a cake called “Eskimo” is exactly what you need. This dessert is simply delicious. This is a delicious dessert that is easy to prepare at home. It tastes exactly like ice cream with this name, has a delicate creamy taste, chocolate bitterness, and instantly melts in your mouth. The delicacy is easy to prepare; for the cake you need to bake fluffy chocolate cakes, and for the layer prepare the most delicate custard.
It is especially pleasant to enjoy this instantly melt-in-your-mouth delicacy during the summer heat. It is easy to prepare, does not require a lot of money, is very tasty and beautiful. This cake needs to be refrigerated before serving. The cake retains its quality perfectly when stored in the cold for several days. It soaks in better, the aroma and taste are enhanced. But usually this melt-in-your-mouth dessert is eaten very quickly. The biscuit can easily be baked in a slow cooker.
Ingredients
The Eskimo recipe is simple, making it at home is not difficult:
For the biscuit:
- sugar - 1.5 cups;
- flour - 1.5 cups;
- eggs - 4 pieces;
- soda - 5 grams;
- butter - 50-60 grams;
- refined vegetable oil - 60 grams;
- cocoa - 2 tablespoons;
- milk - 1.5 cups;
- vinegar - 20 grams;
- vanilla sugar - 20 grams.
For the layer:
- milk - 250 milliliters;
- sugar - 200 grams;
- eggs - 2 pieces;
- flour - 4 level tablespoons;
- butter - one pack.
For filling:
- sugar - 100 grams;
- sour cream - 70 grams;
- cocoa - two full tablespoons;
- butter - 1/2 pack.
Cooking method
Let's look at the step-by-step recipe:
- Sift the flour and cocoa, grind them together, add all the other bulk products and mix thoroughly.
- Break eggs into this mixture, add oil, milk and vinegar. Beat with a whisk or mixer for a few minutes. While beating, wait until you get a fluffy sweet dough.
- Transfer the dough into the prepared pan and smooth the surface with a spatula.
- Bring the oven temperature to 180 degrees Celsius, baking time 50-60 minutes, after half an hour you can periodically check the readiness with a wooden stick.
- Transfer the biscuit to a wire rack, cool, wrap in film and place in the refrigerator for one to two hours. This will give it a little moisture.
- Before making the cream, remove the butter from the refrigerator.
- Beat eggs with sugar with a mixer, add flour, heat milk and pour into this mixture. Place in a water bath, stir all the time while standing, wait until the mass thickens.
- Pour vanillin into the cooled cream, add butter one spoon at a time, beat until it becomes fluffy and airy.
- For the glaze, mix sugar with cocoa, pour in sour cream. Cook over very low heat, stirring until the sugar dissolves. Turn off the stove, add the oil and stir until you get a smooth, shiny pour. Cool it a little.
- Make two cake layers from the sponge cake, spread with cream filling and fill with glaze. Place the cake in the cold for 1-2 hours, it will harden and become even tastier.
Preparing the cake base
Let's prepare the base for the cakes. To do this, you need to grind the biscuit in a blender. And immediately add 55 g of condensed milk and 55 g of softened butter to the blender. Mix everything until smooth. You should end up with a mass that is not too dense and easy to form into a ball.
Now take the silicone popsicle mold and place it on a board on which you will put the mold in the freezer. The board must be stable and not bend. Immediately prepare wooden popsicle sticks.
My form consists of 4 large Popsicles. But the recipe is for 6 of these Popsicles. So I'll make cake pops from the leftover biscuit mixture.
Let's start filling the popsicle cells with biscuit mixture. First, fill half the cell, and then make a groove in the center into which you will need to deposit a strip of ganache. The thickness of the ganache layer is from 0.5 to 1 cm, and the length of the ganache layer will depend on the cell size.
After pipetting the ganache, I insert a wooden stick into the well of the popsicle. You can insert the stick before depositing the ganache, whichever is more convenient for you.
Then we close the ganache with biscuit mixture, filling the popsicle cell exactly to the edge. And now you need to level the top of the future popsicle.
I form the rest of the popsicle on a stick in exactly the same way.
When all the cakes are ready, I cover the entire pan with film and put it in the freezer along with the tray for at least 4 hours. Although cakes in this form can be safely stored in the freezer for up to 3 months.
But today I will cover them with glaze. Therefore, I send it out into the cold until the evening.
How to make chocolate popsicle cake:
FOR THE TEST: Separate the whites from the yolks. Beat the whites into a strong foam.
Grind the yolks with sugar until white.
Add soda, water, vanillin and cocoa to the beaten yolks. Mix.
Carefully fold in the beaten egg whites and flour.
Stir until smooth.
Pour the dough into a greased pan, knock the pan on the table several times, bake in an oven preheated to 180 degrees for 30-40 minutes.
Cool the finished biscuit completely.
FOR THE CREAM: Mix eggs, sugar and flour, beat with a mixer. Add warm milk, stir, put on low heat. Bring the mixture to a boil, stirring constantly. Remove from heat, cool.
Cut the butter into small pieces and add to the warm cream.
When the butter becomes soft enough, beat the cream with a mixer until smooth.
The second option for preparing the cream: beat the butter at room temperature with a mixer. Stop whisking and add the cooled custard in small portions.
Place all the cream on the cooled cake and smooth the surface. If desired, the biscuit can be additionally soaked in syrup with cognac or wine. See recipes for syrups for soaking sponge cakes.
Place the cake in the refrigerator for 30-60 minutes.
FOR CHOCOLATE GLAZE. Mix sugar, sour cream and cocoa. Place over low heat, bring to a boil, remove from heat, add butter, stir until a smooth, shiny mass is obtained. Cool the glaze until warm.
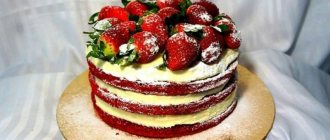
I bring to your attention a delicious “Eskimo” cake, looking at which you just want to eat a piece. When I tried this incredibly delicious dessert, I simply couldn’t believe that it was homemade, it was so beautiful, airy and festive. This cake will be the center of any holiday table. The recipe is very simple. Try it!
Popsicle frosting
The final preparation is the frosting for the popsicle cake on a stick. I will cover them with regular white chocolate. Therefore, now I need to melt it to a temperature of 45C. To do this, I break the chocolate into small pieces and microwave it in a bowl.
You need to melt the chocolate in bursts of 20-30 seconds. That is, first heat the chocolate in the microwave for 30 seconds at full power. Then take out a bowl and mix it.
Then put it in the microwave again for another 30 seconds. Usually 3 times for 30 seconds are enough to melt the chocolate to +45C.
After this, add 40 g of odorless vegetable oil, such as corn oil, to the melted chocolate. But you can replace it with regular, odorless sunflower oil.
The glaze should be thin enough to easily cover the cakes with a final thin layer. Therefore, if necessary, add a little more vegetable oil to the chocolate. Then I pour the finished glaze into a tall glass so that it is convenient to lower the popsicle into it.
Fruit Popsicle Cake
For a large group of children, it is recommended to make a fruit popsicle cake. The recipe can be supplemented to suit your taste.
To prepare the sponge cake, mix four eggs with a glass of sugar. It is necessary to beat until foam appears. Next add a glass of flour. Mix thoroughly and bake the crust. Cool, cut into small cubes and set aside for a while. Chop canned pineapples, oranges and bananas for the filling. Beat a liter of fat sour cream with a glass of sugar. Add cooled dissolved gelatin. In total you will need 65 grams.
Now let's assemble the cake. Place oranges on the bottom of the springform pan, then add a sponge cake mixed with a third of the cream. The third layer should be bananas. Cover them with a sponge cake with cream. The fifth layer is pineapples. Apply cream mixed with biscuit onto the surface. Cover the cake with film and leave in the refrigerator for four hours. Next, remove the mold, coat it with icing and stick a fruit popsicle on the sides. Decorate with confectionery sprinkles.
Popsicle decor
Immediately prepare the decor for the Popsicle cake on a stick. Please note that once you apply the frosting to a cold popsicle stick, it will become hard within seconds. Therefore, there are two options for decorating popsicles: sprinkle the decor directly onto the fresh icing, but here you need to act very quickly, or decorate it later, for example, make a thin chocolate ribbon on top and place the decor on it.
When the frosting is ready, remove the brownie pan from the freezer. I carefully remove the Popsicle Cake from the compartment and immediately dip it into the frosting. I let the rest of the glaze drip off and transfer it to parchment paper, and immediately decorate with colorful sugar sprinkles.
I repeat everything exactly the same with the remaining popsicles.
After this, I pour the remaining glaze into a pastry bag and make a small cut. And I draw a thin ribbon on the cake.
Cakes need to be glazed and decorated very quickly. Since when they are kept at room temperature for a long time, they become covered with condensation. Therefore, we quickly covered, decorated and sent it to the refrigerator for defrosting.
The brownies are currently frozen and will need some time to defrost. I defrost in the refrigerator for 4 hours. Although even frozen they are tasty and taste like ice cream.
This Pecan Popsicle on a Stick is definitely worth making. The popsicles turn out really delicious! In addition, preparing them is not at all difficult. Cook, try and surprise!
Light dessert “Eskimo”
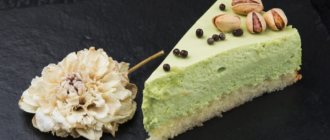
The dessert, which is prepared without flour, has an even richer taste. The delicacy has a soft, creamy, vanilla taste with a slight sourness that contrasts with the bitter chocolate taste.
Ingredients
We need products:
For the cream layer:
- cream cheese - 1/2 kilogram (fat content not less than 30%);
- sugar - 100 grams;
- starch - 1 tablespoon;
- lemon - 1 piece;
- vanillin.
For the chocolate layer:
- butter - 200 grams;
- dark chocolate - 1.5 packs (cocoa 72%, more possible);
- eggs - 6 pieces;
- sugar - 200 grams.
Cooking method
It is advisable to prepare the cake the day before the celebration:
- Grate the lemon zest on the finest grater and squeeze the juice out of it.
- Add the zest, sugar and vanillin to the cream cheese and stir.
- Without stopping whisking, pour in the eggs one at a time, add starch and mix again.
- For the chocolate dough, beat the sugar and eggs.
- Chop the chocolate, crush the butter into crumbs and place them in a water bath until the chocolate melts. Mix both masses until completely homogeneous.
- Pour more than half of the chocolate dough into the prepared pan, lined with foil, carefully place all the creamy dough on top, pour out the remaining chocolate mixture. Mix the top layer a little to get streaks.
- Place the mold in a large saucepan over a water bath and transfer the structure to the oven. Baking time is a little over an hour, when the dough stops sticking to your fingers, it is ready. Cool the dough in the oven. Without removing it from the mold, cover with film and place in the refrigerator. Only a completely cooled cake can be removed from the mold.
This most delicate delicacy will certainly please everyone; the combination of flavors will not leave anyone indifferent.
It can be decorated with fresh or frozen berries. More
- Grind butter with egg and sugar. You can use a mixer to get a homogeneous mass. Put sour cream, add soda and flour. Knead the dough. Preheat the oven to 180 degrees. Transfer the dough to a baking sheet and smooth it over the surface. Cook the cake for about 25 minutes, a golden crust should appear.
- Prepare the cream: boil milk with sugar, add vanilla sugar at the end. Dissolve the starch in cold water, slowly, and pour the resulting mixture into boiling milk in a thin stream. You should get milk jelly. Place soft butter in it and beat. Break the baked cake into pieces and mix with jelly. The shortbread should be soaked in cream.
- Cover the mold with film, place the soaked cake on it, which has turned into a homogeneous mixture, and cover with the ends of the film. Give the finished cake an oval shape and place it in the refrigerator for three hours. After three hours, take out the cake, turn it over onto a flat plate, and insert a stick, like in a popsicle. You can start decorating the cake.
- Prepare black and white icing. Cook using the same methods, but in separate bowls. Melt black and white chocolate in a water bath, add cream, stir until smooth. Cover half of the cake with white icing, the other half with black. Place in the refrigerator to let the glaze harden. On top of this delicious “Eskimo” cake for those with a sweet tooth can be decorated with hazelnuts, chopped peanuts, and coconut flakes.
A selection of homemade ice cream recipes
Published:
When it’s hot, you don’t want to bake anything, so ice cream and […]
no comments yet
Cook with pleasure!