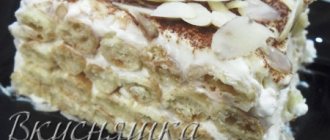
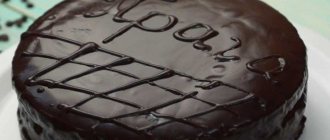
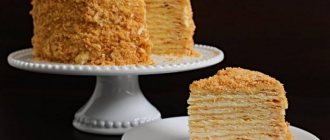
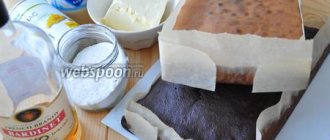
The cake with the proud name “Count Ruins” is a combination of light sponge cake, delicate cream and various delicious culinary additives. There are several variations of making the cake. Housewives experiment in their own way with certain products, changing and adding something. But, nevertheless, the classics of the genre are valued above all else . Cake "Count's Ruins", a classic recipe with step-by-step photos at your disposal. No matter how time-consuming and financially the cake is, the joy that the delicacy will bring to you and your household is priceless.
Classic cake "Count's Ruins"
The classic cake recipe includes not only small pieces of tender, dry meringue, but also walnuts and prunes. The Count's Ruins cake is the king of sweet dishes at any festive event.
Biscuit products
- A pair of chicken eggs.
- Soda - on the tip of a spoon.
- Vinegar – 4 ml.
- 203 gr. granulated sugar.
- Flour (premium grade) - 453g.
- Sour cream (not very fatty) – 210 ml.
- Cocoa (Russian) – 70 gr.
Products for cream
- Sour cream (fat, at least 25%) - 901 g
- Granulated sugar – 310 gr.
- Half a stick of butter.
- Half a can of condensed milk.
Products for meringues
- Granulated sugar – 150 gr.
- Egg white – 6 pcs.
Glaze Products
- Chocolate bar (70% chocolate) – 1 pc.
- Butter - 40 gr.
- Sour cream – 70 ml.
For filling
- Walnuts - 150 gr.
- Dried apricots – 200 gr.
- Chocolate – 20 gr.
Preparing the biscuit
Rinse the cooled eggs and beat them together with the remaining yolks (from the meringue) and sugar until smooth and foamy. Then you should put the egg mixture in a water bath and bring the mass until it rises, stirring all the time.
Sift flour through a fine sieve. Cool and carefully add wheat flour in a thin stream, remembering to stir constantly. Then add sour cream and cocoa. Quench the soda in vinegar and pour the sizzling contents into the future dough, stir everything well again. Let stand for 8 minutes while the oven preheats to 180 degrees.
Grease the pan with butter or line it with baking parchment. Pour the dough and put it in the oven for 25 minutes. Check readiness with a wooden stick, which should be dry.
Preparing the cream
While the cakes are baking, you can get to work with the cream. Soften the butter (you can grate the butter on a coarse grater) and beat it with condensed milk. If you use a grater, the butter should be firm, and if you soften it by hand, it should be removed from the refrigerator to a warm place three hours before you start cooking. Add sour cream and sugar, beat with a whisk or blender until thick, homogeneous and very beautiful. Externally, the cream should be such that you would want to eat it right away, then it is ready. Place the prepared cream in a cool place.
Preparation of meringue
Beat the whites with a blender or whisk, first filling them with sugar. The sugar should completely disappear, and the proteins should turn into a beautiful, snow-white, elastic mass. You can also cook the meringue in a water bath. Fill the whites with sugar and stir. Place in a water bath, the mass will rise slightly, continue beating the product. When the meringue is ready, cool. Add to a pastry bag and pipe onto a baking sheet into flower shapes or heels. Also, either oil the baking sheet or use paper. You should squeeze out the flowers only when the cakes are baked and the oven has cooled down a little. Better yet, prepare them before baking the sponge cake. The meringue should be dried at a temperature of 100 degrees. one hour.
Laying
Remove the sponge cake and cool it. Cut with a knife or using fishing line into two parts along a common plane. Place the lower part on a tray and coat with a thin layer of cream. We lay out meringue flowers along the edge, the entire perimeter, leaving the center free.
Separate a little cream. Chop the nuts, scald the prunes, cut them into small pieces. We cut the second cake into many even or not very even squares, fill everything with most of the cream. Divide the nuts in half, add half along with the prunes to the mixture. Mix everything and place it in the deep part of the cake. Fill with the remaining cream. Place the remaining meringue patches on top in a chaotic manner. Making the glaze.
Preparing the glaze
To prepare the glaze, melt the bulk of the chocolate, separating 20 grams from it, along with sour cream and butter. This can be done either in a water bath or on the stove, just remember to stir without interruption. Pour the glaze over the cake so that the drops flow down from the top in thin streams. Crumble the remaining nuts and sprinkle the entire cake with nut crumbs. Place in the refrigerator for three hours. The cake should be well saturated with everything that is in it. Rub the remaining chocolate over the finished product.
Count's ruins with fluffy meringue
Just one piece of this cake will be remembered for a very long time. There is nothing difficult in cooking if you work carefully and don’t rush anywhere.
Ingredients:
- 200-250 g butter;
- 150 g fat sour cream (30%);
- 150 g chopped nuts;
- 4 squirrels;
- 3 chicken eggs;
- 2 tbsp. granulated sugar;
- 1 tbsp. sifted flour;
- 1 packet of vanillin;
- 0.5 cans of boiled condensed milk;
- a pinch of salt;
- lemon acid;
- vanilla.
Recipe:
- Pour the whites into a clean and dry (this is very important) bowl. We make sure that no yolks get into them, otherwise you won’t be able to whip up a thick foam.
- Add a pinch of citric acid and set the mixer to minimum speed. When the whites increase in volume, add a glass of granulated sugar, but not all at once, but in small portions.
- Now beat the whites at high speed until they begin to hold their shape. Preheat the oven to 110 degrees. We cover the baking sheet with parchment paper, after which we place the future meringue on it with a teaspoon. We act carefully and maintain sufficient distance so that the “chips” do not stick together.
- Cook the meringues for exactly one hour. Then open the door a little and dry the dessert for another half hour. Turn off the burner and give the cakes time to cool. Only after this can they be removed from the oven.
- Beat the eggs well with the remaining sugar until light foam appears. Add sour cream and mix everything thoroughly again.
- Mix flour with vanilla and add it portionwise to the rest of the ingredients. At the end, quench the soda with vinegar (or lemon juice) and knead a fairly thick and homogeneous dough.
- Pour it into a detachable round mold and place it in the oven (180 degrees) for 30-40 minutes. To prevent the biscuit from falling, do not open the oven ahead of time.
- We wait for the cake to cool completely, after which we divide it into two equal halves. To do this, you can use a knife or regular thin thread.
- We cut one into diamond shapes, as shown in the photo below. This way the dessert will look much tastier and more interesting.
- Mix boiled condensed milk with butter at room temperature. Add vanillin and beat the mixture with a blender until it increases in volume.
- Place the round base on a beautiful dish and coat it with a thick layer of cream.
- Place the sliced biscuit on top and also cover them with the sweet filling.
- Then come chopped nuts and a layer of airy meringue. We repeat all steps until the ingredients run out.
- We decorate the finished cake with nuts or chocolate glaze, which will appeal to true connoisseurs of sweets.
- We hide the dessert in the refrigerator for 3-5 hours so that the layers are well soaked, after which we serve it to the table with your favorite drinks.
Important point! If you want to save time or are afraid that the meringue won’t work out, then you can buy ready-made fluffy cakes in advance at the nearest supermarket.
And if you bake a biscuit in a multicooker (“Baking” mode), the cooking time may vary
Variations in making the Count's Ruins cake
The “Count's Ruins” cake can be baked either in the usual, well-known version, or using culinary imagination. The recipe below is very tasty, and comes together much faster than the usual one. In addition, this option will be more economical.
Biscuit products
- A pair of chicken eggs.
- Soda - on the tip of a spoon.
- Vinegar – 4 ml.
- Granulated sugar – 190 gr.
- Flour (premium grade) - 430 gr.
- Kefir – 105 ml.
- Cocoa (powder) – 70 gr.
Products for cream
- Sour cream - 900 gr.
- Granulated sugar – 310 gr.
Glaze Products
- Cocoa – 70 gr.
- Butter – 1/4 of a whole pack.
- Sour cream – 70 ml.
For filling
- Walnuts - 150 gr.
- Dried apricots – 200 gr.
Preparing the biscuit
Beat granulated sugar with eggs and lightly heat the mixture on the stove. Add the previously sifted flour, then stir everything vigorously. Quench the soda in vinegar. Pour into the dough, stir. Divide the dough into two parts. Add cocoa to one. You can bake either one by one or at a time, laying out the dough in layers: the first layer is white, the second is chocolate. Pour carefully so that the dough does not mix. While the cakes are baking, make the cream.
Beat sour cream with sugar until you obtain a thick, beautiful-looking, snow-white cream. The sugar should completely dissolve.
Remove the cakes, cool and divide into two parts along the plane. This can be done with a wide and long knife. Lubricate the bottom part with cream. Cut the top part into many squares and dip it in sour cream, lay it on the biscuit base layer by layer.
Crush the nuts, scald and cut the prunes. Sprinkle generously on each layer. Pour the remaining sour cream over the cake.
Preparing the glaze
Mix cocoa with butter and sour cream and melt on the stove. Pour glaze over the cake, doing this from the top down. Place in the refrigerator for three to four hours.
Cake “Count's ruins”
There are several options for preparing this cake. Perhaps the most famous and most common option is meringue, smeared with custard and laid out in a mound. I will not consider this option, because... in my opinion, this is a special case of the recipe I propose, and you, if desired, can easily prepare it. The version of the “Count's Ruins” that I propose is a sponge-chocolate cake with meringue. It is not difficult to prepare, but, unfortunately, it takes a certain amount of time to prepare. In my opinion, this cake is worth it. Try it!
First of all, I would like to write a short introduction to this recipe. The inconvenience, or perhaps on the contrary, the advantage of this recipe is that the cake is prepared in two or even three steps. Firstly, you will need to bake the sponge cake in advance (preferably the day before) and leave it to dry a little. This is done so that after soaking it with chocolate cream, you will have a sufficiently airy and light base of the cake so that it does not turn into an overly dense mass. Secondly, it is very advisable to bake the meringues in advance (it is advisable to do this the day before) so that they dry out slightly. This cake contains custard, which, unfortunately, dissolves them - eats them away, turning them into sugar. To minimize this impact, the meringue is slightly dried before assembling the cake.
I used a springform pan with a diameter of 26 cm to prepare the cake.
PREPARATION:
As I wrote above, you will need to bake the sponge the day before or at least 4-5 hours before assembling the cake. You can bake the sponge cake according to any of your recipes or, like me, bake it according to the sponge cake recipe without separating the eggs posted on the site. To prepare the meringue, you will need to beat the egg whites with powdered sugar. There are several ways to do this. Most often in cookbooks and on the Internet they suggest doing this using the so-called “cold” method. This is exactly how egg whites are whipped in the confectionery industry, BUT! This is done at a temperature of +2°C (not only the whites themselves, but also the containers and whisks of the mixer are cooled to the same temperature before whipping), which, you see, is not entirely convenient at home. It is much more convenient and more efficient to beat egg whites at room temperature. Therefore, it is very advisable to remove the eggs from the refrigerator several hours before starting to prepare the meringue so that they warm up. If you forget to do this, after separating the eggs into whites and yolks, place the container with the whites in a bowl of warm water. So, let's begin. Divide the eggs into whites and yolks.
It is very important that not a drop of fat gets into the proteins, because... fat (even in minimal quantities) greatly interferes with the beating process, making it almost impossible. Based on this, it is necessary that 1) the container in which you will beat the whites and the mixer whisks be sufficiently fat-free (I usually wash them again with dishwashing detergent immediately before whipping, and then wipe them dry) and 2) so that the whites are When separating the eggs, not the slightest drop of yolk escaped. Lightly salt the egg whites and start beating at low mixer speed. After the whites have whipped into a foam, increase the mixer speed and beat until soft peaks form. Let me explain a little. You need to beat the whites until the peak formed by the whisk no longer instantly spreads and merges, but, on the other hand, it will not yet be strong enough to hold its shape, its peak-top will still be soft and will fold under own weight. Next we will need to add powdered sugar. Don't do it in one go! Add it in small portions, whisking continuously at high speed.
After all the sugar has been added, beat the egg whites until 1) the sugar grains are completely dissolved. You can understand this by rubbing the protein mixture between your fingers. And 2) until the whites are whipped to stiff peaks.
A well-beaten protein mixture has a glossy shine and the peaks formed on its surface hold their shape and do not bend. You can easily turn a container with whipped egg whites upside down, and its contents will remain in place.
At the very end of beating, add a few drops of lemon juice and beat for a couple more minutes. Whipped protein mass does not allow long-term storage, because... It begins to settle very quickly. That is why meringues are baked immediately after preparation. Place the protein mass on parchment paper.
This cake does not require the meringues to be perfectly smooth and the same size. After all, these are ruins and the meringues here are something like the stones of a former castle, but they can be completely different. Place the baking sheet in a cold oven. Set the temperature to 110°C, open the oven door slightly (literally a few mm, for this I place a thin pencil under the door) and bake, or rather dry, until the meringues easily come away from the parchment paper. The baked meringue has a characteristic rustling sound and its bottom does not collapse when pressed. It may take you 1 to 2 hours to bake and dry. Approximately 40–50 minutes after the start of baking, the oven door can be closed tightly. We use the remaining yolks after baking the meringue to make custard. To do this, grind the yolks with sugar, add flour and milk.
Stir everything until smooth and place on low heat to brew. Brew the cream with constant stirring so that it does not burn and lumps do not form in it.
Start brewing on low heat. As the milk mixture warms up, increase the heat on the stove. You need to brew the cream until it thickens. Usually it is enough to bring the mixture almost! (no need to boil!) until boiling. Cool the thickened cream to room temperature. In addition to custard, we will also need chocolate cream. To prepare it, put all the ingredients of the cream (except for butter and cognac) into a saucepan, put it on the fire and, with very gentle heating and constant stirring, ensure that they all combine into a single chocolate mixture. Add butter and heat until completely melted. At the very end, add a spoonful of cognac (optional!) and remove the cream from the heat. There is no need to refrigerate the cream. We will need it hot. And all we have to do is put the cake together. To do this, cut a cake layer about 1 cm thick from the sponge cake.
Cut the rest of the sponge cake into small pieces and fill with hot chocolate cream.
Stir the chopped biscuit and cream until the mixture becomes homogeneous chocolate. At the very end, add chopped walnuts. Lightly soak the cut sponge cake (if desired!!!). For impregnation, you can, depending on your preferences, take any sweet syrup. Personally, I like to soak it either with pure cognac (lightly!), or with cognac diluted with sweet water. If you wish, you can do without impregnation altogether, because... The cake is very thin and even in this case it will not be dry. Grease the cake with custard and place two layers of meringue around its perimeter.
Lay out the meringues in a checkerboard pattern, covering them with custard to seal them together. Place the chocolate mass in the center of the formed depression.
Cover the laid out mass with layers of meringue, not forgetting to grease them with custard. Decorate the top of the cake with chocolate and nuts.
This cake can be eaten immediately after assembly.
Enjoy your tea!
Adviсe
For baking, it is best to use a springform pan in which the bottom can be removed or the sides can be revealed. Not only is it easy to use, but it also makes the cake very smooth. It can also be used when laying cakes and when leveling multi-layer baked goods.
You should remove it from the mold like this: moisten a thin but long knife in water, carefully walk it around the entire perimeter, between the wall and the flour product. Then remove the bottom and take out the cake.
Egg whites, both for making meringue and for working with dough or cream, should not be beaten in a circle, only from the center or from one edge. The wrong approach will reduce both lightness and airiness.
Of course, such a cake can be prepared for a birthday and thereby surprise the birthday boy, and congratulations for a woman, for example, on the holiday can also be taken from us here.
