Georgian khinkali
Georgia is a country of delicious food. Anyone who has visited it will not forget the taste of all kinds of pastries and hearty main courses. Many national recipes can be repeated at home. Shall we try?
Ingredients:
- Beef – 200 g
- Pork – 200 g
- Onions - 150 g
- Coriander – 10 g
- Flour - 700 g
- Egg white - 2 pieces
- Water - 1.5 liters
- Garlic - 2 cloves
- Fresh cilantro - 1 bunch
- Savory - 1 pinch
- Salt - to taste
- Vegetable oil - 1 tbsp.
- Ground black pepper - to taste
How to cook:
Wash the meat and chop it into small pieces. Grind it in a meat grinder along with peeled onions and garlic. Also add finely chopped cilantro, savory, and salt to the minced meat. Stir it, pour in boiled cold water so that it becomes a little liquid. Leave the minced meat in the refrigerator for 2 hours. In the meantime, knead the dough. Mix the water with the egg whites and most of the flour. Add salt and vegetable oil. Knead the dough. Make a ball out of it and leave it in the refrigerator for 30 minutes. Then stir in the remaining flour. After this, let the dough stand for 2 hours at room temperature under a towel. After this, cut the dough into pieces. Roll each into flat cakes (thickness - 2 mm, diameter - 15 cm). Roll the flatbreads towards the middle and place minced meat in each one. At the end, pinch the khinkali. Boil salted water. Cook khinkali in it for 12 minutes. Serve them sprinkled with pepper.
Ingredients
Before you start making homemade khinkali, you need to make sure you have all the necessary ingredients. The dough is simple; to prepare it you need:
- flour - 3 cups;
- egg – 1 pc.;
- water – 1 glass;
- vegetable oil – 3 tablespoons;
- salt to taste.
As for the meat part of the khinkali filling, the recipe includes several variations. More often they use beef or pork, less often lamb. Two types of meat will be used for this recipe:
- beef – 250 gr;
- pork – 250 gr;
- onions – 3 pcs.;
- meat broth;
- cilantro, parsley, mint, coriander, cumin - to taste;
- ground black pepper, salt - to taste.
In some cases, mushrooms or cheese can be added to khinkali, and some types of classic seasonings include herbs that grow exclusively in Georgia.
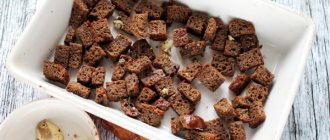
Khinkali in the oven
In principle, real khinkali turn out incredibly tasty no matter how you cook them. And in addition to traditional boiling and steaming, I can suggest baking khinkali in the oven. Since lately I’ve been cooking almost everything in the oven, so, in my opinion, any dish turns out tastier, I haven’t ignored Georgian cuisine, in this recipe I’ll tell you how to make khinkali in the oven. Of course, this version of their preparation cannot be called traditional, but after all, khinkali are fried, so why don’t we bake them on a bed of tomatoes, and under a fragrant cheese cap. And if you use a homemade product for this simple khinkali recipe in the oven, and not store-bought khinkali, it will turn out absolutely amazing, try it yourself.
Ingredients:
- Khinkali – 28-30 pieces
- Meaty tomatoes - 3-4 pieces
- Hard cheese – 70-100 grams
- Fresh greens - 60-70 grams
- Ground black pepper - To taste
- Salt - To taste
Number of servings: 10-12
How to cook Khinkali in the oven
So, first, we thoroughly wash the tomatoes and cut them into slices about 0.7 cm wide. Now we take a cast-iron frying pan with a removable handle and line the bottom with tomato slices, add a little salt and pepper. Place frozen khinkali on the tomatoes sideways, sprinkle everything with chopped herbs and grated cheese. Place the frying pan in an oven preheated to 180 degrees and bake the khinkali for about 20-25 minutes. When the dish is covered with a fragrant cheese crust, take it out and place the khinkali on plates. Bon appetit everyone!
ARTICLES ON THE TOPIC:
- Rice noodle salads, photo recipes step by step
- Meat and potato pies recipes with photos
- Shortbread pie with cranberries - step-by-step recipes with photos
Khinkali with cheese
Khinkali have recently gained immense popularity and now they can be found both in stores and in various cafes. But you are unlikely to find such a variant as khinkali with cheese anywhere.
Ingredients:
- Flour - 500 grams
- Warm water - 400 grams
- Hard cheese – 500 grams (unsalted)
- Egg – 1 piece
- Butter - To taste
Number of servings: 30-32
How to cook “Khinkali with cheese”
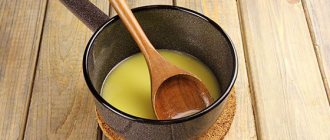
First we need to knead a tight dough from flour and slightly warm water. Cover the finished dough with a towel and leave it to rest for 10-15 minutes. For the filling, grate three cheeses on a coarse grater. In a bowl, beat the egg and mix it with grated cheese. Now we divide the dough into several parts and alternately roll each of them into a thin layer, cut out small circles from the dough. Then roll out each circle a little more and place the prepared filling (1 teaspoon) in the middle. Now we lift the edge of the dough and twist it on top so that we get beautiful folds, pressing the top of the khinkali a little. Some of the finished khinkali can be frozen, and some can be boiled in lightly salted water for 8-9 minutes after boiling. After this, remove the khinkali from the water with a slotted spoon, place them on a plate and cover with a towel for 5 minutes. Serve hot khinkali, pouring melted butter over them. Bon appetit everyone!
How to cook khinkali at home - step-by-step recipe with photos
Let's start with the test. In the classic version in Georgia, only water, flour and salt are used. There are variations of cooking with butter and egg, but keep in mind that the resulting dough will be denser. We will tell you both options.
Dough for khinkali without eggs
You will need:
- 1 glass ice water
- 3 cups flour
- 3 pinches of salt
Step-by-step preparation:
- Sift the flour through a sieve into a bowl.
- Use your fingers to make a depression in the slide that appears.
- Pour in ice water and salt, then mix thoroughly so that there are no lumps.
- Knead the dough until it stops sticking to your hands.
- Cover the bowl with the dough with a towel and set it aside and begin to make the filling. During this time it will settle and fit.
Tip: the dough for Georgian dumplings can also be kneaded in a bread machine.
Khinkali dough without egg
Khinkali dough with egg
You will need:
- 3 cups flour
- 1 egg
- 3 tbsp. l. vegetable oil
- One and a half glasses of ice water
- 1 tsp. salt
Step-by-step preparation:
- Sift the flour through a sieve into a deep bowl.
- Make a well, add egg, salt and butter.
- With one hand we begin to thoroughly knead the dough, with the other we gradually pour in ice water.
- Knead until thick and homogeneous without lumps and go to work on the filling. During this time the dough will have time to rise.
- The finished dough for both recipes can be stored in the refrigerator for three days, wrapped in cling film.
Already rolled out dough for Georgian dumplings with egg
Tip: before starting modeling, knead both versions of the dough thoroughly again.
Khinkali juicy
I always loved khinkali and ordered them in Georgian restaurants. But after a trip to Sochi last year, I got the idea to make the same khinkali as in local restaurants. I thought, now I’ll read the recipes and it will turn out the same. No matter how it is. It probably took half a year to select the proportions; I talked on the phone with a chef from Sochi, came up with something myself, and learned from my own mistakes. And probably after six months I started to get them. Having consolidated my success, I want to share my experience with you. I like khinkali to be juicy and aromatic, so that’s exactly the recipe I made. It’s such a thrill to take a bite, drink the broth and eat juicy meat with a slightly rubbery thin dough. In the recipe I will try to reveal all the secrets that I learned from the chef and that I came up with myself to simplify production at home. According to this recipe you will get 23-25 khinkali. It’s better, of course, to sculpt them in several hands so that the dough doesn’t get soft from the juice, or freeze them in batches.
Ingredients for “Juicy Khinkali”:
Dough
- Wheat flour / Flour - 500 g
- Water – 200 ml
- Salt - 10 g
Ground meat
- Minced meat (Beef 350 g + pork 150 g) - 500 g
- Onions - 200 g
- Cilantro - 20 g
- Mineral water - 1 glass.
- Spices (0.5 tbsp salt 0.5 tbsp cumin 1 tsp ground black pepper 0.5 tsp ground chili pepper 0.5 tbsp suneli hops 0.5 tbsp Caucasian Salt seasoning) - to taste
Cooking time: 120 minutes
Number of servings: 2
Recipe for “Juicy Khinkali”:
For me, the main difference between khinkali and dumplings is not the shape, but the aroma from the spices and the spicy broth inside. Therefore, there are a lot of spices in the minced meat. 0.5 tbsp. spoons of salt 0.5 tbsp. spoons of cumin 1 teaspoon ground black pepper 0.5 teaspoon ground chili pepper 0.5 tbsp. spoons hops suneli 0.5 tbsp. spoons of “Caucasian Salt” seasoning. 20 g cilantro (can be replaced with dried)
Previously, for me, the biggest difference between restaurant khinkali and homemade khinkali was the dough. In good khinkal ones it was like rubber, shiny, thin and did not tear. But homemade ones or bad cooks turned out like dumplings - the dough was soft, burst, and didn’t hold the juice. And they didn’t keep their shape, but turned into some kind of manta rays. I had to work here. The most important thing is that the dough should be very dense, almost inelastic. The recipe proportions for finely ground flour are almost ideal.
I start mixing the dough in the food processor, but it is still not homogeneous and I am already kneading it with my hands. If suddenly you get a sticky ball right away, then add flour, the dough should be dry and not stick to your hands at all. Place the bun in the refrigerator for 1 hour.
Grind the onion in a blender with a glass of water, cilantro and all the spices.
Once you take the dough out of the refrigerator, add the mixture to the minced meat and mix thoroughly. The consistency should be similar to semolina porridge. They say that it is undesirable for the meat to be left with onions for a long time, so you need to sculpt it right away.
The dough is very tight, it is difficult to roll it out thinly with a rolling pin. In almost all khinkal shops I use machines for rolling out dough. That is why they turn out so even and smooth. On the left is a small bowl - experienced chefs taught how to make khinkali easier for non-professionals, more on that later. There is almost no flour on the board, because the dough does not stick at all. A small handful of flour to dip the bottom of the finished khinkali.
We take dough a little larger than a ball for this type of tennis. Carefully roll out the dough quite thinly into an even circle, about the thickness of an envelope with a sheet in it. It should shine through slightly in the light. Using a machine I reduce the thickness 2-3 times. It cannot be too thin, otherwise the juice can quickly pass through the dough, and there is a high probability that it will tear during cooking.
Sprinkle the bottom of the bowl lightly with flour and cover with our sheet of dough and lightly press it inside. Be careful not to damage the dough with your nails.
Add half a tablespoon of minced meat. And here I added a little of my own. I really like to have a lot of broth, so I freeze beef broth in molds in advance (then the salt in the minced meat is halved) or just ice. I put half an ice cube in the middle.
And put another half tablespoon of minced meat on top.
Now the most labor-intensive part is making khinkali. There are quite a lot of videos on Youtube with tips on how to sculpt. Hands must be dry. We begin to move the khinkali counterclockwise. With the index finger of the right hand we make a fold along the entire height of the wall, connecting to the left, where we rest against the thumb and index fingers of the other hand. Here you just need to get used to it.
There should be at least 10 folds. Close the neck of our workpiece, slightly lift it by the very tail and twist/squeeze the dough over the minced meat. Must be uniform.
Leave a 2 cm tail, cut off the rest with a knife. We check that there are no holes or holes. Dip the bottom into flour.
Place the finished khinkali on a dry, non-sticky, smooth surface. If you want to freeze, it is better to place them in batches of 8-10 pieces (so that the juice does not have time to seep out) on a board into the freezer and after they are frozen, transfer them to a bag. There is no need to rush, otherwise you might end up with a big khinkal kolobok. I like to quickly (they often help) put together 25 pieces and immediately send them to cook.
It is necessary to cook in a large amount of water - during the cooking process, khinkali increase in size. It is better to cook 15 pieces in a full 5 liter pan. It is better to grease the bottom of the pan with vegetable oil so that the khinkali does not stick to the bottom. Bring lightly salted water to a boil over high heat, use a slotted spoon to make a whirlpool and begin to lower the khinkali. Holding the tail, quickly make one circle, lowering the khinkali halfway into the water, and release. You will see that the dough will immediately turn white.
When the khinkali float to the surface, reduce the heat slightly. Try not to disturb them again, the dough is thin, it may burst and then goodbye broth. Cook fresh khinkali for 7-8 minutes after dipping them in water. Frozen - 15-17 minutes.
Remove with a slotted spoon very carefully and immediately place in deep plates. Sprinkle freshly ground black pepper on top. It is often thought that khinkali is eaten with wine. But Georgians have told me more than once that they eat them with strong drinks. Hold the khinkali carefully by the tail, helping from below with a spoon. Bite off the side of the dough and drink the juice. Then you can take 50 grams and enjoy juicy meat with minced meat. There is no need to eat the tails, you will need them to count how much khinkali you have eaten. It’s a pleasure to eat them and you can fit a lot of them.
As you can see, the khinkali are juicy and have a lot of broth.
Khinkali (classic recipe)
Khinkali is a dish of Georgian cuisine. They say that it was invented by the wife of a warrior who, due to a wound, could not chew. Then the wife finely chopped the meat and made khinkali. Juicy, aromatic, very tasty!
Ingredients:
- Flour - 500 grams
- Chilled water – 250 grams
- Beef – 600 grams
- Onion – 1 gram (large)
- Zira – 1 teaspoon
- Red pepper - 1 teaspoon (not heaped)
- Cold water - 450-500 Milliliters
- Cilantro - 1 bunch
Number of servings: 4-5
How to cook “Khinkali (classic recipe)”
For the dough we will need: flour, cold water and salt.
The ratio of flour and water is 2:1. Sift the flour onto a work surface, make a well in the center, add water and salt. Gradually mix flour with water. Knead into a tight, plastic dough. Cover it and leave it in a cool place. Meanwhile, make the filling. For minced meat, take beef with fat, a large onion and cold water. Grind the meat in a meat grinder through a large wire rack. Chop onion and cilantro. Salt to taste, add pepper and cumin. Knead the minced meat thoroughly. To make the khinkali filling juicy, a sufficiently large amount of water is added to the minced meat. Knead the minced meat thoroughly again and place in a cool place for half an hour. Roll the dough into a sausage and cut into equal 15-17 pieces, approximately 40g each. Roll each piece into a thin cake the size of a saucer. To make it easier to form the khinkali, place the flatbread on a saucer. Place 1-1.5 tbsp in the center of the cake. l. minced meat, gather the dough into folds in a circle. According to tradition, a khinkali must have at least 19 folds. Pinch the folds in the center and press tightly so that the broth does not leak out during cooking. Tear off part of the long tail or cut it with a knife. This will leave part of the tail so that you can take the khinkali by it while eating. Boil water, add salt. Stir the water to create a whirlpool. Drop the khinkali in one at a time and continue stirring with a wooden spatula to prevent them from sticking together. Cook over high heat for 15-20 minutes until they float tails down. Use a slotted spoon to catch the khinkali, sprinkle with black pepper and serve. Bon appetit! They eat khinkali with their hands, holding the tail. Carefully bite off the side and drink the meat broth, leaving the tail. Sources
- https://povar.ru/recipes/gruzinskie_hinkali-45790.html
- https://povar.ru/recipes/hinkali_v_duhovke-22330.html
- https://povar.ru/recipes/hinkali_s_syrom-22332.html
- https://www.povarenok.ru/recipes/show/155645/
- https://povar.ru/recipes/hinkali_klassicheskii_recept-45937.html
[collapse]
Cooking features
If you think that homemade khinkali is something similar to dumplings, then you are mistaken. There is a significant difference between these dishes. For example, for khinkali, the filling is prepared not using a meat grinder, but by hand - the meat must be chopped into small pieces. According to real chefs, this meat filling acquires a special taste.
The classic khinkali recipe does not necessarily contain only one meat; you can add vegetables, mushrooms, and cheese to it. It is also difficult to imagine this dish without the taste of cilantro - Georgians always add it to their favorite treat.
The dough is prepared from three components. All you need to do is flour, salt and water. And you should also add hot pepper - this is the rule of the national Georgian dish, but you don’t have to follow it if peppered food is contraindicated for you or you simply don’t like it.
Cooking real khinkali correctly means not only mixing the ingredients in the right proportions. There are also cooking rules. Cook the treat in a large saucepan, adding just a couple of pieces at a time to boiling water. Cooking a large amount of khinkali can cause them to stick together.
Experienced Georgian chefs believe that care must be taken when sculpting each product. When making a bag with filling, the edges of the dough need to be connected, making folds. There are 18–19 such wrinkles in an ideal product. This art may not be possible the first time - don’t be discouraged, the ability to make elegant bags of meat comes with experience.