Greetings, my dear readers! This year there were a lot of peas, and I decided to preserve them. Canned green peas are a universal preparation for any housewife. I make soups with this product, add it to main courses, vinaigrettes, and even prepare green sauces.
The taste of this preparation is much better than from the store. Plus it is much more environmentally friendly, because you yourself will know what product you will cook from and what ingredients to add. By the way, Russia is one of the largest producers of this product!
The plant contains a lot of dietary fiber, easily digestible vegetable protein and important vitamins. The calorie content per 100 grams of canned peas is only 40 kcal, and adding sugar and salt increases it slightly - up to 67 - 75 kcal. Therefore, it can and should be eaten when losing weight. In canned form, it retains most of its beneficial properties. In this article you will find simple recipes.
A simple recipe for preparing canned green peas according to GOST
My friend's mother shared this recipe. She adds this preparation to her signature salad. The dish always turns out very light and melts in your mouth. The preparation is prepared without vinegar, and the peas are so tender and slightly sweet. The method for preparing preserves is suitable for both a pressure cooker and a home autoclave. Be sure to try it, because it uses only 2 ingredients.
You will need:
- 1 kg of peas;
- 1 liter of water;
- 1 tsp salt.
How to cook:
1. Take peeled fresh peas and place them in jars. Leave 2-3 cm of free space in each container.
2. Fill the jars with boiling water, add 1 tsp. salt per liter of water. Close the jars with lids and shake.
3. Pour 5-7 cm of liquid into the pressure cooker and place the jars there so that they are above the water level.
4. Place the pressure cooker on the stove and let the steam release for 7-10 minutes to completely remove the air. Then close the valve.
5. Sterilize for 40 minutes. After turning off the heat, keep the pressure cooker closed for another 15-25 minutes.
Do you know how peas are useful? It contains 40% more vitamin C than cranberries. And the entire group of B vitamins.
No additional processing
This option is suitable for people who do not want to spend several hours canning beans. But the method has a significant disadvantage. If the workpiece is not subjected to heat treatment, the likelihood that botulism bacteria will settle in the marinade increases. To prevent this from happening, vinegar is added not to the water, but directly to the jars themselves with ready-made peas. The product will have a sour taste, so it is recommended to add this preparation only to salads.
The marinade contains:
- salt – 15 g;
- water – 1 l;
- sugar – 10 g.
Additionally, take 20–25 ml of vinegar for each half-liter jar.
Young and juicy peas are washed and filled with cold water. After boiling, simmer on the stove for 25–35 minutes, reducing the power to minimum. Cook in an enamel pan, stirring occasionally. But be careful not to crush the grains. Remove when the liquid has evaporated.
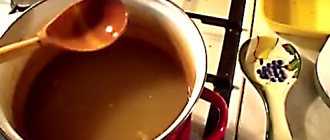
While the peas are cooking, prepare the brine. Sugar and salt are poured into boiling water. You can add a few peas of allspice for flavor. Simmer the marinade for 10 minutes, stirring with a wooden spatula until the dry ingredients dissolve.
Boiled peas are poured into jars with a slotted spoon or a plastic spoon. Pour boiling brine and pour 1 tbsp into each container. l. vinegar. They seal it and after cooling, hide it in the basement.
Important: If sediment appears at the bottom of the jars or the marinade becomes cloudy, it means that botulism bacteria have entered the peas. Such preservation, as well as specimens with swollen lids, cannot be eaten. It's better to throw it away and not risk your health.
Young bean grains can be preserved in several ways. With bay leaf and tomato juice. With cloves and allspice. With vinegar and sugar. The main thing is to add acids to each marinade that neutralize botulism bacteria. And carefully sterilize jars, because dirty dishes are a source of germs and the cause of swollen lids.
how to can corn for the winter
Green peas, canned like in the store
For lovers of store-bought canning, this recipe is definitely for you! It exactly replicates the taste of food from the counter. Although many people are already wondering, is it possible to eat food from the supermarket without harm to health? Using this option, you can easily prepare a healthy and tasty preparation.
ARTICLES ON THE TOPIC:
- How to prepare pickled peas for the winter at home - 4 simple...
- Cucumbers pickled with mustard seeds - 4 recipes for crispy cucumbers for the winter
- Pickled watermelons for the winter - 5 recipes for delicious canned watermelons
Ingredients:
- 1 kg of peeled peas;
- 1 liter of hot water.
For 1 jar, volume 750 grams:
- 1 tsp salt;
- 1 tsp Sahara;
- 1 tbsp. vinegar 9%.
Step-by-step instruction:
1. Boil the peeled peas. If the grains are young, 10-15 minutes will be enough. Cook the more mature ones for 20 minutes. The water in the pan should cover the beans.
2. Prepare the container and sterilize it in the microwave.
3. Place the peas in containers so that there is 2-3 cm of free space. Add 1 tsp to each. salt and sugar, pour 1 tbsp. vinegar 9%.
4. Fill the jars with hot water to the top and close the lids.
5. Take a clean pan and place a towel on the bottom. Place the jars in a saucepan and fill with water up to the level of the peas. Boil the jars for 20 minutes.
Use a little trick. To increase the boiling point, add 100 g of salt to the pan.
Then remove the containers and cover with a towel, leave until completely cool.
Fast way
If you don’t want to wait several days until the green peas are infused and ready to eat, then this canning recipe is perfect for you. For this you will need the following ingredients:
- green pea;
- water;
- salt;
- granulated sugar;
- lemon acid;
- vinegar.
The first step is to sort out the peas and get rid of any damaged or wormy beans. Then they need to be peeled and placed in a saucepan. Pour in water twice as much as peas, and cook the beans over high heat until they boil. After this, the heat should be reduced and the peas should be allowed to cook for another half hour. If the peas burst or squash during cooking, they should be removed from the pan using a slotted spoon and discarded, as they will make the marinade cloudy.
Now we can prepare the marinade: to do this, boil one liter of water in a saucepan, adding sugar and salt in a ratio of 1:2, and also add a little citric acid.
Place the peas in a colander to get rid of excess liquid, then place them in pre-sterilized half-liter jars and pour hot marinade on top. Add one teaspoon of vinegar to each jar and cover them with lids. Construct a water bath and heat the almost finished peas in it for at least 40 minutes. After this, you can roll up the jars with lids, wrap them in towels and let them steep until they cool. You can eat these peas within a day or two after preservation.
How to pickle green peas for the winter at home?
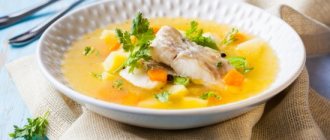
This recipe is suitable for those who do not like adding vinegar to rolls. The workpiece turns out very tender. With these peas you can easily prepare delicious and healthy chicken puree soup. It comes out with a rich taste. Add to salads and use to serve other dishes.
For a 1 liter jar take:
- peeled peas;
- 1 tsp Sahara;
- 1 tsp salt;
- 1 liter of water.
Step by step recipe:
1. Cover the peas with water. The water should completely cover it. Add salt and sugar. Mix everything.
If you are making more jars, increase the ingredients proportionally.
2. Cook over medium heat for 30 minutes after boiling.
3. Drain the water from the pan and strain it through cheesecloth.
4. Place the grains in a jar, fill with strained liquid.
5. Place the containers in the pan, cover with lids. Fill with warm water to the middle of the jars. If you have a liter jar, then boil for 40 minutes. If the jars are 0.5 liters, boil for 20 minutes.
Turn the finished preserve upside down and leave until completely cool.
How to close green peas for the winter without sterilization - video recipe from YouTube
At first glance, it may seem that it is easier to buy peas in a store than to can them at home. But if you have a lot of peas in your garden or happen to buy a lot of them, then why not prepare them for future use? It's very simple.
No need to buy additional devices or products. They are all simple and you probably already have them in your kitchen. This product is many times tastier and healthier than store-bought. After all, you prepared it from proven ingredients, with love.
Take the article to your social networks and use it for your health! I wish you success! See you soon!
The benefits of green peas
Green peas are considered one of the first food crops that people began to grow. Archaeologists are confident that this happened about 5,000 years ago in China or Egypt.
Green peas are not only famous for being low in cholesterol, saturated fat and sodium, but also rich in manganese (36%), copper (12%) and phosphorus (16%). It is a good source of vitamin A (22%), ascorbic acid (32.5%), vitamin B6 (15%), vitamin K (44.6%) and folic acid (21.6%). It also contains dietary fiber that is beneficial for digestion (30.3%).
- For heart. This beneficial property of green peas is due to the high content of folic acid, vitamins B6 and K, and lutein. The listed nutrients are rightfully considered the main protectors of the heart and blood vessels. By eating green peas at least 4 times a week, you reduce the risk of coronary disease, hypertension and atherosclerosis by 22%.
- Against cancer. One glass of peeled peas contains 10 mg of coumestrol, a powerful antioxidant that inhibits the growth of cancer cells. It is especially effective against stomach cancer. In addition, the product is rich in anti-tumor phytonutrients.
- Digestive benefits. High doses of protein and fiber in this culture help regulate the rate of metabolic processes, promote the digestion of heavy foods, break down starch into simple sugars, improve intestinal motility, and prevent constipation and diarrhea.
- For bone health. Green peas can provide up to 50% of the recommended daily value of vitamin K and a good dose of manganese. These substances strengthen bones and prevent their calcification.
- For good vision. Lutein (a natural plant pigment) and vitamin A in the product nourish the organs of vision, protect against cataracts and macular degeneration, and protect the retina from damage.
- For weight loss. Green peas are a low-calorie product with a lot of fiber. It promotes a quick feeling of fullness and cleanses the intestines of toxins. Try adding it to heavy, fatty meals to help you eat less without feeling hungry.
Preparation
1. Rinse pea pods, collected approximately 10-12 days after flowering, in water. Then open each of them and separate the peas into a container. Be patient, as this process of shelling peas takes a lot of time.
2. Pour the peeled peas into a washed, clean jar up to the shoulders - do not completely fill the jar with them.
3. Pour warm water into a saucepan or saucepan and place a jar of peas in it. Try to pour in water so that the jar is almost submerged in it - a little more than the middle of the container. Then pour water up to the shoulders and into the jar itself, add salt and granulated sugar. There is no need to add any other seasonings.
4. Cover the jar with a lid and place the pan on the stove, bring to a boil and reduce the heat to low, simmering the preserve for about 25-30 minutes. During this time, the peas will change color and become bright green. After the specified time, lift the lid and pour in vinegar.
5. Remove the jar from the water and immediately screw the lid on or seal it with a seaming wrench.
6. Wrap the jar in a towel or blanket and let it cool for 6-8 hours. The longer the peas take to cool, the less likely it is that your seamer will explode.
Transfer the finished, cooled canned peas to the cellar or pantry for storage. The shelf life of this product is no more than 1 year!
Beneficial properties and harm of canned green peas
Modern methods of processing and preservation make it possible to preserve all the beneficial properties of peas that they had in fresh form.
That is why canned peas contain a sufficient amount of vitamins A, B, C, as well as microelements - magnesium, calcium, potassium. In addition, after preservation, it retains a large amount of natural sugar, starch and dietary fiber.
When consuming, do not forget that excessive consumption can lead to heaviness in the stomach, so you should not overeat it.
Brain pea varieties are used for canning because they are the largest and tastiest. But canned green peas can not only be purchased in the store, but also prepared at home. Let's look at the most popular recipes for cooking green peas.
Cooking tips
Anyone can cook canned green peas - we've put together a whole selection of useful tips to help you cope with the task! Even if you are a novice housewife, inexperienced and not seasoned in kitchen battles, you can achieve great results.
Let's learn how to properly can peas! Please pay attention to the following parameters:
- Choose small jars - half a liter is enough;
- Pay attention to the volume of the cooking pan - the appropriate volume of liquid covering the grains should fit;
Take young green pods with tender grains - they allow you to achieve the desired taste. Old hard peas leave sediment during cooking and make the taste unpleasant;- Before canning peas for the winter, be sure to check each grain from the pod - throw away the spoiled rounds, select smooth, beautiful and light green kernels;
- If the kernel bursts during cooking, carefully remove it with a spoon, otherwise the liquid will become cloudy;
- A simple way to determine if it is ready is to take out the grain and see if it has wrinkled. If the peel becomes wrinkled, then it’s time to preserve the product in jars;
- Did you have to stop harvesting? Blanch the kernels and freeze until you decide to preserve green peas for the winter;
- You can try the product only three days after screwing on the lid.
We also recommend: Centenary Egg
If you are prepared for the cooking process, it’s time to learn how to preserve green peas correctly with your own hands. Believe me, soon you will be able to surprise your family with a delicious snack!