How to cook
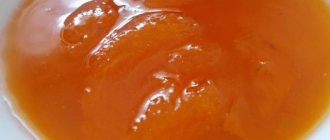
Cook jellied meat
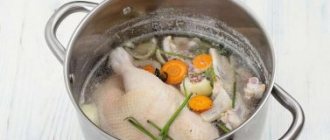
- Cut the knuckle into 2 parts (this makes it easier to put in a pan). Rinse, scrape. Place in a saucepan and cover with cold water. Boil.
- It boils - skim off the foam. Reduce heat to a low, even simmer. Add peeled onions, peppers, and bay leaves to the broth. Cook the jellied meat for 2 hours under a closed lid over low heat (it should boil, but not too much)..
- Add the breast (on the bone) and a bunch of greens. Boil. If foam appears, remove it. Add a little salt. Continue cooking under a closed lid for 2-2.5 hours after boiling. Meat in jellied meat should be covered with water by 2 fingers (3-4 cm) to prevent it from getting dry. If there is not enough water, add boiling water (otherwise there will be nothing to pour into the meat in the molds when the jellied meat is cooked).
- 30 minutes before the end of cooking, check the broth for saltiness. Add salt if necessary.
Disassemble the jellied meat
- Remove the meat from the jellied meat and place it in a colander. It is convenient to place a colander over a pan of jellied meat so that the broth from the meat can drain into it.
- Place some of the meat on a flat plate and begin disassembling the jellied meat (with a fork and knife). Break the meat into fibers and place them in a large container for jellied meat (add a little broth into it so that the meat does not dry out).
- Add garlic and pepper to the meat (if you want) and pour in the broth (through a colander so that spices and onions do not get into the jellied meat).
- Place the remaining meat into smaller containers (I got 1 large rectangular container for jellied meat and 2 small bowls).
Cool the jellied meat and let it harden
- Cool the jellied meat in the molds at room temperature. Cover with a lid or foil and refrigerate for several hours. The freezing time for jellied meat may vary. Even if you put it in the freezer, it won't immediately set into jelly. Need time. I usually make jellied meat in the evening. I leave it in the cold overnight and by morning the tasty and aromatic jellied meat is ready!
- Store only in the refrigerator.
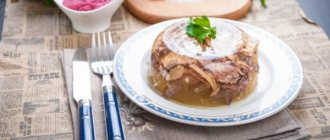
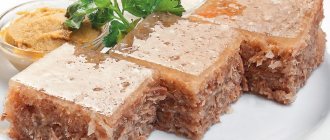
A freshly cut piece of delicious jellied meat! Give me horseradish! )))
Everything you need for jellied pork legs with chicken The meat part of the jellied onion, garlic, dill, pepper, salt, bay leaf for jellied carrots gives the jellied a beautiful golden hue, celery gives a wonderful aroma Cook the jellied strain Strain the broth Separate the meat into fibers Place the meat in form Fill the meat with broth
Jellied meat can be decorated with rings of carrots that were boiled in it. Leave at room temperature until the jellied meat cools, and then cover and put it in the refrigerator.
A piece of delicious jellied meat with vegetables and green onions!
Lunch of jellied meat with potatoes and tomatoes
An excellent tasty and satisfying lunch was made from jellied meat, potatoes and tomatoes
Festive jellied meat made from pork legs, knuckle, beef and chicken.
Why festive jellied meat? Yes, because you always want to cook for the holidays and not skimp on it, so to speak, for the material. It's a holiday!!! Walk like that. So we will cook jellied meat using all the abundance of meat, pork, beef, chicken.
Go! We will need:
- Pork legs - 2 pcs.
- Pork knuckle - 1 pc.
- Beef shank - 1 pc.
- Beef meat - 1 kg.
- Chicken legs, thighs - 2 pcs.
- Onions, carrots - 1 pc.
- Parsley root - 1 pc. (not for everyone)
- Bay leaf, allspice, peppercorns, garlic, salt - according to your individual taste.
How to cook jellied meat - the process itself
1. Place the chopped and, as previously written, washed pork and beef meat into a large saucepan. (we’ll wait with the chicken for now, let him live for now..).
2. Fill with cold water, preferably filtered, or better yet, spring water. The water should cover the meat by 4-6 cm.
3. Place the saucepan on the fire and wait (watch, don’t leave) until the water boils. By the time it boils, scale will form in the pan. We scoop it up with a spoon and throw it away.
4. Reduce the supply of fire! We look into the pan and do this (by turning on the fire) so that the water does not boil, but moves a little, this will be correct. For another 4-7 minutes we stand and shamanize over the pan, skim off the foam. There won't be much foam, since the meat was pre-soaked. We tell ourselves how great we are, give ourselves credit, cover the pan with a lid and we can leave the kitchen for 3 hours.
From time to time you can look into the pan, stir the mixture a little, make sure that the water does not boil away, you should not add it. Well, if something goes wrong and the water has boiled away, you can add a little hot water from the kettle. (but this no longer counts...)
5. 3 - 4 hours have passed and it’s time for the chicken to dive into the common pot. Throw it into the pan, cover the lid and cook it all for another 2-3 hours.
6. Don't forget! An hour and a half before it’s ready, add onion, carrots, laurel, pepper, parsley or celery roots, grated garlic, and salt into our vat.
Important! How to salt jellied meat? Jelly likes more salt. You may then notice that if you taste the broth based on the salt, it may seem quite salty to you.
But when it is ready, frozen, you will feel that there is not enough salt, you should add. So, I always add a little more salt than enough.
If the water still disappears, add it hot from the kettle before salting. You still need the broth.
The total cooking time is 6 - 7 hours. To check whether the broth is ready or not, you need to check it for stickiness. Let's scoop up a tablespoon of liquid, put it on a stand, and let it cool down. Dip your index finger and thumb into the spoon, connect your fingers and what should happen..? They should stick together. Well, not like superglue, but still.
7. The next step in preparing jellied meat. Using a slotted spoon, place all the meat on a large plate. Let it cool down.
8. At this time, you can strain our broth using gauze. We fold the gauze into 3 rows and pass the broth through it. What remains is thrown away. By the way, we also throw out all the root vegetables. As my Caucasian friend told me, they took all the harmful substances from the meat and are to be destroyed; they cannot be used.
9.As the broth cools, you can periodically remove fat from its surface. Here, whoever likes the finished dish. I like it to have fat on top, but some people can’t even see that fat.
10. When the meat has cooled down, handle it with your hands; it is important to remove small bones. Divide evenly among plates. I don’t use chicken skins and don’t put them in jellied meat (again, not for everyone).
11. Fill everything with broth and mix.
How to beautifully pour jellied meat into plates
Look, you can get rid of this in different ways.
- A layer of meat - carefully the broth - again a layer of meat.
- A layer of meat (pork, beef) - broth - a layer of chicken meat. (this is a perversion, but it’s possible...)
- Layer of meat - broth. (without stirring).
- Meat - slurry - let it harden - add decorations - slurry again and let it harden.
Here, you can experiment as you like, but it is important to note that all this takes time. I gave tips.
12. Next, cool the plates with liquid jellied meat to room temperature and put them in the refrigerator to harden. Under no circumstances should you expose it to the cold, otherwise you will gnaw on the meat icicles. (about a new dish...)
13. The most responsible activity! We are waiting for everything to freeze. Usually everything is ready overnight.
That's it! And it’s not difficult at all, right?
Now I will also give some of the best recipes for homemade jellied meat. I would like to note that everything can be done as described above. The only thing that will differ in the recipe is the ingredients and only a little explanation.
Features of cooking
In classical cooking, there is a difference between jellied meat and aspic (the latter is considered a great delicacy). If you want to cook jellied tongue, ham or fish, you will need a separate portion of gelatin. For prefabricated jellied meat, if you have chosen the right meat, you do not need a single gram of gelatin: the dish will set on its own due to natural gelling components. They are found in pig hooves, ears, beef tails or the cartilage of old chicken.
Anyone who has ever cooked jellied meat knows that the main thing is to have plenty of time. You need to cook it no later than a day before the intended feast. Approximately 6-8 hours will be required for cooking, and the same amount for the jellied meat to harden. However, this is the only problem: housewives do not have any other difficulties, such as how to cook jellied meat. The dish takes a long time to prepare, but there is nothing particularly difficult about it.
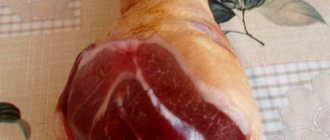
From pork knuckle and pork feet
The knuckle is the leg of a pig, or rather its drumstick (or forearm, respectively). That is, in essence, it is a leg with a decent piece of meat - the same ham. Knuckle is a convenient option for jellied meat in every sense. First of all, you don’t even have to think about gelatin or agar-agar, because the broth based on this piece of meat will turn into jellied meat on its own.
In addition, you don’t have to take fillet of meat, because there is enough of it on the shank. And one more interesting point - the broth based on this part turns out to be the richest, you can even check it literally by touch. If you prepare the broth correctly, everything else is a matter of technique.
Ingredients (for 8 servings)
- 1 pork knuckle;
- 2 medium onions;
- 2 medium carrots;
- 3 medium cloves of garlic;
- salt and pepper, dill - to your taste.
You can also take these - they will make the broth even stronger. For this amount, it is enough to take one leg, soak it in cold water for several hours, chop it in half and cook along with the rest of the meat.
Jellied meat is a properly cooked and well-congealed broth. So we need to properly prepare the broth itself.
Recipe step by step
- First, it is advisable to soak the shank in cold water so that it softens a little. And then rinse thoroughly and cut off all the meat from the bone.
- Now the main stage begins - we start cooking the broth. The shank and meat are placed in a fairly large, voluminous pan and filled with water so that it covers the contents at least a finger's width.
- Bring everything to a boil and immediately put it on low heat. The broth will now be cooked in exactly this mode - the water barely gurgles, the meat is gradually boiled. At the same time, remove all the foam.
- 4 hours after boiling, add chopped onions and carrots and all the spices.
- And after another hour (i.e. only 5 hours from boiling), add finely chopped garlic and immediately turn off. If you put it in earlier, the aroma will evaporate.
- After turning off, remove the meat and remove the bone from the broth. And we turn the meat into minced meat - either in a meat grinder or by hand. By the way, if you chop it with a knife, then our jellied meat will be more appetizing - tangible pieces of meat will fall on your teeth, not mush.
- Well, now you need to turn the broth into jellied meat. We take the pan to the refrigerator or to the balcony. Leave for several hours, or better yet overnight. Of course, it is better to serve beautifully served jellied meat on the holiday table. To do this, take the molds and pour the broth into them. Place the meat and take it out to the balcony or into the refrigerator.
This step-by-step recipe for jellied pork knuckle can be considered basic. After all, if you wish and for interest, you can add other vegetables, as well as other meat, to the dish. But jellied meat is always served with mustard and horseradish, and garnished with herbs.
How to properly prepare jellied pork knuckle and turkey at home
We usually prepare jellied meat in winter. It can be taken outside at this time to freeze.
Interesting: Instant crispy lightly salted cucumbers
Ingredients:
- Pork knuckle 1 pc.
- Idea neck 2 pcs.
- Onion 1 pc.
- Carrot 1 pc.
- Garlic
- Salt
- Boiled egg 2 pcs. (For decoration)
Preparation:
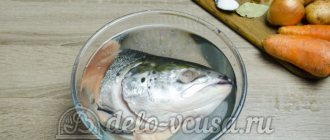
We take the pork knuckle, chop it in the middle, and get to the meat so that it can cook well.
The knuckle was washed well, but that’s not enough. Soak it in cold water for 4 hours. During this time, all the blood will come out of it; in the future, the broth will be transparent.
Pour 2 liters of water per 1 kg of meat. To improve the taste, add 2 turkey necks, a carrot and an onion.
Put it on the fire and start cooking. Total cooking time is about 4 hours
Until the broth boils, watch and remove the foam that begins to float on the surface. If it is not removed, it will affect the transparency of our future jellied meat
As soon as the broth boils, turn the heat to low so that it gurgles a little. The broth for jellied meat is cooked over low heat so that it barely stirs.
After 4 hours, we’ll see if the meat separates from the bones, then the broth is ready, if not, then it needs to boil some more. Half an hour before cooking, add salt and garlic to taste to the pan.
Our jellied meat is cooked, the bones are falling away from the meat
We strain the broth so that not even a small bone gets into our future dish. We disassemble the meat, separate it from the bones and cut it into medium pieces.
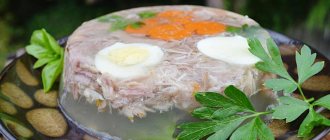
For beauty, cut the carrots into slices and place them on the bottom of a bowl prepared in advance for jellied meat. We will also place boiled egg slices on the bottom.
Meat cleaned from bones, mixed with pork and turkey, cut into pieces
Place the meat on top of the carrot and egg; you don’t need a lot of it so that there are pieces of jelly and frozen broth left.
You can also add a few pieces of egg and carrots for beauty, in case we don’t turn the jellied meat over for some reason
Pouring broth
Fill everything in the bowl with broth
Place the prepared jellied meat in the freezer or in the refrigerator for 4 hours; if it does not harden, let it sit longer. Usually, jellied meat freezes for the same amount of time as it takes to cook.
We take it out, the jellied meat has frozen well and is slightly covered with fat on top. Remove it carefully with a spoon.
Before serving, turn it over onto a plate and garnish with vegetables. The jellied meat is ready, you can eat the natural product
If you buy fresh homemade meat for jellied meat, the jellied meat will be noticeably tastier. But that's at your discretion
Ingredients
- Pork knuckle - 1 piece
- Chicken - 2 legs
- Onions - 2 pieces
- Bay leaf - 4 pieces
- Allspice peas - 8 pieces
- Salt - 1 tablespoon
- Celery root - 1 piece
- Fragrant herbs (dill, parsley, basil) - a bunch
- Carrots - 1 piece
- Water – 2.5-3 liters.
Cooking time - 5 hours
How to make jellied meat from shanks and chicken
Rinse the legs as well. Place everything in a saucepan, add water and put on fire.
You need to take a large saucepan of 4 or 5 liters.
When the meat boils, be sure to skim off the foam. Cook the jellied meat over low heat, the water in it should boil slightly without splashing out. The lid on the pan should be almost closed, opened half a finger.
We wash the onions under running water and throw them whole into the meat, along with salt, bay leaf, and allspice.
I added dried dill, parsley and basil; if you have fresh herbs, it’s better to add them. We clean the celery root and rinse it under running water.
Cut the celery root into large pieces. We wash the greens under running water, chop them finely and put it all in a saucepan. Cook for 3.5 hours.
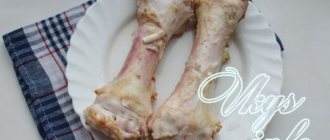
When the meat is cooked, take it out and let it cool a little.
Strain the remaining broth through a sieve to leave a clean, transparent broth without herbs or seasonings.
You can prepare another dish from the pork knuckle, and separate the meat from the leg and cut it into pieces about 5 centimeters in length and up to 1 centimeter in width. If desired, you can cut it smaller, but this is most optimal.
If, when serving, you will turn the jellied meat over, then place decorations on the bottom of the jellied meat molds, this can be a sprig of greenery, a carrot flower, green peas, canned corn, pieces of a boiled egg. Place the meat on top and pour in the broth. If you serve it in the form, then first the meat, then the broth. And then we put decorations on top.
When all the ingredients of the jellied meat are laid out in forms, we put it in the refrigerator until it hardens completely. If you doubt that the jellied meat will harden, you can add a gelling compound. But since we cooked the broth with pork knuckle, it will solidify perfectly.
Our jellied meat is ready. You can serve it garnished with fresh herbs and mustard or horseradish. Not a difficult, beautiful dish that turns out very tasty. It is especially popular in the summer during the heat and is a traditional New Year's dish for Russians and Ukrainians.
vkys.info
Category:
How to beautifully serve jellied meat from the knuckle
Whatever knuckle jellied recipe you choose, your appetizer will be the center of attention! But you can up your gastronomic stakes if you can present your creation in an original way!
- For any jellied meat, serve horseradish and mustard in vases with a spoon.
- Pour the jellied meat into deep small soup bowls. Before serving, lower the bottom of the plate into boiling water for 20-30 seconds and carefully turn it over onto a serving plate.
- To make it very, very aesthetically pleasing, first we put design elements of carrots and boiled eggs, fresh leaves of herbs, into soup plates and pour broth to a couple of centimeters of the height of the plate.
Place in the refrigerator to harden for 30-40 minutes. And put the meat on the frozen layer of broth and put it in the cold again for final hardening.
It is very beautiful to serve jellied meat in the form of all kinds of figures. You can use the same molds for cutting out shapes that we use for baking cookies. In this case, pour the jellied meat into small plates or shallow containers. After the jellied meat has completely hardened, cut out the figures.
How to cook delicious transparent jellied pork knuckle
If you want to make jellied meat tasty and transparent, proceed using the secrets of experienced housewives. As a rule, a step-by-step recipe describes the cooking technology, but is silent about some nuances. Read my tips carefully, and then you can avoid common mistakes.
- Don’t be lazy and drain the first broth after boiling, fill the shank with cold water again and proceed to the main cooking of the jellied meat. The procedure will reduce the calorie content of the dish and get rid of the not too pleasant greasy aftertaste.
- After cooking, immediately remove the foam, otherwise the jelly layer will not become transparent.
- Do not let the jelly boil too much - it will not cook faster, but the broth will become cloudy.
- Do not salt the jellied meat right away!
- Do you doubt whether the jellied meat will freeze? If you want to ensure that the jelly hardens, cook with gelatin. In this case, you don’t need to add other meat ingredients.
- Don't skip the extra spices. In addition to the traditional garlic, pepper and bay leaf, add any dry herbs.
How to cook jellied meat with shanks and legs - general principles
Preparing the main ingredients involves cleaning them thoroughly. It is better to scrape the skin and hooves with a knife, or you can use a brush. If the product is not very pure, then it is better to tar it over the burner of a gas stove and then clean it. Next, it is advisable to soak the legs and shanks in cold water and only then put them on the stove.
Cook jellied meat for 4 to 8 hours. But usually 5-6 is enough. For the jelly layer to be transparent, be sure to remove the foam from the surface. The finished legs and shanks are cooled and pitted. The pulp is chopped and mixed with chopped garlic. The broth is filtered and poured over the meat. Jellied meat freezes at temperatures from 1 to +6°C, on average about 10 hours.
Jellied pork and chicken knuckle
Absolutely the same jellied pork knuckle and chicken that was described in the previous recipe can be made not only in a bottle, but also in the classic way.
In this case, the meat is distributed evenly among the dishes, bowls or containers, pieces of carrots, garlic and parsley leaves are placed on top, and then the whole thing is poured with the strained broth. After hardening, you will get an excellent jellied chicken and pork knuckle.
Recipe with pork and turkey
The option for preparing jellied meat with turkey is no different from preparing such a dish with chicken. Only half a carcass will be enough this time. The weight of turkey meat should be the same as the shanks. In this case, the broth for jellied meat will be rich, and the taste will be even more delicate than that of the finished product with chicken.
Recipe for jellied knuckle
What you will need for cooking:
- kilogram of pork knuckle;
- two onions;
- garlic cloves – 3-4 pieces;
- half a teaspoon of allspice in peas;
- 3-4 bay leaves;
- 1 small spoon of salt.
It will take at least a day to prepare. Calorie content per 100 grams is 230 kcal.
How to make jellied pork knuckle:
- Before you start cooking, place the pork knuckle in water and leave it there for 1 hour;
- After this, we cut the meat from it into large pieces, leaving the skin and bones;
- Place the meat, skin and bones in a container and add one and a half liters of water;
- Peel the onion, place the whole peeled onion in a container along with the meat;
- Place the container on the stove, turn on medium heat and leave to simmer;
- Add salt, black peppercorns, bay leaf. Remove the foam from the surface;
- After everything starts to boil, reduce the heat level;
- Let the meat cook for 4 hours. During this period, it will be completely cooked, the remaining meat will move away from the bone;
- Peel the skin from the garlic cloves and cut into thin slices;
- After this, place the meat in a colander and leave to cool;
- After this, it should be cut into small pieces, and the remains should be cut off from the bone. If desired, you can grind it with a meat grinder;
- Next, mix the pork with garlic and place in cups;
- After this, fill everything with strained broth;
- For beauty, you can put a piece of carrot, half a boiled egg, or green peas on the meat;
- Leave to stand until completely cooled;
- Then we put it away until it hardens completely in a cool place on the balcony or in the refrigerator.
Learn how to prepare simple pizza dough correctly.
The recipe for vegetable stew with zucchini and chicken is just to lick your fingers! Read how to cook.
There's a post ahead, but that doesn't mean the kitchen should be sparse - try our selection of recipes for fried pies with potatoes.
Beef and chicken jellied meat
Tankerok
Delicious beef and chicken jellied meat with delicate transparent jelly is not greasy, with a slight aroma of garlic. It is not necessary to add gelatin for it to freeze well.
- 1 kg beef
- 1 kg chicken (legs, breasts)
- 1 kg chicken feet and necks or 1 kg beef legs (butter)
- 1 onion, peeled (remove only the top layer)
- salt, garlic (to taste)
- bay leaf (about 5-7 leaves)
- peppercorns (about 20 peas)
- 2-3 liters of water
Jellied meat with gelatin, more like jellied meat. The jelly turns out to be too stiff, so I don’t add it, but cook the jellied meat using meat products, which during cooking add stickiness to the broth (natural gelatin). These are either sinewy beef legs with large oils, or chicken legs and necks, although the latter are a bit of a hassle. You can cook jellied meat from pork legs and tails, but it turns out fatty and looks more like brawn.
We wash the meat products well and soak them in cold water for several hours. If you are using beef legs, when purchasing, ask them to chop them into small pieces in order to fit them into a large pan as compactly as possible.
Wash the meat products again and fill with cold water. The water should only slightly cover the meat. Cover with a lid and bring to a boil. If necessary, remove the foam. Reduce the heat to low and leave the meat to cook for 6-7 hours (the broth should only gurgle slightly). An hour before the end of cooking, salt the broth, add the onion (remove only the top layer of husk and cut off the dried roots, rinse well), bay leaf and pepper. The onion skins give the broth a nice flavor.
At the end of cooking, the meat should be almost completely separated from the bones. If you drop a little broth on your fingers, you should feel sticky (if you squeeze your fingers, they “stick together”). If there is too much broth and not enough gluten, cook the jellied meat for another hour, but without a lid, slightly increasing the heat so that excess moisture evaporates. Turn off and let cool slightly to room temperature.
Remove the pieces of meat from the broth. The broth itself must be strained well. I put gauze in a large sieve (it needs to be rinsed very well), folded 2-3 times. Strain the broth into another pan. If you get any pieces of meat while straining, then also remove them and put them in a bowl with meat. Gently squeeze the gauze and its contents into the pan with the broth and then throw it away.
We prepare the forms in which the jellied meat will harden (we wash it and dry it well). Now you need to disassemble the meat. Separate the pulp from the bones, divide into small pieces and place on the bottom of the molds. It is necessary that chicken and beef meat be mixed. There should be no seeds left in the mold. Be careful. I don’t put films, cartilages and veins in jellied meat. If the jellied meat was cooked with the addition of chicken paws and necks, you need to sort the meat more carefully.
We taste the cooled broth, if there is not enough salt, then add some salt (hot broth always seems saltier than cold broth). Squeeze out 1-3 cloves of garlic (as you like). Mix well. Pour the broth into the molds with the meat using a ladle. Mix lightly with a spoon so that the meat is evenly distributed, and leave the molds on the table until they cool completely. Then we put it in the refrigerator. A good jellied meat will begin to solidify on the table.
Bon appetit!
Published in the Cold appetizers category Tags: beef, chicken
« Breaded chicken thighs
»
Jellied pork (beef) knuckle
Jellied meat (aka jelly) is a meat dish with Russian roots, which was served on days of celebration in rich families with hot sauces or horseradish. It is based on broth, to which finely chopped meat is added (most often it is chopped with a knife, less often a meat grinder is used).
Jellied meat can be prepared from the meat of any domestic animal or poultry that has undergone a long cooking process (at least 4 hours). This dish is especially tasty if you make it from different types of meat. For example, jellied pork and beef. Various parts of the animal containing gelling (thickening) substances are suitable for it: head (entrails), legs, pig ears, tail, drumstick (knuckle). Many housewives add gelatin or agar-agar to the prepared jellied meat to thicken it. But, if you cook the meat in a small amount of liquid, this will not be necessary, since the broth will already be thick.
Products
For jellied meat you will need the following ingredients:
- pork and beef knuckles without skin – 1 pc. each;
- carrots - 1 large root vegetable;
- onion - 1 medium or large head;
- ground pepper;
- peppers in peas (allspice and black) – 8-9 pcs.;
- salt;
- garlic - a small head.
The preparation time for homemade jellied meat from the knuckle is 10-12 hours.
Preparation
Step-by-step photo recipe for jellied knuckle:
1. Rinse both shanks thoroughly under cold running water. Peel and rinse the onion and carrots. Place all these ingredients in a saucepan, cover with cold water, add peppercorns, salt and place over high heat. Add a bay leaf if desired. Do not add too much water; the broth may turn out thin and empty (low-fat and non-sticky).
2. After the water boils, reduce the heat and remove the foam that has formed on the surface with a spoon with holes. Cook the shanks with spices for four hours with the broth simmering at low simmer. Remove the cooked meat from the pan and separate the tender flesh from the bones.
3. Grind the meat using a knife or a meat grinder with a not very fine grid. Peel the garlic, grate it (the finer the better, so as not to crunch on your teeth) and mix into the minced meat.
4. Season the minced meat with pepper, adding a little strained broth in which the meat was cooked. Add salt if necessary. Mix thoroughly.
5. Place the finished minced meat in containers no more than a third of their volume.
6. Pour in the strained broth and stir. You can put thinly sliced boiled carrots on top. Or immediately mix the minced meat with the desired amount of broth in a large cup or pan, and then place it in small containers. Do what is most convenient for you. Cover the containers with lids, leave on the counter until completely cooled, then put in the refrigerator to harden.
7. Remove the layer of fat that has formed from the surface of the frozen jellied meat, cut into segments and serve. Jellied meat made from pork and beef shanks with horseradish or mustard is especially tasty. However, even without these seasonings the dish is simply great!
Bon appetit!
receptino.ru
Popular recipes
- Pollock stewed in tomato sauce
- Marinating rabbit and hare meat
- Chicken fillet baked with vegetables and cheese
- Goose baked in the sleeve
- Blue whiting baked in the oven
New recipes
- Buckwheat with fish and mushrooms
- Beef and zucchini cutlets
- Chicken wings in tomato-mayonnaise sauce (in the oven)
- Muffins with minced chicken and sausage cheese
- Smelt stuffed with mozzarella (in the oven)
Features of preparing aspic
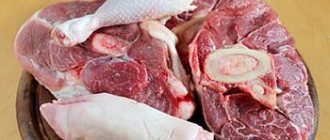
- As I already said, for the jellied meat to freeze well, you need to take pork legs, shanks, beef shanks, turkey or chicken legs. It is in the legs that the highest content of collagen substances is found. And also in pork skin. For the meat part of the jellied meat, you can use any meat you like.
- But it’s even more important that the legs are fresh and well-seared and cleaned. When purchasing, pay attention to the color of the meat. And also, of course, the smell. Poorly scraped legs, with traces of soot, can absorb a burning smell, which will subsequently be transferred to the finished dish.
- Before cooking, the meat and legs should be chopped into pieces up to 10 cm in size. Rinse, add water and leave to soak for 3-4 hours.
- After boiling, drain the first water, add new meat and cook until done.
- Pour excess water into the pan. So that you don’t have to add more later when the liquid evaporates during the cooking process.
- When cooking the broth, it is advisable to immediately bring it to a boil, and then cook it over low heat. Within 4-6 hours it will be ready even in the largest pan.
- Take spices to your taste, but be sure to include allspice and black peppercorns, a few cloves of garlic and one unpeeled onion. Of course, you need to wash it thoroughly first.
- Distribute the finished meat over the bottom of the molds, pour in the strained broth and let cool completely. Then you can put it in the refrigerator.
Step-by-step preparation
- Wash 1.5 kg of pork knuckle well. Take legs with a lot of meat. Place the shanks in a saucepan with a capacity of at least 5 liters. Add a peeled onion (1 piece), cut into 4 parts, and 2-3 bay leaves (wash in advance). Add 5-6 peas of allspice. Pour 3-3.5 liters of cold drinking water into the pan. The pork knuckles should be completely covered with water. Place 1 tablespoon of table salt in the water. Take regular rock (non-iodized) salt, or you can use sea table salt.
- Place the pan over high heat. Bring to a boil, reduce heat to low. Cook until the meat is cooked, periodically skimming off any foam that forms. Boiling lasts approximately 3-4 hours. The exact time depends on the age of the animal from which the meat was obtained. The finished shanks can be easily pierced with a knife. The meat comes off the bone easily. Transfer the cooled meat to a plate. Cool the meat and broth to room temperature (you don’t have to wait, but start disassembling the meat at a temperature acceptable to you).
- Strain the broth through a sieve into another pan. Taste the meat broth for salt. If necessary, add more salt (to taste).
- Remove the bones from the shanks. When disassembling meat, be careful not to leave small pieces of bones in the meat.
- Separate the pieces of meat into fibers. Transfer to a saucepan with broth. Grind the skin and fatty meat with a meat grinder or blender. You can just chop it finely. Place the meat mixture into the pan. Stir well.
- Peel and finely chop 3-4 cloves of garlic. Pour the chopped garlic into the pan with the preparation. Stir.
- Pour the resulting mass into molds and plates. Place in a cool place to harden. This jellied meat freezes within 2-3 hours. No gelatin is used in this recipe.
- Cut the jellied meat in molds into squares or rectangles of the size you need. Place on a platter or plates in portions, decorate, and serve.
If you don’t like cloudy jellied meat, then exclude point No. 12 from the recipe. Finely chop all the meat with a knife, place in molds, and carefully pour in clear, strained broth.
Let it harden in the refrigerator. In this case, you will get a layer of meat with a transparent layer of jelly from the meat broth. Did you know? To decorate the jellied meat, beautifully chopped pieces of boiled carrots, chopped green onions, dill leaves, parsley (finely chopped greens) are placed in a layer of broth in a mold.
You can add canned green peas, canned corn, multi-colored pieces of bell pepper, and other products. When cooking jellied meat, various herbs and spices are used, at your discretion. If you end up with more jellied meat than you need, the excess product can be frozen (in a bag, in a mold). For further use, the jellied meat taken out of the freezer is defrosted in the refrigerator, heated and poured into molds again. Do not bring the dish to a boil or re-cook it. The jellied meat may not freeze.
Beef and chicken jellied meat without gelatin
To prepare we will need:
- One beef leg
- half a chicken
- and 10 chicken legs
- salt - 1 tablespoon (slightly incomplete)
- allspice - 4 - 5 pcs.
- ground black pepper
- one carrot
- one onion
- bay leaf - 2 pcs.
I’m not talking about weight, it can be different, but after reading the article to the end you will understand the essence of the recipe. I will use an 8 liter aluminum pan. Because with prolonged languishing, the enamel can chip. You can use stainless steel. The main thing is to select a pan and place the meat so that the parts do not stick out above the water level, much less the pan.
Jellied meat recipe:
First of all, we rinse our meat products well under running water.
If desired, cut off the burnt areas of the chicken legs. I personally cut it. I used to cut off my claws, but now I don’t.
Place all the legs in a large saucepan, then add water so that it is 1 - 2 cm above the bones and meat.
Place on the fire and bring to a boil, and simmer over high heat for several minutes.
Then drain this broth, rinse the meat under running water and put it back into the pan.
We collect water and send it to the fire. If you feel sorry for this broth, you can pour it into a separate container and then cook soup or borscht. We don't do this, we pour it out.
How to cook borscht with beef step by step recipe with 18 photos
Why do we drain it so that the jellied meat is transparent? Now I add one onion. There is no need to clean it, but be sure to cut off the roots so that not a single particle of earth gets into the jellied meat.
When the jellied meat boils, reduce the heat. We don’t need the jellied meat to boil violently, we need to simmer it. As foam appears on the surface, remove it with a spoon. The transparency of the jellied meat also depends on this.
After a few hours of simmering, I add carrots, but they must be clean.
After simmering the jellied meat for 6 hours, add spices, bay leaf and black pepper. You can take 4 peas of allspice and the same amount of regular pepper, or then use ground pepper.
I also salt, adding one tablespoon of salt to our 8 liter pan, without a slide. In general, you can always try and add more.
Our jellied meat languished for a little over 7 hours.
How to understand that jellied meat is ready. We look at the meat, in our case it is a beef leg. When the meat comes away from the bone, and in the joint area, then the jellied meat is ready.
In general, it is recommended to cook jellied meat with beef for about 8 - 9 hours. I usually cook for about 8 hours, but in general I look at the meat.
Strain the broth, as there may be small bones in it.
We throw away cooked vegetables and chicken legs. There is no meat in them, and we added them for the sake of collagen.
Transfer the remaining parts to a bowl and let them cool slightly.
And then carefully sort it out with your hands and chop it with a fork. We need this not only for beauty, but also to remove possible small bones.
Now is the time to taste the broth and add ground pepper and salt to your taste. When we add ground black pepper specifically to the broth, and not to the pan during cooking, our jellied meat is more aromatic, not spicier.
Now place the meat on dry and clean plates or trays, pour in the broth and leave to harden in a cold place. We have a balcony, and on the balcony it’s just about 5°C.
The result is such a delicious jellied beef and chicken, made without gelatin. You can decorate with boiled carrots or herbs. You can also add garlic to the plate. We squeezed one clove of garlic through a press into half the trays, the taste is simply excellent and very aromatic.
As you can see, the broth turned out to be transparent, and pieces of meat are beautifully visible.
And this is what jellied meat looks like already on the plate, without a tray, well frozen and very tasty.
We prepared clear jellied meat from beef and chicken. Moreover, you can use any part of the chicken, not necessarily the back part. The main thing is not to forget to add legs for collagen.
And this option does not include chicken legs, but is also tasty and frozen.
Pork knuckle jelly with chicken in a bottle in the shape of a pig
Here is another very original way to decorate jelly for the holidays. It’s easy to prepare and the ingredients are all ordinary. It is the presentation of this dish that touches the guests. A very cheerful pig on a platter among lettuce leaves.
Bottles of 1 and 1.5 liters or more are suitable. Whatever container you take, that size will be the size of the piglet.
I took one pork knuckle and chicken parts. For decoration: 4 cloves and three circles of boiled sausage. The jellied meat will be very meaty.
What you will need:
Preparation:
- I will cook jellied pork legs exactly as in the first recipe. First, I soaked the pork for three hours in water.
- Then I set it to boil. I remove the foam as it appears. When the water boils, reduce the heat and cook for five minutes. I remove it from the stove and drain the water. I wash the meat and the pan. I fill it with clean water again. Let me remind you that we pour one and a half liters of water per kg of meat.
- Now we’re finally cooking. When it boils, carefully skim off all the foam and turn the heat to low. The jellied meat is cooked for 4-5 hours.
- When the meat is ready, but still falls off the bones, you need to add salt, carrots, onions and spices. The onion is washed, but the husk is not peeled.
- Cook for about another hour. I remove from the heat and use a slotted spoon to remove all the meat and bones. Let the meat cool. I strain the broth first through a strainer and again through a double layer of gauze.
- Finely chop the cooled meat. I look carefully to make sure there are no small bones left. You need to taste the meat and add salt and pepper if necessary. If desired, add a finely chopped clove of garlic.
- I carefully place the meat in a plastic bottle with a teaspoon and gradually add broth.
- The bottle is full. Cool to room temperature. Then I put it in the refrigerator for several hours. Even if she stands there for two days, nothing will happen to her. I take it out just before serving. Because the finished pig will already be on the table and can “swim”.
- Using scissors, I cut off the bottom of the bottle, and then cut lengthwise to the neck. This way I release the jellied meat from the bottle.
- From two circles of sausage I cut out ears from the third snout. I make slits on the piglet's head and insert ears into them. Two carnation buds are eyes. Two more are the nose. I attach the nose to the head with a toothpick.
- I place the piglet on a plate and garnish with herbs and halved tomatoes.
This pig with horseradish and mustard will be a good decoration for the holiday table. And it will delight all guests.
How and how long to cook jellied pork knuckle and legs in a slow cooker?
A slow cooker will help you prepare jellied meat. And although the cooking time will be approximately the same as in a saucepan, you still won’t have to constantly monitor the process. They just put everything in a bowl, filled it with water and left it to cook.
Be sure to remove the fat from the broth using the method described below and see how transparent your food will become.
- pork knuckle - 15.-1.7 kg;
- pork legs - 2 pcs.;
- onions - 1 pc.;
- carrots - 1 pc.;
- black peppercorns - 10 pcs.;
- garlic - 5-6 cloves;
- Bay leaf;
- salt.
1. For one and a half kilograms of shank you will need two pork legs. If you have more meat, then you should take more legs.
Soak the meat in cold water all day, changing the water every three hours.
2. Place the soaked meat in a multicooker bowl. Add vegetables, bay leaf, salt and pepper to this.
Pay attention to the color of the meat; after soaking it turned light pink.
3. Fill with cold, clean water. We set the “Quenching” mode and the time to 7 hours. Then we take out the meat and leave it to cool. We also catch vegetables and spices and throw them away.
4. Squeeze the garlic into the broth and heat it again, without bringing it to a boil, so that the garlic gives it its taste and aroma.
5. Separate the meat into fibers or cut into small pieces and place it on the bottom of the mold.
6. Line a colander with gauze and strain the broth through it so that you don’t get a piece of bone or garlic in the dish. Fill the molds with broth. We blot its surface with paper towels to get rid of the layer of fat on the surface of the jellied meat.
Just compare, the fat was removed from three molds with paper towels, but not from one. This is what it looks like when the jelly has hardened.
Beautiful, transparent jellied meat will decorate your table!
Jellied pork shanks and chicken favorite recipe
This is the jellied meat I love the most. Chicken meat makes the snack less fatty and improves the taste. If the shank is fatty, I take a chicken breast, but if I’m afraid that the jellied meat will not freeze well, I add a few wings as well. You decide for yourself, because using legs and thighs won't be a big mistake either. You can find out a few more recipes by going to another page.
Attention! It is permissible to replace chicken meat with turkey; the cooking technology will not change. If you decide, the best part to cook is the turkey drumstick and wings.
You will need:
- Water – 4 liters.
- Knuckle – 3 kg.
- Chicken – 1 kg.
- Onion – 2 heads.
- Carrots - a couple of pieces.
- Garlic cloves – 3-5 pcs.
- Bay leaf – 4 leaves.
- Allspice – ½ small spoon.
- Black peppercorns - the same amount.
- Salt – 2 large spoons.
How to cook correctly:
- Get started by preparing the basic products. If the drumstick is a farmer's one and requires processing, singe it, scrape it, and wash it. Soak for several hours, changing the water several times.
- Cut the drumsticks into pieces. Also divide the chicken into pieces. Place the meat in the pan.
- Fill with water, turn on the highest heat. After boiling, pour out the first broth, add water again so that its level covers the pieces. Bring to a boil, reduce heat to low.
- Cook for approximately 5 hours, without letting the broth boil too much.
- Add a whole onion and all the spices from the recipe list. Divide the carrots into pieces and add them to the broth. Add salt and adjust the taste of the aspic.
- After 30 minutes, check the jellied meat for readiness and turn off the stove.
- Disassemble the meat and distribute into trays. Chop the garlic cloves and place on top of the meat.
- Strain the broth and pour into molds. Use a spoon to skim off excess fat from the surface.
- Leave to cool on the kitchen counter first. Then refrigerate until completely set.
Advice! The dish will be tastier and more elegant if you add finely chopped green onions to it before it hardens.
Cooking jellied pork legs and knuckles with gelatin
Ingredients for preparation:
- pork knuckle 3 kilograms;
- pork legs - 6 pieces;
- carrots – 2 pieces;
- onion – 2 heads;
- gelatin – 30 grams;
- a little salt;
- garlic – 3 heads;
- black pepper, ground at your discretion;
- water – 5 liters.
Cooking time will be 24-30 hours, calorie content will be 240 kcal.
Let's start cooking:
- First of all, we wash the legs and shanks. It is better to soak the knuckle for 1 hour in cool water;
- The legs need to be cleaned of dirt with a knife;
- We cut the knuckle together with the legs into several parts;
- Place all the meat components in a container, fill with water, and place on the fire;
- In the meantime, peel the onions, wash the carrots well, and remove all dirt from their surface;
- We also peel the garlic cloves;
- After the liquid in the pan begins to boil, add coarsely chopped vegetables;
- Leave everything to boil over low heat for 3 hours. During this period, the meat should acquire a soft structure;
- Pour salt into the finished broth, add a few pinches of ground black pepper;
- All vegetables must be removed from the broth and discarded;
- Place the meat and leave to cool;
- Separately, put gelatin in the water, mix it with the broth and put it on the stove;
- Stir constantly during cooking to break up all the gelatin. Boil until boiling;
- Strain all the liquid through gauze folded in several layers. This will make the broth clear;
- Remove the meat from the bones and cut into small slices. Place the meat on plates;
- Fill everything with broth with gelatin;
- Place the plates in a cool place until completely frozen.
Design and decoration
10. I disassemble the cooled pieces of meat with my hands. I throw away all the pork and chicken skins and bones. I use a fork to break the meat into small fibers. I finely chop the garlic or press it through a press. I mix everything with garlic and pepper with ground black pepper.
11. Select dishes for decorating jellied meat. Do you need small, portioned molds or, on the contrary, large ones, of which there will be one or two for the whole table - decide for yourself. I have small trays, but there are also quite spacious ones. And everything is so clearly visible in them, both meat and flowers. I make both simple carrot stars and large roses. For roses, I cut the carrots into thin slices.
12. I begin to collect an artistic composition. In each tray I place a layer of meat on the bottom. Decide for yourself whether it will be a large layer. Do you want more meat or more jelly broth?
I decorate the top with flowers made from carrot “petals”. For decoration, you can use cucumber slices and hard-boiled eggs, in a word, whatever your imagination tells you. And the finishing touch is a couple of sprigs of greenery. You can use dill, rosemary or parsley.
There is also a nuance to be taken into account here. If you serve jellied meat inverted from a container onto a dish, then flowers and herbs should be placed at the bottom of the bowl, and pieces of meat on top. In large trays, flowers are on top of meat, and broth is on top of flowers.
13. All trays are filled with meat and decorated. The broth has already cooled down enough. Carefully, using a holey spoon, pour broth into all containers. I leave them until they cool completely. Then I put it away in the cold.
14. In the refrigerator, containers must be kept tightly closed. Jellied meat has the ability to absorb odors. And we don't need it. The next day you can try. I try to have as little fat on top as possible, but it is still there. I remove this layer of fat with a long, sharp knife.
15. You can serve it directly in a tray or cut it into portions. Or you can serve it beautifully on a platter. Only here it must first be thawed by lowering the form with jellied meat into hot water.
16 Jellied meat is placed on the table next to horseradish and mustard. They are inseparable friends. You can also cut lemon into slices with it.
The jellied meat turned out to be excellent. It is as strong as brawn and very meaty. I can say for the taste - eat, eat, eat... and you want more! And how happy I am with the transparency of the jelly layer, words cannot describe!
Delicious jellied pork legs in a slow cooker
A detailed video from Marina Petrushenko’s channel is also interesting for those who like to cook in a slow cooker. As you know, everything is prepared tasty, quickly and without any problems.
https://youtube.com/watch?v=NonLg7Bu6w4%3Fstart%3D21%26feature%3Doembed
This is how simple and amazingly tasty you can serve jellied meat for the New Year’s table. If my recipes were useful to someone, please write in the comments, I will be very pleased.
Thank you to everyone who cooked with me today! If you liked these simple recipes, click the social media buttons to save them on your page!