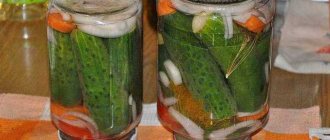
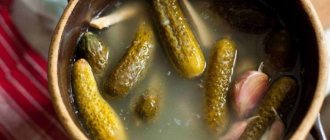
Pickled garlic heads with beets
The beets in the recipe are used primarily to give color to the garlic.
Depending on the amount of beets used and their variety, you can achieve either a soft coral or a rich dark red hue. This garlic can even be served on a holiday table. Ingredients:
- Garlic – 1.5 kg.
- Beets – 1 pc.
- Dried cloves – 6 buds.
- Black peppercorns – 10 pcs.
- Dill umbrellas – 3 pcs.
- Vinegar – 150 ml.
- Water – 4.5 l.
- Salt – 40 g.
- Sugar – 40 g.
Cooking process:
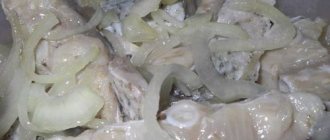
- Boil 2/3 of the specified volume of water (3 liters). When the water boils, place the very well washed heads of garlic into it. There is no need to peel the garlic and separate it into cloves.
- Boil the garlic in water for about 5 minutes, then drain it in a colander, and when the drops have drained, place the heads of garlic in a container with cold, or better yet, ice water.
- Peel the beets, wash and cut into pieces.
- Wash the dill umbrellas and place them in clean jars.
- Place garlic heads and beet slices into jars in layers until filled.
- The remaining volume of water is 1.5 liters. - Boil and use it to cook a marinade. To do this, throw peppercorns and clove buds into the water, add sugar and salt, and boil everything together for a couple of minutes. Then pour vinegar into the marinade.
- Pour the hot marinade into the jars and close the lids tightly. Garlic can also be stored under nylon lids.
This preparation should be stored at room temperature in a dark place for two weeks, and then put in the refrigerator. Within three days after placing the jars in the refrigerator, garlic can be consumed, and the snack can be stored in the refrigerator for months.
Cooking steps
I used winter garlic, you can also use spring garlic. Peel the garlic and rinse under running water. Place in a colander.
Fill jars of garlic with sunflower (or olive) oil. The oil should completely cover the garlic.
Place a lid on each jar. If you shake the jar with the preparation, the spices will disperse into the oil. The oil will take on a beautiful yellow tint.
It is recommended to store garlic in oil for the winter in the refrigerator under a closed lid for up to six months.
Happy preparing!
Garlic is not intended for long-term storage. After a couple of months it begins to rot or mold, and if it survives until spring, it sprouts or withers. But there is a wonderful way to store it - in glass jars. There are many options for such storage, we will look at all of them in this article.
The first thing you need to do to better preserve garlic throughout the year
– it’s time to dig it out. To do this, you need to know the ripening time of each individual variety. An overripe vegetable is more prone to rotting.
Another important factor
– landing time. Garlic can be spring (planted in early spring) or winter (planted in autumn). The first is harvested in August-September, the second in late spring or June, depending on the variety.
The main sign of maturation
– yellowing of the lower leaves, as well as cracking of the seed pod on the arrow.
Find out!
What can you plant after peas, and why vegetables are so important.
The best varieties of spring garlic for long-term storage:
- Aleysky;
- Gulliver;
- Abrek;
- Sochinsky 56;
- Gafurisky.
The best varieties of winter garlic:
- Alcor;
- Hermann;
- Reliable;
- Podmoskovny;
- Replicant.
In general, spring varieties tolerate long-term storage much better than winter varieties. They can last up to two years, maintaining their freshness.
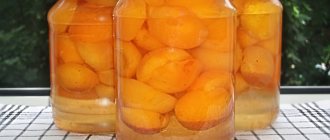
Pickled garlic with red currants
The unusual combination of garlic and red currant berries results in a very harmonious taste. The appetizer is bright, aromatic and moderately spicy. But you need to be prepared for the fact that the jars with the preparation in this recipe are sterilized, and at least 3 months must pass from the moment of preparation to the first sample of the dish.
Ingredients:
- 10-15 heads of garlic.
- 500-700 g red currants.
- 250 ml apple cider vinegar.
- 40 g salt.
- 70 g sugar.
- 10 black peppercorns.
Cooking process:
- Wash the garlic and, without peeling it, divide it into cloves.
- Rinse the red currant branches well with water, making sure that no leaves or debris remain. There is no need to separate the berries from the branches.
- From the total mass of berries, select approximately 200 g and place them in equal volumes in prepared jars.
- Add garlic cloves to the berries. They should be packed quite tightly.
- Place the remaining berries in a saucepan and add one liter of water. Place on the stove, add half the volume of sugar and salt, and add 10 peppercorns. Boil for 5 minutes.
- Reduce the heat slightly and mash the berries directly in the pan with a masher or other convenient piece of kitchen equipment. Boil the berries for about two minutes.
- After removing the marinade from the heat, strain it through cheesecloth and return the strained liquid to the pan. Add apple cider vinegar, remaining sugar and salt, stir and let it boil.
- Pour the marinade over the garlic and sterilize the jars for 10-12 minutes. This can be done either on the stove or in a slow cooker.
- Roll up the jars or close them with nylon lids, and after cooling, place them in a cold room or refrigerator.
Preparing garlic for the winter using cloves
Garlic pickled with cloves turns out very beautiful, and it is also convenient to prepare and eat. Strictly observe the proportions of the marinade in grams per liter.
Garlic, pickled, is very beautiful and also convenient for cooking and eating. Strictly observe the proportions of the marinade in grams per liter.
For marinating we will need:
- garlic - as much as you see fit;
- water – 1 liter;
- 9% percent vinegar – 100 ml;
- salt – 50 g;
- sugar – 60 g;
- peppercorns – 10 pieces;
- dill seeds - half a teaspoon.
- Peel the garlic into cloves. We wash and dry it.
- We carry out the process of sterilizing jars and lids.
- Place the dill seeds and black peas into the prepared jars and tightly pack the garlic cloves.
- Put water on the fire, add salt and sugar and boil for 2-3 minutes.
- Add vinegar to boiling water, let it boil and immediately turn off the heat.
- Pour the resulting boiling water into jars and seal them.
- We put finished products in the basement. The appetizer will be ready in a couple of weeks.
Important! Store-bought garlic often darkens when pickled, which is due to the large amount of pesticides and fertilizers in the composition, so for preservation it is advisable to take a naturally grown product.
Read also How to make a 4 wheel cart
Cold pickled garlic
This recipe does not require sterilization of the product in jars. Cold pickled garlic retains maximum beneficial properties and in winter serves not just as a snack, but as a natural immunomodulator. It can hardly be recommended as an independent dish, but it can enrich the taste of a wide variety of snacks.
Ingredients:
- 1 kg garlic.
- 600 ml water.
- 3 tbsp. l. vinegar.
- 4 tbsp. l. Sahara.
- 2 tbsp. l. salt.
- 8 black peppercorns.
- 10 buds of dried cloves.
Cooking process:
- Wash the garlic well, but do not peel the skin. It can be pickled with whole heads or individual cloves, as desired.
- Add marinade ingredients to a saucepan with water: salt, sugar, cloves and pepper. Bring to a boil and remove from heat. Then add vinegar. Cool the marinade to room temperature.
- Steam or sterilize jars. It is safer to sterilize empty jars, which can be done in the oven or microwave. In the oven, you need to sterilize washed, wet jars by placing them bottom up. To do this, you should select a temperature of 150 degrees, the sterilization time for 3-liter jars is 15 minutes, smaller containers are kept in the oven for 7-10 minutes. To sterilize in the microwave, you need to pour some water into the jars and put them on maximum power for 2-3 minutes. Large jars can be placed on their side, but also with water inside.
- Place heads or cloves of garlic into prepared jars and fill to the top with cooled marinade. Roll up the jars with tin lids, also sterilized in advance.
It is better to store the preparation in a cool room, and you can try it 2-2.5 months after preparation.
Storage
This stage of the marinating recipe is the final one, because the job is done and all that remains is to put away the jars with the delicious preparation for storage. When the jars with pickled cloves have cooled, we put them in a cool, dry place or in the refrigerator. You can eat pickled preparations after two weeks.
Garlic, even pickled, is a low-calorie product , because 100 grams contains only 42 kilocalories, but you can’t eat much of it fresh, and pickled garlic cloves for the winter, prepared according to this recipe at home, retains all trace elements and vitamins, except C, which is destroyed when heated.
You can also pickle garlic heads according to this recipe; you just need to carefully remove the husk from the head, without separating the cloves from the axis, and rinse thoroughly with cold water. Cooked pickled garlic heads should be stored in the refrigerator.
Spicy pickled garlic in soy sauce
This fiery appetizer is perfect for feasts that include strong drinks. In addition, this garlic will serve as an ideal addition to sauces, stews, soups and meat dishes. Soy sauce gives the snack a rich color, so it looks somewhat exotic.
Ingredients:
- 8-10 heads of garlic.
- 200-250 ml soy sauce.
- 8 pods of hot pepper.
Cooking process:
- Peel the garlic, separate into cloves, and wash.
- Wash the hot pepper, cut off the stems and cut into rings without removing the seeds. If you take pods of different colors, you will get a more colorful snack.
- Mix garlic cloves and pepper slices in one container, place the vegetables in sterilized small jars.
- Fill the jars about 2/3 full with soy sauce. You can use any sauce to suit your taste. Cover the jars with lids and leave for 4 hours so that the juice from the pepper and garlic releases, which fills the jars to the top.
- After the specified time has passed, carefully pour the sauce into the pan and place on the stove. Bring it to a boil.
- Pour the hot soy marinade back into the jars and close the lids. You can use the method of rolling with tin lids or store the workpiece under nylon lids.
The snack will be ready in a couple of weeks, and can be stored for up to six months.
Preparation for storage
Dig up the garlic, leaving the stems. They will be needed so that the head receives nutrients for some time.
Next, clear the soil with your hands and place it on a bed to dry for 4-5 days.
If the weather is rainy
, it is better to put the vegetable under a canopy or even indoors.
If the weather is too hot and sunny
, then the garlic will not like it either - burns are possible.
Drying indoors lasts 2-3 weeks.
The scales will begin to peel off and become thinner and more transparent.
To prevent the teeth from sprouting, the roots of each head are scorched over an open fire.
If you did not harvest the crop on time, then in order to avoid the appearance of rot or mold, it is advisable to perform the following procedure:
- Heat 0.5 liters of sunflower oil.
- Add 10 drops of iodine to it.
- Mix everything.
- Dip the garlic heads into the mixture.
- Dry in the sun.
We figured out the choice of garlic and its preparation. Now let's move on to the question of how to store garlic in a jar.
How to prepare pickled garlic for the winter
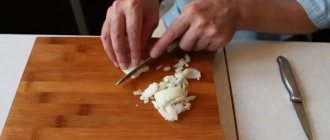
We select garlic heads with intact, not very large cloves for pickling. We peel the husks, trimming the bottom of each prong. Rinse with running water.
We steam small jars over steam, place the lids in a ladle with water and set to boil. In each jar we put a little dried dill and fresh herbs.
Fill the containers tightly with peeled garlic, shaking occasionally so that there are fewer empty spaces.
Pour water into a saucepan or ladle. Throw in the bay leaves and add dried thyme (or other aromatic herbs).
Add table salt, sugar and allspice peas or black pepper.
At a low boil, heat the marinade for several minutes until the sugar and salt crystals have completely dispersed. Pour in table vinegar a minute before the end of cooking the marinade.
Read also Chicken with oyster mushrooms
Carefully pour the boiling marinade into jars, pour enough to completely cover the garlic cloves. Immediately screw on the threaded caps or roll up the blanks with a machine.
Cover with a blanket or something warm for at least a day so that the workpieces undergo additional sterilization. Then we move it to a dark place with moderate temperature. Good luck with your preparations!
Today we will prepare pickled garlic for the winter without sterilization. Garlic pieces are present in all vegetable marinades. But, as a rule, they are ignored, taking only canned mushrooms or cucumbers out of the jars. If you try a thin piece of garlic that remains at the bottom of an empty bottle, for example, of pickled tomatoes, you are unlikely to like the taste. Whole pickled garlic cloves are a completely different matter: aromatic and crispy.