How to freeze parsley for the winter
During the season, I try to prepare more fresh herbs in different versions, and today I will tell you how to freeze parsley for the winter in three ways. For me, the most convenient way is to finely chop the leaves, put them in a bag and freeze. You can always get as much as you need without defrosting the entire package. The most practical way is to freeze the parsley into cubes in ice cube trays. And the fastest way is to freeze the greens in a bunch. Everything will come in handy: finely chopped leaves and cubes are added to various dishes a few minutes before they are ready, and whole branches will go into broths, soups, aspic, jellied meat.
Parsley recipe for the winter
Ingredients:
- Fresh parsley - several large bunches;
- tight bags;
- cling film;
- molds or ice container;
- chilled boiled water.
How to freeze parsley for the winter in the freezer in different ways
Regardless of which option suits you, the first thing to do is to untie the bunches and remove wilted, yellowed shoots, and tear off leaves with spots. Then place it in a kitchen sink filled with water, or in a large basin or bowl, where you leave it for a while. Replace the water and stir lightly to remove soil particles from the leaves and cuttings. Do this two or three times. Rinse clean greens with tap water and leave in a colander. 10-15 minutes is enough, do not hold it longer, the leaves will begin to wither. Place on a towel in one layer and roll up. The fabric will absorb the water and the greens will be almost dry, ready for further processing.
Freezing parsley for the winter in a bag
For this method, it is important that at the time of cutting the leaves are almost dry, without droplets of water. If they are wet, then in the freezer they will stick together into a lump, then you will have to break it or cut it. Collect dried parsley into small bunches. Cut off the stems. Chop the leaves finely, as you usually do for dressing.
Place in thick bags, regular or with a zipper. You shouldn’t tamp a large portion into one: firstly, it’s inconvenient to store, and secondly, even if you quickly get as much greenery as you need, some of it will have time to thaw, and after repeated freezing it will darken. Roll the bag or tie it and put it in the freezer. Be sure to sign so you don’t get confused later and add something else to the finished dish.
How to freeze parsley cubes in ice cube trays
The preparation process is the same as in the method above, but complete drying is not necessary - we will still fill the leaves with water. Lightly squeeze the parsley sprigs into a towel, cut off the stems, and chop the leaves themselves smaller than usual. It is not very convenient to place coarsely chopped greens into small cells and compact them. Place chopped parsley into ice cube trays and firm with your fingers. Fill to the brim with clean, chilled water (boiled or distilled). Place in the freezer for 3-4 hours. Remove the frozen parsley cubes from the cells, put them in a tight bag, label them and send them back to the freezer for storage.
Is it possible to freeze parsley in bunches for the winter?
The method of freezing a whole bunch of parsley is considered the simplest and fastest. The only condition is that the greens must be dry or almost dry. Clean, dried parsley sprigs with leaves should be collected in small bunches, so that they can be used in one, maximum two times. Place on a piece of cling film or in a plastic bag.
Wrap tightly, covering all sides. The result is thin rolls that can be stored without a container or other packaging. The application is exactly the same as fresh parsley: in broths, soups, bake fish, meat, chicken with herbs.
Frozen parsley is stored in the freezer for a long time - a year or more, until the next harvest. It is undesirable to defrost and re-freeze it - the pieces will stick together, darken, and the taste will deteriorate sharply.
Frozen parsley fully conveys the aroma and taste of fresh herbs. Using different freezing methods, you can prepare a healthy addition for a variety of dishes and at the same time save a lot on buying greens: in the summer it costs pennies, and in the winter it is much more expensive. I hope the tips on how to freeze parsley for the winter will be useful to you!
Wrap tightly, covering all sides. The result is thin rolls that can be stored without a container or other packaging. The application is exactly the same as fresh parsley: in broths, soups, bake fish, meat, chicken with herbs.
Product Features
The rules for storing parsley root and shoots for the winter are different:
- The above-ground part of the plant is harvested in June to preserve the aroma of parsley.
- The roots are harvested at the end of summer - it is at this time that the parsley root needs to be dried so that the vitamins are preserved in it for the long winter.
Ways to make winter semi-finished parsley products in your home kitchen:
- freezing;
- drying;
- canning with oil;
- pickling.
You can freeze parsley and store the aromatic plant in the freezer to enjoy the healthy greens during the winter months. There are three methods on how to properly freeze parsley for the winter:
- in cling film;
- in ice briquettes;
- in packages.
Procedure for how to properly dry parsley at home for frozen storage:
- Rinse the above-ground part carefully with cool running water and remove the coarsened part of the plant.
- Place in a colander or spread on cloth napkins, allowing the water to drain or be absorbed. You can use an electric dryer.
- Finely chop the dried stems and leaves, tear them with your hands or grind them in a blender. You can form bunches by twisting several plants together and tying them with thread.
- If you pack parsley in cling film: divide the green mass into portions, wrap, pack, and keep in the freezer at a temperature of -16°C.
- To prepare greens in the form of beautiful ice blocks, distribute the finely chopped raw materials into molds, pour warm boiled water into the recesses of the container, let cool and put in the freezer.
In the solid state of the crop, its healing characteristics remain active for up to 12 months and the piquancy of fresh herbs is preserved. Portioned ice cubes with herbs are dipped into broths and soups a few minutes before they are ready, and bundles frozen in cling film are used for preparing salads and are suitable for serving first and second courses before serving.
Important.
To preserve nutritional properties and vitamins, avoid re-freezing.
Advantages of freezing over other methods:
- preserves the shape, color and smell of fresh plants;
- preserves the healing characteristics and activity of microelements;
- saves time;
- stored for up to one year.
Harvesting parsley for the winter at home is a simple process. You just need to determine what is acceptable for yourself.
The root system and shoots of the plant are dried if it is not possible to make preparations in the freezer.
What is the best way to store root parsley for the winter in the refrigerator:
- Wash the plants and separate the roots.
- Dry on fabric for an hour.
- Cut the dried parsley into thin slices, bars or cubes.
- Distribute evenly on a tray in one layer.
- Place in the oven and dry with the door open for 5 hours (recommended drying temperature 50-60°C).
To store for the winter, you can dry the root parsley at normal temperature, leaving the slices in a well-ventilated area for about a day. After drying, place the parsley root in jars or any other containers with a tight lid.
How to dry herbs:
- Peel and sort the stems, separating the withered and crumpled leaves. Rinse.
- Finely chop or tear.
- Spread thinly on a tray.
- Leave in a cool, unlit place until the moisture evaporates naturally.
In order to prepare dried parsley in the form of greens or finely chopped roots, you can also use modern kitchen “helpers” - a microwave oven or an electric dryer. The smaller the plant shoots are cut, the faster the cooking process will be completed. When dried, root parsley or herbs can be stored for up to two years without loss of beneficial properties.
Important.
Do not allow moisture to get into the dried mass!
Just as in the case of drying the product, greens and root vegetables should be prepared separately. The roots should be cut as finely as possible with a sharp knife, but do not use a blender (otherwise additional moisture will be released from the plant). It is also good to dry the shoots on a towel or in an electric dryer.
Procedure:
- Rinse the glass jar and lid well in hot water and sterilize.
- Carefully place the resulting raw material in the jar, layer by layer, without squeezing or crushing the green mass.
- Pour any type of refined or unrefined oil into a container.
- Store parsley prepared in this way in the basement, cellar or refrigerator.
To preserve the finished product, the green mass must “sink” in the oil liquid by at least one and a half fingers!
You may be interested in:
An original way to prepare a green plant is to freeze it in butter in a chamber. For this:
- Gently wash the green part, chop it and lightly dry it.
- Distribute among the honeycombs of the ice container.
- Heat the oil until liquid and cool to room temperature, without allowing it to harden.
- Pour the green raw material into thick, frozen oil and freeze it in the same way as in the first method with water.
The main benefit of cooking greens with oil is that it preserves the pure flavor of the plant for a long time.
There are two main ways to pickle parsley for the winter:
- classic and fast - without heat treatment;
- canning in spicy brine.
Pickling parsley with salt without marinade is the easiest way. Suitable for both whole plant stems and for preserving the odors of finely chopped green mass.
Procedure:
- Separate the greens from the roots.
- Place whole branches or chopped raw materials in a sterilized glass jar. Finely chopped greens can be lightly compacted.
- Sprinkle with salt in a ratio of 200-250 grams of salt per 1 kg of parsley.
- Cover tightly and store in the refrigerator, cellar or cool place.
- To avoid molding, sprinkle the mixture with additional salt.
Pickling in a marinade is an original method for preparing parsley for the winter. To prepare you will need:
- parsley;
- salt;
- vinegar;
- garlic;
- Bay leaf;
- allspice;
- water;
- sugar.
Procedure:
- Wash the parsley, chop and dry.
- Sterilize the glass jar and lids.
- Place garlic (1-2 cloves), 3-4 allspice peas and bay leaf on the bottom of the jar.
- Prepare the marinade: boil water in a saucepan, add salt and sugar. Add vinegar, stir and remove from heat.
- Place parsley into jars, compact tightly, pour hot marinade.
- Sterilize jars with preparations and roll them up.
- Let cool. Store salted parsley in the refrigerator.
You can salt parsley by adding other herbs to the preparation - celery, dill. Recipe for vitamin dressing for salads and soups from parsley, celery and dill.
Ingredients:
- 1 bunch of young dill;
- 1 bunch of parsley (several varieties can be used);
- 3 stalks of celery;
- salt;
- pepper;
- vegetable oil.
Procedure:
- Wash the greens, dry them, finely chop them.
- Cut the celery stalks into cubes.
- Place in a jar, sprinkle with salt and pepper.
- Tamp well, pour in vegetable oil.
- Close the lid tightly.
The vitamin mixture is stored in the refrigerator for 4 - 6 months, suitable for salads, soups and main courses.
Important.
We suggest you read: How many beets can you eat per day?
The higher the salt concentration, the longer the product can be stored!
Parsley is an unpretentious garden plant used in cooking, cosmetology and folk medicine due to its content of beneficial microelements and appetizing spicy aroma. You can preserve parsley for the winter at home in various ways - freeze it fresh, dry it, and even pickle it in a marinade.
Parsley is an aromatic edible plant that can be grown both in open-air garden beds and in a plastic container on the windowsill. It is unpretentious and with minimal care produces several harvests per season. In cooking and folk medicine, all parts of the plant are used: the fleshy root and leaves.
Fresh leaves are added to:
- salads,
- hot dishes (first and second);
- in decoctions to strengthen hair;
- in lotions and creams;
- Together with the stem, smoothies and juice are made from them.
Root parsley is used in:
- cosmetology;
- vitamin complexes;
- broths and hot meat and vegetable dishes;
- folk medicine.
Parsley, which is selected for storage for the winter, must be freshly cut. It is better to buy it from trusted sellers on the market, rather than take it from the supermarket. Store-bought herbs go a long way from the garden to the shelves; storing parsley is often incorrect, so the greens lose some of their aroma and freshness.
When selecting greens for drying or freezing, you need to pay attention to the following signs:
- Fresh greens will be uniformly dark green.
- Parsley leaves should not be wilted.
- The bunch should not contain branches with torn leaves. Unscrupulous sellers remove yellow and rotten leaves, passing off old greens as freshly cut.
- Parsley should be free of visible dirt.
- If you crush a leaf in your fingers, you can feel the specific aroma of greenery.
Store-bought packaging does not allow you to examine and smell the bunch, so you should not purchase greens wrapped in film.
Greens can be frozen in a variety of ways, but before storing parsley frozen, it needs to be prepared.
The preparation process includes three stages:
- Treatment. Disassemble the parsley, discard wilted or damaged leaves, and trim the roots.
- Flushing. Do it in two approaches. First, rinse the greens under running water and then put them in water with salt. Salt helps remove nitrates and insects from the surface of the plant.
- Drying. Only well-dried greens are frozen. To do this, shake the parsley vigorously, and then spread it in one layer on a paper or cotton towel and turn it over until all the moisture has evaporated from the leaves and stems of the plant.
Selected, peeled, washed and dried parsley is ready to be frozen and stored in the refrigerator or freezer.
How to freeze parsley for the winter
Parsley is widely used in cooking because it perfectly enhances the taste of any dish. In addition, this product is extremely beneficial for health. It improves vision, increases hemoglobin, normalizes blood pressure and strengthens the immune system. It should certainly be present in the diet of an adult, as it protects against premature aging.
It can also help those losing weight, because it has the ability to speed up metabolism and also does not contain calories. What is important is that when frozen, it practically does not lose its beneficial properties. That is why housewives freeze this valuable plant in order to add it to soups, salads and stews in winter. At the same time, color, taste, and aroma are preserved.
Before freezing, it is very important to choose fresh parsley, preferably from your own garden. If this is not possible, then make sure that it has a rich green color and a pleasant smell.
The process of freezing parsley takes little time. This also requires very few materials. Next, we invite you to familiarize yourself with several ways to freeze parsley for the winter, which, however, are perfect for other varieties of greens.
The most convenient and practical, which involves freezing finely chopped parsley. First you need to rinse it well, shake it and dry it. Next, it is recommended to cut off thick stems that have no leaves and throw them away. Using a sharp knife, chop the parsley very finely on a cutting board. We pack it in small bags. It is very convenient that one is enough for a serving. Before putting the bags in the freezer, you need to squeeze the air out of them well.
We recommend reading: How to Ripe a Picked Pepper
The second method involves freezing the parsley in a whole bunch. This is the simplest option, but not the most convenient. The bunches need to be placed in plastic bags and placed in the freezer. It’s just important to do it in such a way that the entire bunch is consumed. If you cut a piece from it, there is a risk that the rest of the greens will melt.
This method involves freezing in ice cubes. To do this, chop the parsley, put it in ice cube trays, pour water on top and freeze. When the cubes are frozen, they can be transferred to a plastic bag. This method is very convenient, especially for those who will add parsley to soup. The only downside is that the cubes take up a lot of space, so this option is suitable for refrigerators with a large freezer.
These simple ways to freeze parsley will allow you to eat salads with herbs harvested from the summer all winter.
It can also help those losing weight, because it has the ability to speed up metabolism and also does not contain calories. What is important is that when frozen, it practically does not lose its beneficial properties. That is why housewives freeze this valuable plant in order to add it to soups, salads and stews in winter. At the same time, color, taste, and aroma are preserved.
Features of storing parsley and types of preparations for the winter
For every housewife there are recipes that suit her preferences and wishes. You just have to search a little. Creating suitable home conditions for preparations is not difficult. And the resulting seasoning compensates for all the effort expended.
The entire plant is harvested for the winter; there are not many ways to accomplish this task:
- Drying. The roots and leaves of plants are dried in the oven or in the fresh air.
- Freezing. The crushed parts of the culture are frozen and stored in the freezer.
- Marinating or salting. Chopped greens and chopped roots are pickled or salted.
- Oiling. The workpiece is mixed with oil and stored in the refrigerator.
You should choose a method of preserving the culture by studying the recipes.
Dried parsley
There is nothing difficult about drying parsley. It is enough to fulfill a few requirements, and everything will work out.
How to dry a plant and preserve the aroma is a question many housewives ask. Compliance with the requirements and rules results in parsley retaining not only its odors, but also its mineral components.
The advantages of this method are that the parsley loses weight and becomes more compact. And it is easier to store it, and it does not require special conditions.
To prepare green mass or roots for future use, they are washed and dried well. Then they sort through, removing unsightly, diseased and deformed specimens. At the end of sorting, the roots are cleaned.
The roots, depending on the size, are cut into circles or cubes. The prepared raw materials can only be dried. They do this in different ways.
On open air
This method takes a long time, but the effectiveness does not suffer from this. Greens are dried whole sprigs or chopped for immediate consumption.
To dry, it is placed on a plane, evenly distributed over the surface on which it is dried. The thinner the layer, the faster the raw material will dry. Lay out no more than 1 centimeter thick.
The greens collected in bunches are hung under a canopy or in another well-ventilated area. The leaves should hang down. It is advisable to exclude direct sunlight on the foliage, as it will turn yellow and lose its attractiveness.
The roots are also dried in the fresh air, cut into arbitrary shapes and covered with gauze to prevent insects. Periodically turning the pieces will speed up the drying process and eliminate scorching.
Depending on the accompanying conditions, the plant will have to dry from 5 to 20 days, not forgetting to periodically turn the raw materials to speed up the process.
In the oven
It doesn’t take much time to prepare the spice this way. The seasoning will dry out much faster than in the first case.
It is important here not to overdo it with the temperature, because the higher it is, the faster the roots and greens dry. But this affects the appearance and the complex of useful substances included in their composition.
The optimal temperature is 40-60 ⁰С. The washed and peeled roots are cut into cubes or slices and laid out on a baking sheet. The greens are laid out in sprigs or cut and distributed in a thin layer.
Dry with the door open, the approximate time spent in the oven is 5-6 hours. Finely chopped raw materials dry several times faster.
In an electric dryer
This kitchen assistant will always help out the housewife. You don’t have to do anything special, the roots need to be cut, and the green branches should be laid out whole.
Set the “For herbs” mode, and set the temperature to no more than 45 ⁰C. It is necessary to periodically monitor the process, changing places of pallets. It is difficult to indicate the exact time; it depends on related factors: air humidity, slice thickness and much more.
In the microwave
Place the parsley on a plate, preferably flat, and cover the bottom with a napkin. The power of the device is maximum. The time for which the raw materials are placed in the microwave is 2 minutes, then you should look at the appearance of the plant. If it is not dry enough, leave it for another 2 minutes. And so on until the mass reaches the desired state.
Pickling parsley
An effective way to preserve crops for the winter is to sprinkle them with salt. There are many recipes for its preparation. It is necessary to select the most suitable method.
The grass remains green and lush until autumn, which is why it is collected throughout the season. You will prepare it for the winter without waiting for the end of autumn; reserves of spices can be made in advance. All beneficial and taste qualities will remain unchanged, the main thing is that the plants are of high quality and healthy, and the leaves have a rich dark green hue. Many varieties of parsley are ready for harvest within 2-3 months after planting. Young first-year parsley is the most fragrant.
When greens and roots are to be harvested, it is better to dig up the plant in the fall, when the maximum amount of elements beneficial to health has accumulated in the rhizome.
When harvesting, the stems should be cut at the root; new branches will grow very soon. If you do this along the edge of the bush, the inner stems will grow better.
We invite you to read: Health benefits and harms of parsnips, contraindications, video
All collected parsley must be divided:
- leaves;
- roots - carefully remove dirt, rinse and dry.
Whether you bought parsley at the market or just cut it from the garden, you store it for some time, while protecting it from:
- oxygen access;
- direct rays of the sun;
- excess moisture and its loss.
A few tips won't hurt at all; they are simple but effective:
- Remove spoiled twigs and soil from the bunch, trim the stems, wrap tightly in parchment paper or a cloth napkin and place in a cool, dark place. Do not wash! 3-4 days of storage guaranteed.
- Fill a jar a third full with water and put a bouquet of parsley in it, you can cover it with a plastic bag on top and put it in the refrigerator. Change the water periodically. The greens will last up to 2 weeks.
- Sort through, but do not wash, place for a short time on a paper towel (or simply wrap in a napkin), place in a plastic bag (punch holes in it in advance) and put in the refrigerator.
- You can also wash it. Then you will have to dry each twig with a paper towel, lay it out on the paper until completely dry, put it in a container, close it and put it in the cold. A month of freshness is guaranteed.
Do not send greens for storage wet.
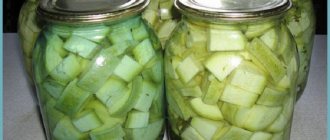
When storing parsley root in the refrigerator, without freezing it, without pickling it or pickling it, it is best to include it in a soup dressing, for example, bell pepper with the addition of various herbs. This preparation will be perfectly stored in the refrigerator.
There are quite simple ways to preserve it in normal home conditions. It is not at all necessary to experiment and try out each of the given recipes. You can use the one that seems most suitable and simple.
In any case, all the vitamins contained in the spice, its unusual taste and aroma will remain unchanged.
So, the options.
Freezing
Before you start freezing, you first need to untie the bunches and remove limp, yellowed shoots and leaves with spots. After this, keep the greens in water for a while, stir the parsley constantly, and change the water two or three times. Be sure to rinse the gas again under running tap water and drain it in a colander for about 15 minutes.
Place on a towel and roll it up. The spice, as a result, is almost dry and ready for processing.
Finely chop the parsley leaves before placing them in bags. To make it more convenient to store in the freezer, it is recommended to roll the pacts.
The main difference from the previous method is that the greens do not require drying. Remove the stems, chop the leaves into smaller pieces, place in molds, fill with boiled water to the brim, and then place in the freezer for 4 hours. Remove the frozen cubes from the cells and package them in bags for winter storage.
- With a bunch - this method is the fastest.
Gather the greens into small bunches to use once or twice later. Wrap each bunch tightly in cling film and store it that way.
Frozen parsley will keep in the freezer for at least a year. Freezing it again is undesirable, as this will significantly worsen its taste.
A simple option that allows you to preserve parsley all winter without freezing. The main condition is to dry in the shade and in a ventilated place; you will not be able to preserve the aroma of greenery under the influence of direct sunlight, and the leaves will turn yellow. It is easy to dry the greens in bunches: tie a few branches with culinary thread and hang them for a week.
Carefully separate the greens from the dried parsley branches and place them in a glass container. Should be stored under a closed lid.
Some people prefer to dry chopped greens. It is simply scattered on thick paper and placed in the shade or used in the oven for these purposes (no more than 50 ℃).
Pickling
People used salting as an option for long-term food storage when refrigerators did not yet exist. Salt is a natural preservative. Today it is not used often, but it will perfectly preserve all the properties of greenery and will not allow harmful microorganisms to develop.
Pickle the parsley. It's simple:
- Grind it (grate the roots).
- Add table salt 5:1 (spice/salt).
- Mix and place in glass jars.
Store in the refrigerator or other cool place.
In oil
In the absence of a freezer, it becomes necessary to do without freezing. Sometimes sunflower oil is used. They are poured with greens, dried, chopped and tightly packed in glass jars. And so that there are no air bubbles between the leaves. Keep the jars tightly closed and refrigerated.
The methods proposed above preserve the quality of harvested parsley. On the coldest days, there will always be aromatic dishes with summer seasoning on your table.
You can preserve parsley for the winter at home in different ways:
- whole in bundles or in a plastic container;
- in ice trays;
- in a plastic bag or in small portioned bags.
Each housewife chooses the method that will allow her to take some greens for cooking.
How to freeze parsley for the winter in the refrigerator
Parsley is not only an aromatic herb that can transform the taste, and when fresh it can also decorate any dish, it is also a whole set of vitamins and microelements necessary for human health.
Read on Dacha6.ru:
The easiest way to preserve this aromatic seasoning for the winter is to freeze it. This method is much more convenient than preparing it in oil or pickling (parsley will not lose its fragrant aroma and retain most of its beneficial substances).
Summer residents practice 3 main methods of freezing: chopped pieces, whole branches and in ice cubes.
Classic salting method
To pickle parsley we need the following ingredients:
- kilogram of parsley;
- 0.2 kg of coarse kitchen salt.
Read also: Blackberry compote for the winter - the best recipes for a healthy drink
Next, they begin to prepare the workpiece itself. The parsley is thoroughly washed and sorted. It is necessary to remove all damaged and limp leaves. Then all suitable branches are dried on a paper or waffle towel.
After this, all the leaves are cut and ground with prepared salt. The pulp is slightly crushed by hand. The main thing is that the salt is evenly distributed over all the pieces. It's time to fill the jars with seasoning. The pulp is poured into containers and lightly compacted. You don't need to fill the jar completely. You should leave a little space on top, which in the future will be filled with the secreted juice. For sealing, use ordinary nylon lids. They close the jars tightly and send them for storage in a cold place.
What kind of parsley is suitable?
For freezing, only bright green herbs should be selected, without diseases or mechanical damage. The plant must be fresh. For example, when stored in the refrigerator for 3 days, parsley loses up to 50% of its beneficial vitamins. For the same reason, it is not advisable to buy greens for freezing; it is better to use your own, freshly picked.
An important nuance: in most supermarkets, greens are deliberately highlighted to make them look fresher. You should not buy parsley for freezing in such places.
Preparatory work:
- The collected parsley must be cleaned - remove debris and all unusable leaves, cut off the roots.
- Soak the greens in salt water. It should cover the parsley completely.
- Gently shake off excess moisture from the parsley bushes and place them on a clean towel to dry naturally, turning them over periodically.
Greens prepared in this way are ready for freezing.
For freezing, 3 common methods are usually used: in bags, in ice cubes, in bunches. Let's take a closer look at each of them.
When choosing this method, it is extremely important to ensure that the greens placed in the bags are completely dry. Otherwise, the parsley inside will stick together into one icy lump, which will be difficult to split into separate pieces.
It is most convenient to store chopped greens in bags. To do this, parsley is collected in bunches, the stems are cut off and chopped. This option in winter is well suited for seasoning first and second courses.
You can use both regular cellophane bags and special cases with clasps (with a zipper). There is no point in stuffing a lot of greens into one bag. If you regularly remove frozen greens from the refrigerator, they will begin to partially thaw and spoil. You will use up a small package much faster, so there are much fewer problems with it than with a large one.
It is recommended to sign each workpiece so as not to get confused in winter about where everything is stored. Before placing in the freezer, the bags are rolled up and tied.
If you don’t have the time or desire to bother with a shredder, freeze the parsley as is, in bunches. The greens should be thoroughly dried first.
It is necessary to distribute the parsley among the bunches so that each of them can be used 1-2 times. The collected bundles are carefully tied with a large rope. Next, they should be placed (separately!) in plastic bags or wrapped in cling film.
These greens are perfect for adding to soups, baked fish, meat and chicken. Plus, whole bunches look more colorful than chopped parsley.
This method will save you from the need to thoroughly dry the parsley beforehand. Use standard refrigerator molds to make ice. Place chopped parsley in them, compact it and fill with water. As a result, in winter you will always have frozen portioned cubes with herbs on hand.
The filled mold with parsley is placed in the freezer for 4 hours, after which it is removed and the cubes are quickly transferred to plastic bags, which are placed in the freezer for permanent storage.
If the freezer of your refrigerator is already packed to capacity, then you can dry the parsley, preserving the vitamins and microelements contained in it to the maximum. With this method, the seasoning will also largely retain its fragrant aroma.
Drying should be done in stages:
- It is necessary to remove yellowed and diseased leaves and cut off the root.
- Next, the parsley is washed well and dried.
- Place parchment on a baking sheet, onto which the greens are spread in an even layer. All this is placed in the oven, preheated to a temperature of +60 C.
- To ensure that the parsley dries evenly, you need to stir it periodically.
In practice, freezing is much more convenient than drying. The latter method should be chosen only in cases where it is not possible to freeze greens.
For freezing, 3 common methods are usually used: in bags, in ice cubes, in bunches. Let's take a closer look at each of them.
Is it possible to freeze parsley for the winter?
Parsley contains many vitamins and microelements, which the human body especially lacks in winter. One way to preserve these flavorful greens is to freeze them.
This article will talk about how to freeze parsley for the winter. In addition, you will learn about why you should give preference to freezing rather than pickling or preparing in oil.
Frozen greens will retain their flavor, while pickled greens will lose it. You can freeze parsley:
- Shredded in bulk.
- In ice cubes.
- Twigs.
What are the benefits of parsley?
Traditional healers call this edible plant a vitamin bomb. It contains such valuable elements as
- aroma oils;
- vitamins: C, PP, E, K, A, B1, B2, B3, B5, B6, B9;
- minerals: potassium, calcium, phosphorus, magnesium, sodium, iron, zinc.
The nutritional value of parsley is minimal (45 kcal per 100 g), and the presence of dietary fiber (fiber) is maximum, so it can be used in dietary nutrition.
Note!
Parsley can be used to decorate a finished dish, improve the taste of soup and improve your health at the same time.
This plant has medicinal properties:
- Has an anti-inflammatory effect.
- Helps cope with depression.
- Improves metabolism.
- Strengthens gums.
- Positively affects the functioning of the thyroid gland, gastrointestinal tract and adrenal glands.
- Restores blood sugar levels.
- Prevents the development of cardiovascular diseases.
Using parsley you can get rid of anemia, chronic constipation, and problems associated with the menstrual cycle. For men, the root of this plant helps fight prostate diseases, and also improves erection and increases potency.
It is difficult to overestimate the degree of usefulness of greens, since the therapeutic effect on the human body is very great. The diverse influence of the constituent elements leads to an increase in overall tone.
The effects of parsley on humans are:
- improving the functioning of the adrenal glands;
- improving metabolism;
- anti-inflammatory effects;
- strengthening blood vessels;
- ensuring normal functioning of the brain;
- improving the body’s condition in diseases of the stomach and duodenum;
- stimulation of digestive enzymes;
- stimulation of appetite;
- feeling of satiety;
- beneficial effects on the organs of vision;
- strengthening gums and much more.
We suggest you read: How to properly throw away a mirror - instructions
When using parsley in any form, do not forget about contraindications. In addition to benefits, it also brings harm. You should consult your doctor before self-medicating.
It is not advisable to use parsley for those who:
- suffers from bladder diseases, cystitis, urolithiasis,
- has chronic diseases of internal organs,
- has a tendency to allergies.
Everything is good in moderation - there is no need to abuse it, and there will be no harm from using the culture.
Benefits of freezing
It is worth noting that each method of preserving greenery for the winter has its own advantages. We invite you to consider the benefits of freezing:
- The vitamin complex is preserved. Perhaps the most important thing when preserving a vegetable is to preserve the beneficial substances contained in it. Therefore, freezing has an exceptional advantage over other types of storage, since in this case all vitamins will be preserved.
- The aroma, taste and consistency are preserved almost unchanged.
- Preparing parsley for freezing is very simple. Usually this takes no more than half an hour. Next, it's time for the freezer.
We recommend reading: How to Refresh Dried Thin Lavash Without a Microwave
Preparing greens for freezing
No matter how you choose to freeze parsley, you need to prepare it for putting in the freezer, and this is always done the same way:
- Cleaning parsley bushes: remove unusable leaves, cut off the roots and throw out foreign matter.
- Flushing. This is done by soaking the greens in salt water. Firstly, this method does not injure the parsley leaves. And, secondly, this way you can remove nitrates from it and kill microorganisms living in the greenery. The water should cover the parsley bunches.
- Drying. Excess moisture is removed by shaking, after which the parsley is laid out on a towel to dry completely. To ensure proper drying of all branches, they should be turned over from time to time. This is especially important if you plan to store frozen greens, pre-chopped greens, or whole sprigs. As an option, you can expressly dry the greens. To do this, you need to lay it on a towel and roll it up, so that most of the moisture is absorbed into the towel.
Now the green mass is ready for freezing. Freezing methods will be discussed in more detail in the next part of the article.
Methods for freezing parsley
There are several ways to preserve parsley for the winter, but freezing is the easiest. You can freeze greens using different methods:
If you decide to store parsley in a bag, it is very important to pay special attention to drying the herbs. If there is water on the leaves, then in the freezer the greens will stick together into one lump. Subsequently, it will have to be either split or cut, which is not very convenient.
If you decide to store the green mass of a vegetable in a bag, then you need to collect it in bunches, cut off the stems, and then finely chop it. So, you will have parsley for dressing.
Storage bags can be regular or zippered. You should not compact a large portion of greens into one bag, as it will be inconvenient to store. Even if you manage to quickly separate some of the greens needed for consumption, some of the frozen parsley will have time to thaw. After repeated freezing, it will darken.
The prepared mass in the bag must be signed, and the bag must be rolled or tied. If you do not label the bags, then the green mass of the vegetable can be confused with another seasoning, which you may also decide to freeze.
Freezing parsley in bunches
The fastest and easiest way to freeze parsley is to place whole bunches in the freezer. But is it possible to do this? Of course, it is possible, only on the condition that the greens are well dried beforehand. The twigs are collected in bunches of such a size that they can be used 1-2 times. Whole bunches can be wrapped in cling film or a plastic bag.
Tightly wrapped in a bag/film, parsley in bunches forms thin rolls that are usually stored without additional packaging or container. This parsley is used for making soups, broths, baking fish, meat or chicken with herbs. Who doesn't love enjoying fresh food with the scent of spring on a cold winter evening? Freezing greens does just that.
In ice trays
Preparation of green mass consists of the above-mentioned steps, but in this case there is no need to thoroughly dry the leaves, since the chopped parsley will still be filled with water. At the same time, you need to chop the greens even more thoroughly than usual, otherwise you will not be able to compact them into the small cells of the ice mold.
So, you need to put the greens into cells and compact them. After this, the molds are filled with purified or boiled chilled water. Place in the freezer for about four hours. Afterwards, take the finished cubes out of the cells and put them in a bag, label it and put it back in the freezer, this time for permanent storage.
If there is no freezer, what to do?
If you don’t have a freezer, then there’s no need to talk about how to freeze parsley for the winter in the refrigerator. However, there is a way out. There is another way to preserve the vitamins and microelements of greens. To do this, it needs to be dried. By the way, the seasoning will retain its natural aroma. The work consists of the following stages:
- Checking the greens. All spoiled, yellowed and rotten parts of parsley must be removed. Then you should cut off the root.
- Then the greens must be prepared: washed and dried thoroughly.
- Place the parsley on a baking sheet covered with parchment and place in the oven preheated to +60℃. When greens are dried at low temperatures, all their beneficial properties are preserved.
- In order for the green mass to dry evenly, it should be stirred from time to time.
You should resort to drying only if you don’t have a freezer. In general, freezing parsley is easier; to do this, you just need to sort it out, rinse it and give it the desired shape. So, you will save on buying greens and make useful preparations for preparing various dishes. We bring to your attention a video accompanying the topic:
It is worth noting that each method of preserving greenery for the winter has its own advantages. We invite you to consider the benefits of freezing:
Drying greens
Dried parsley is used in first courses, as well as in the preparation of meat and fish dishes. You can put it in a cup of broth, but keep in mind that it will not begin to release its aroma as quickly as fresh, so the broth should stand for a while and cool.
For drying, you can use a drying cabinet, a gas or electric oven, a special vegetable dryer, or a microwave oven.
If the drying cabinet or vegetable dryer is equipped with a timer and forced ventilation, and is also adapted for drying greens, then there are no problems at all, you just need to carefully set the controls. If you use a gas stove oven for drying, then drying is best done at the lowest heat possible, with the oven door slightly open.
It is not difficult to control the final result. If, when you press the greens tightly with your hand, you feel a characteristic cracking sound of dry material, it means that the moisture level has dropped to the desired limit.
Might be interesting Cucumbers with chili ketchup for the winter in liter jars Method of preparing mead Borscht dressing - is such preparation necessary?
At low temperatures, dried greens have a dark green color and retain all vitamins and microelements.
Before putting dry greens into containers, you need to wait until they are completely cooled.
How to freeze parsley for the winter in the refrigerator: is it possible to freeze greens, how to do it correctly
Let's talk about how to freeze parsley for the winter in the refrigerator. Garden abundance is a balm for the soul of the owners and at the same time a lot of worries. It’s not enough to grow a crop; it also needs to be preserved.
Freezing parsley is an ideal way to preserve fresh herbs, which preserves color and aroma and makes it easy to use in the kitchen. Parsley is the most common seasoning: people like to add it to salads and soups, and use it in folk medicine and cosmetology. No matter how much parsley you store for the winter, it will still not be enough.
But an experienced gardener does not need to be taught how to care for a garden in order to freeze enough vegetables, parsley and other greens for the winter in the refrigerator.
Recipes for pickling greens for the winter
Standard recipes for pickling greens for the winter at home are good for their multifunctional use in dishes. There are 2 methods of salting - wet and dry salting. For wet salting, the herbs are washed, placed in jars in layers and filled with brine. For 1 liter of water, 50 grams of table salt. The jar is left at room temperature for a couple of days, then put in the refrigerator.
For dry salting for the winter in a jar of salt, the greens are washed, dried, and chopped. For 1 kg of spices, 250 grams of salt are required. The mixture is placed in a jar in layers until the juice is released. Compact and fill the container to the brim, close with an airtight lid. The shelf life of wet and dry salting is limited to 1 year.
Dry pickling of greens for the winter
Invent a dry recipe for greens with salt for the winter yourself. In dry form, a mixture of various spices will not ferment and will not spoil the product due to the wrong combination of herbs during salting. The spices are washed, dried whole or crushed, mixed with salt and the mixture is poured into a vacuum container. If you properly pickle dry spices and store them correctly, microorganisms will not multiply and they will not become moldy.
Dry salted assorted spices
Components:
- 100 grams each of basil, cilantro;
- 150 grams each of dill, parsley, celery;
- oregano branch;
- 50 grams of sea salt.
Procurement process:
- Wash the herbs, dry them, chop them and salt them.
- Place oregano in a container and compact the dry mixture.
- Store the assortment in a vacuum container.
How to prepare greens for the winter in a jar
Greens in a jar can be pickled or pickled for the winter. In prepared form, the seasoning is always at hand and makes dishes more flavorful. Spices in a jar can be salted by wet freezing. Salting for the winter is better than drying herbs. Wet-frozen chopped greens retain all the beneficial substances and the fresh appearance of the spices.
Advice! Dried seasoning is best stored in the freezer, but storing it in kitchen drawers will also work.
Pickled herbs in brine or oil are no less useful than freshly purchased product. The most commonly used are beet tops or sorrel. The disadvantage of pickling is that an open jar cannot be stored for a long time, even in the refrigerator. Therefore, it is better to marinate spices in small containers.
Wet salting of greens for the winter with carrots
Components:
- 100 grams each of dill and parsley;
- 50 g celery;
- 100 grams of green onions;
- 100 g carrots;
- 30-40 grams of table salt.
Procurement process:
- Chop the spices and add plenty of salt.
- Cut the carrots into small cubes.
- Place carrots and herb mixture in layers and compact.
- Store in a cool place.
Pickled dill with onions
Components:
- 1 kg of onions;
- 3 dill umbrellas;
- 50 grams of pepper and salt.
Procurement process:
- Chop the onion into rings.
- Place an umbrella of dill on the bottom of the jar, covering with a layer of onion.
- Season each layer generously with salt and pepper.
- Store in a cool place.
Pickling dill in universal seasoning with olive oil
Components:
- 400 g dill;
- 1 lemon;
- 100 g olive oil;
- 1 head of garlic;
- 30 grams of salt.
Procurement process:
- Wash and grind the dill in a blender.
- Add finely chopped garlic to the dill.
- Squeeze the lemon juice and grate the zest on a fine grater.
- Pour in olive oil and blend in a blender to a mushy mixture.
- Place into jars and cover with lids.
- Store in a cool place.
How to properly prepare spices
Harvesting parsley for the winter does not have to happen at the end of the season. The more often the branches are cut, the more tender and juicy the fragrant grass grows back. If you do not touch the bushes until the end of summer, the branches will become stiff. The bed with parsley should be of such a size that part has time to recover while the owners are working on the other. If you use parsley roots in the kitchen, you need to decide in advance which bushes you need to dig up in the fall.
We recommend reading: Using Sea Buckthorn Oil After the Expiration Date
Harvesting parsley for the winter can be done not only with the help of cold: the grass can be sprinkled with salt, pickled, greens and parsley roots can be dried. The latter option is not as rich in vitamins, but it is good for preparing dry spicy mixtures. Only industrial shock freezing can completely preserve the vitamins and microelements of a product. But if you do everything correctly and quickly at home, you can get the maximum benefit from your preparations.
Fresh, healthy leaves are suitable for winter storage. You should not freeze store-bought parsley for the winter. There, the greens are treated with preservatives that will turn the seasoning into real poison.
Planning and preparation
Every kitchen has its own recipes for how to properly freeze parsley. To make it convenient to use the herb in cooking later, you need to take into account several important points:
- If possible, it is better to allocate a separate drawer in the freezer for vegetables and spices so that the smells of the products do not mix.
- Parsley should be well washed and thoroughly dried. If you do not remove excess moisture, the mass will eventually freeze into one lump.
- Material for packaging must be prepared in advance: zip bags, food foil, ice trays, plastic containers.
- Freezing must be packaged wisely. It’s good if the greens are immediately divided into portions. Why can't you store the seasoning in one large bag? Every time you take out another portion, the entire contents of the bag will come into contact with air and lose their properties.
- The spice should last all winter.
See also How to properly freeze spinach for the winter at home Read
The method for freezing parsley should be tailored to the dishes to which the seasoning will be added. Provide several different options for adding to entrees, salad dressings, and garnishing. There should be a suitable preparation for all your favorite recipes.
How to pickle parsley in a jar for the winter
You can buy parsley in the store at any time of the year, and if you have your own garden plot, you can stock up on the greens. The pickling method is perfect for this; when used, the greens remain healthy and do not lose their appearance and aroma. In addition, all you need for cooking is leaves and salt.
Required ingredients:
- Parsley – 300 grams;
- Salt – 3 tablespoons.
How to salt parsley in a jar:
- The leaves need to be sorted well, washed, and thick stems removed;
- In order for the leaves to dry, you need to spread them on a flat surface in a thin layer, the best thing is to leave the leaves overnight, they will dry well, and in the morning you can continue cooking;
- After this, you need to roll the leaves into a roll and cut them, so the mass will be cut into thin strips and salted well;
- Directly on the board on which the pulp was chopped, add salt to it, mix well, grind with crystals, as when kneading dough;
- Glass jars must be washed with soda, sterilized, placed upside down to dry completely, and only then can they be used for preparations;
- It is necessary to spread the resulting mass into prepared jars and compact it;
- All that remains is to close the containers with lids, you can use both polyethylene and iron ones, the most important thing is that the lid closes tightly and air does not pass inside;
- After closing, the jars can be put away for permanent storage. Since the mass has not been boiled or sterilized, there is a possibility of its spoilage, so such twists should be stored in a cool place. A cold cellar or refrigerator is ideal.
Parsley can complement any dish, especially if it contains meat or fish. Of course, you can’t do without salted greens when preparing vegetable salads or stews. Therefore, it is worth preparing a sufficient amount for the whole winter and eating almost fresh parsley.
Harvesting methods
The first thing to do is prepare the greens for freezing. It must be washed, sorted, freed from dry and limp twigs. Then form the parsley into a bunch and cut off the rough lower stems. The remaining tender leaves must be filled with plenty of water for an hour so that small grains of sand sink to the bottom, and snails and insects crawl to the surface. Afterwards, the greens are sorted out again and washed under running water. Now you can dry it on a kitchen towel or parchment paper. When the excess moisture has evaporated, you can prepare to freeze. We offer several interesting recipes on how to properly freeze parsley for all occasions.
The easiest way to freeze
Chop the parsley, place it on a baking sheet and put it in the freezer. Do not chop the greens too finely: the less the knife touches the leaves, the more nutrients are retained in them. Some housewives simply tear up the grass with their hands. Frozen parsley is very fragile, and during the transfer process it will break, chopping even more.
An hour later, the frozen parsley is taken out of the refrigerator and transferred into portioned bags. Such a crumbly preparation will take up less space, be easy to divide into pieces and look beautiful in the soup.
Some people like to freeze a whole bunch of parsley for the winter, simply stuffing it into a bag, but then using such a preparation is very inconvenient. If space in the freezer allows, you can pour the seasoning into a plastic container and close tightly.
You can place the greens on food foil and roll them up and put them in the freezer. Some housewives love this packaging option. In winter, you can unroll the roll and take out as much frozen greens as you need.
Beautiful twigs for decorating holiday dishes
We pack the washed and dried leaves in food foil envelopes and place them so that they are disturbed as little as possible before use. Freezing parsley this way requires great care. When it comes time to use the sprigs, it is important to let the envelope defrost before opening it, otherwise the decoration will break. Curly parsley is especially decorative.
See also How to freeze fresh squash for the winter at home and whether it is possible to Read
Blanks in the form of ice cubes
Place finely chopped parsley in an ice container and add a small amount of water. This method is suitable for those whose freezer is not too busy for the winter. Once completely frozen, transfer the cubes to a bag.
These cubes can be added directly to a bowl of hot soup - they will add a fresh summer flavor and help the dish cool down faster. Using greens frozen in this way is well suited for facial cryomassage. The cubes whiten and rejuvenate the skin.
Instead of water, the greens can be doused with olive oil - this will be a salad option for freezing. As an alternative, tomato juice will do. Personally, I freeze it with a little lemon juice and honey for savory vegetable salads.
The ideologists of real Cossack borscht prepare cubes of greenery with finely chopped salted lard, then grind them in a mortar with garlic - this is called “pounding” the borscht. Little tricks like these make time-tested recipes easier.
Methods for harvesting dill and parsley
- Freezing is considered the best way to prepare greens. It helps preserve up to 90% of nutrients and vitamins
- Salting - allows you to preserve up to 70% of vitamins and nutrients
- Drying - with this method, only 50% of nutrients and vitamins are retained
- Pickling - probably does not preserve any vitamins, but is delicious to use as an addition to a dish or as a snack
Freezing dill and parsley
Before freezing greens, they should be sorted out, excess grass removed, rough stems cut off and washed thoroughly. Then you need to dry it so that no drops of water remain on it. It should not be dried for long, just enough for it to dry out. Greens, especially dill, quickly lose moisture, and with it aroma and color. Therefore, it is advisable to process it on the same day as collected.
Cold, namely freezing greens, helps to ensure that they are dehydrated as quickly as possible. This is what allows you to preserve the maximum amount of vitamins, color, and of course, what is important - the smell!
You can freeze it in different ways.
1. Chop parsley or dill, place in freezer bags or plastic containers and place in the freezer, in portions at a time. Why in portions? Because if you take the greens out of the freezer and defrost them, then you will no longer be able to freeze them again. It thaws very quickly, and during this process water is released, and since the greens are very tender, they quickly “leaf”. That's why we freeze it at once. We took it out and used it immediately.
2. A very good method is when the dried greens are not cut, but wrapped entirely in cling film. Also in the bag, there should be enough greens for one use.
3. You can freeze greens in ice-freezing containers. Very convenient, small capacity just for one use. There are two ways to do this.
- chop the greens, you can use only dill, or only parsley. Or you can mix them together, or add other favorite herbs. Place tightly in an ice-freezing tray and fill with water. The ratio is two parts greens and one part water. I heard that either butter or vegetable oil is used for this purpose in the same proportion. The result is dill oil, or “green oil.” But I haven’t tried it, so I can’t say anything about it.
- I also really like the second method. Greens need to be chopped in a blender. Then place the contents in ice cube trays. There is no need to add water or oil. Everything will freeze anyway. For this version, I like to mix different herbs. One such cube will enrich any first or second course with its aroma and taste. And even in the coldest winter it will give us a feeling of sun and warmth.
- In both the first and second cases, we freeze the contents of the molds, then shake everything out into a bag and put it in the freezer. We use one cube for one cooking.
- These cubes can be used to wipe your face and décolleté area. So there is another reason to consider this method of preparation. Vitamins and cold for the face are an excellent cosmetic product!
Greens frozen in this way can be stored in the freezer without losing vitamins, taste, color and smell for 6 to 8 months. That is, if it was frozen in September, it will last until May.
Thus, frozen dill is used for preparing first and second courses, for hot appetizers and salads. It is better not to use it for fresh salads. When frozen, its structure is destroyed, and the appearance will not be entirely aesthetic. In addition, it may be slightly bitter, which will not be noticeable when hot.
Frozen greens are also good to add to baked goods, or use as a filling (for example). And other harvesting methods are completely unsuitable for this option.
Pickling dill and parsley
Not all housewives like this method, since when it is used, the greens lose their color, because the salt takes the juice from the plant. But still, many people use it, just as they used it once upon a time, when there were no traces of refrigerators.
This is a very simple way to harvest greens.
- First, you should sort it out, remove the coarse petioles, wash and dry it in the same way as in the first option.
- then cut it and put it in clean, preferably sterilized jars. The jars should also be thoroughly dried. Lay out in layers of 1 cm. The first and last layer is salt.
- a layer of greens, a layer of table salt... and so on. Do not use iodized salt; the color of both parsley and dill will be lost.
- Having thus filled the jar to the very top, help yourself with a spoon. Then shake it, wait a little while the mixture settles and releases the juice. Then fill again to the top. Cover with a plastic lid.
- Greens salted in this way should be stored in the refrigerator.
- You can also grind it with salt in a blender and store it in a closed jar in the refrigerator. But I like the first method better. I love it when the greens are visible in a dish.
- Use the contents of the jar as needed, always with a dry spoon. Then cover with a lid and continue storing in the refrigerator.
When using, do not forget that the greens are salted. Therefore, first add the greens, and then add the final salt to the dish!
Salted greens can be used for preparing hot dishes and cold salads.
Drying greens and storing them
Many people use only this method of harvesting greens for the winter. It may be due to ignorance that in this case only 50% of the vitamins are retained. Or maybe just the old-fashioned way. Or maybe because with this method of preparation, dried herbs have the richest taste and aroma. Be that as it may, the greens have been dried, are being dried and will continue to be dried.
There are also several ways to dry greens, and they are all very simple. For all options, we again clean the greens, rinse and dry them on a towel. With this method, you can also dry coarse stems, you just need to cut them as finely as possible.
I usually dry the tender soft branches separately and the stems separately. I subsequently grind the stems in a coffee grinder and add them to various dishes. They produce a very nice rich aroma. I add the chopped tender parts of the plant to the dish for beauty.
- chop the greens. Line a baking tray with baking paper, place the greens on it and place in the shade. It is advisable that the place is well ventilated. It is not recommended to place it in the sun. Under the influence of ultraviolet light, it quickly loses color and odor. It should also be protected from dust and insects. It will dry for 2-3 days. During this time, it must be stirred and turned over periodically. On the first day this should be done especially often.
- You can dry the greens in bunches by tying the stems with thread. Also keeping it from the sun and dust.
- Dry the greens in the oven at low temperatures. For the first 2-3 hours, dry it with the door open, and at a temperature of no more than 40 degrees. Then the temperature is increased a little and dried until tender, stirring occasionally.
- But it is better not to use this method at all, since during processing all volatile essential oils evaporate, thanks to which each type of greenery has its own unique smell. In addition, the greenery turns yellow and becomes ugly. And it gives the dish no color, no smell, no vitamins. Why is it needed then?
- You can dry it in special dryers, which are designed for drying fruits, vegetables and, of course, various herbs. They have very low temperatures and constant air movement. This is the most correct way of drying.
- Store dried herbs in paper bags, without access to air. Or in glass jars with the lid closed.
Dried herbs are used for preparing first and second courses and for cold salads
Pickled greens
Lately, I’ve been hearing more and more often that greens are pickled. Last year I decided to pickle dill myself. And I can say that I liked it. After opening the jar, you can add delicious fragrant herbs to meat and fish as an appetizer. This dill is also good for boiled potatoes, vinaigrette and any side dish. I decided I would do it every year. Moreover, what to do is all very simple!
- We sort through the dill, remove the coarse stems, and rinse thoroughly.
- Wash the jar and sterilize it.
- Place horseradish, currant, cherry leaves and a few cloves of garlic in a jar.
- fill the jar with dill
- make the brine: add 1 tablespoon of salt, 4-5 peas of allspice, and a couple of bay leaves to half a liter of water. Bring to a boil.
- pour the prepared dill with brine. Add 0.25 teaspoon of vinegar essence, or 1 tbsp. spoon of 6% vinegar.
- Sterilize a half-liter jar for 15 minutes, then close the lid. I usually screw the jars with iron lids, but some people screw them with reusable lids or close them with plastic ones. There are no recommendations here; those who are used to it do so.
- let cool. Store in a dark, cool place if covered with plastic lids or a cool place if closed with iron ones.
When preparing dishes with greens stored for the winter, you should consider several basic rules
- If you are preparing the first or second courses, then the greens should be added at the very end of cooking, 5 minutes before readiness.
- You don't need to add a lot of greens. If you overdo it, the dish may acquire a bitter aftertaste.
- add greens of varying degrees of preparation according to the recommendations.
And finally, a couple more tips. If the dill has already grown and seeds appear on it, do not throw them away. Collect, dry, and then use as a seasoning for dishes. Many Italian chefs use them this way with success.
Try to make any preparations only in a good mood and with love. And may all your dishes be filled with the same!
Bon appetit!
At the end of summer and autumn, many housewives prepare a variety of pickles
.
However, few of them know how to pickle greens for the winter
correctly.
When you have purchased or grown a large amount of green onions, dill or parsley yourself, you need to do everything possible to save at least some of it for the winter. Greens are dried, frozen, added to preserves and made into independent pickles
.